Overview
This expert guide outlines the five key steps to professional wheel refinishing: proper surface preparation, damage assessment and repair, selecting the right refinishing method (powder coating or automotive paint), mastering application techniques, and allowing adequate curing time. The author emphasizes that professional-quality results require patience, attention to detail, and respecting the complete process—from thorough cleaning and stripping to final curing—which transforms not just the wheels themselves but a vehicle’s entire appearance.
Table of Contents
- Introduction
- Proper Surface Preparation: The Foundation of Success
- Damage Assessment and Repair: Getting Back to Basics
- Selecting the Right Refinishing Method
- Application Techniques: The Art of Wheel Refinishing
- Curing and Final Steps: Patience Pays Off
- Conclusion
- Frequently Asked Questions
Introduction
In my 20+ years working in automotive restoration, I’ve seen firsthand how wheel refinishing can turn back the clock on tired-looking vehicles. Think of your wheels as your car’s shoes – they’re one of the first things people notice. Just like a stunning pair of dress shoes can elevate an entire outfit, freshly refinished wheels can transform your vehicle’s entire appearance.
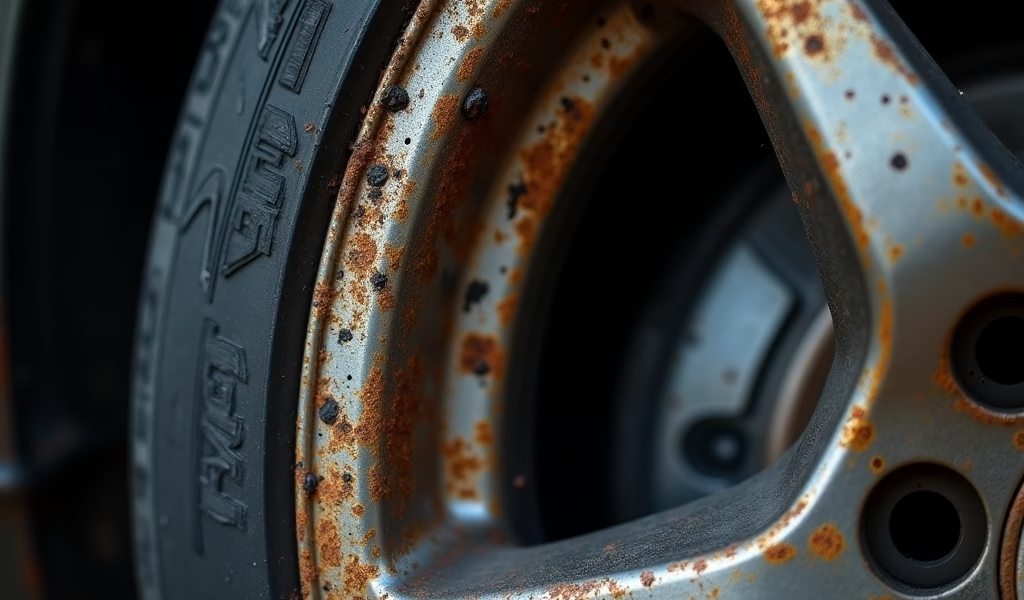
Every day, your wheels take a beating. They battle road salt that eats away at finishes like termites through wood. They endure brake dust that bakes onto surfaces under intense heat. And let’s be honest – we’ve all had that heart-dropping moment when we’ve scraped a curb and marred a once-perfect wheel.
The good news? A proper wheel refinishing procedure can save you hundreds compared to buying new wheels. I’ve rescued wheels that owners were ready to toss in the scrap heap, bringing them back to showroom glory with the right techniques.
Whether your wheels are suffering from clear coat peeling like an old sunburn or bearing battle scars from parking mishaps, this guide will walk you through the five critical steps that separate amateur touch-ups from professional-grade wheel refinishing. Let’s roll up our sleeves and dive into the process that will have your wheels turning heads again.
Proper Surface Preparation: The Foundation of Success
In the wheel refinishing world, preparation isn’t just important – it’s everything. Skipping proper prep is like building a house on quicksand; no matter how beautiful the finish looks initially, it’s doomed to fail.
Start by completely removing the wheels from your vehicle. Yes, it’s tempting to take shortcuts with masking and working on the car, but trust me – after refinishing thousands of wheels, I can promise you’ll get superior results by removing them entirely. This gives you 360-degree access and eliminates the risk of overspray on brake components or your vehicle’s paint.
Next comes cleaning, but we’re not talking about a quick rinse. Wheels collect an astonishing cocktail of contaminants:
- Brake dust particles embedded in microscopic pores
- Road oils that bond to the surface
- Grime that ordinary cleaners can’t touch
Use a professional-grade wheel cleaner and various detailing brushes to access every crevice. For wheels with significant contamination, consider using a clay bar treatment to pull embedded particles from the surface pores.
Once clean, you’ll need to strip the existing finish. Depending on your wheel’s condition, this might involve:
- Chemical strippers to dissolve clear coats and paints
- Sanding with progressive grits (typically starting around 220 and working up to 600+)
- Media blasting for severely damaged or corroded wheels
The goal is to get down to bare metal in areas requiring repair and to create a properly scuffed surface where the original finish remains sound. Pay special attention to the barrel of the wheel (the inner portion where the rim width affects fitment), as it often harbors hidden corrosion.
After stripping, a thorough degreasing is essential. Even the oils from your fingerprints can compromise adhesion. Use isopropyl alcohol (at least 91%) or a professional panel prep solution to wipe down the entire surface. Remember – preparation might not be glamorous, but it’s where professional results are born.

Damage Assessment and Repair: Getting Back to Basics
With your wheels stripped down to their birthday suit, it’s time to play detective. This is when the true extent of damage reveals itself – often more than what was visible under the old finish. Don’t be discouraged; even wheels that look like they’ve gone ten rounds with a cheese grater can usually be restored.
First, let’s categorize what we’re dealing with:
- Surface scratches and light curb rash: These affect only the finish and perhaps the very surface of the metal
- Deep gouges and heavy curb damage: These have removed actual material from the wheel
- Structural issues: Including bends, cracks, or significant material loss
For surface scratches, progressive sanding is your best friend. Start with a grit coarse enough to level the damaged area (typically 220-320), then work your way up through finer grits until you reach at least 600. The secret here is patience – rushing through grit levels leaves deeper scratches that will show through your final finish like a sore thumb.
For deeper gouges where material is missing, you’ll need a high-quality automotive body filler specifically formulated for metal. Apply it carefully with a plastic spreader, allowing it to stand slightly proud of the surrounding surface. Once cured (don’t rush this!), sand it flush using a block to maintain the wheel’s proper contour.
Now, a word of caution that could save your life: structural damage requires professional assessment. I’ve seen too many DIYers try to “patch” a cracked wheel, creating a ticking time bomb. Wheels support your entire vehicle at highway speeds – this isn’t the place to gamble with safety. If you spot cracks or significant bends, consult a professional wheel repair specialist before proceeding.
For wheels with pitting from corrosion (common on older alloys), you’ll need to make a judgment call. Minor pitting can be filled, but extensive corrosion might indicate the wheel is compromised. When measuring your wheel diameter during inspection, check for any irregularities that might suggest warping or structural issues.
Remember, the repair phase sets the physical foundation for your refinishing work. Take your time here – no amount of beautiful paint can hide underlying flaws.
Selecting the Right Refinishing Method
Choosing the right refinishing method is like selecting the perfect tool for a job – match it correctly to your needs, and you’ll get stellar results. Mismatch them, and you’ll face frustration and disappointment.
Let’s break down your primary options:
Powder Coating
Think of powder coating as the heavyweight champion of wheel finishes. This process electrostatically applies dry powder to the wheel, which is then baked at high temperatures to form a skin-like finish. The result is virtually bulletproof compared to liquid paint.
Pros:
- Exceptional durability (2-3 times more durable than paint)
- Superior resistance to chemicals, UV light, and heat
- Environmentally friendly (no VOCs or solvents)
- Thick, single-coat application fills minor imperfections
Cons:
- Requires specialized equipment (not DIY-friendly)
- Limited color-matching capability for exact OEM colors
- More expensive than paint options
- Difficult to touch up if damaged
Automotive Paint Systems
Traditional automotive paint systems include basecoat/clearcoat technology – the same process used on your car’s body. These systems have come light-years in terms of durability over the past decade.
Pros:
- Excellent color matching capability
- DIY-friendly with proper equipment
- Wide variety of finish effects (metallic, pearl, etc.)
- Can be touched up if damaged
Cons:
- Less durable than powder coating
- Requires multiple layers (primer, base, clear)
- More susceptible to chemical damage
- Shows imperfections more readily
Hybrids and Specialties
The market now offers interesting hybrid options, including ceramic-infused clear coats and high-temperature wheel-specific paints that bridge the durability gap.
When making your selection, consider these factors:
- Vehicle usage: Daily drivers in harsh conditions benefit from powder coating’s durability
- Aesthetic goals: Special effects are often easier with paint systems
- Budget: Be realistic about what you can spend
- DIY vs. Professional: Some methods require specialized equipment
For most enthusiasts, I recommend professional powder coating for daily drivers and automotive paint systems for show cars or vehicles in gentle environments. The Powder Coating Institute offers excellent resources for understanding this durable finish option.
Remember that wheel finishes face uniquely harsh conditions – extreme temperature cycles from braking, constant exposure to road chemicals, and regular cleaning. This isn’t the place to cut corners on materials. Whatever system you choose, opt for premium products specifically formulated for wheels.
Application Techniques: The Art of Wheel Refinishing
Now we’re getting to the heart of the process – the actual application. This is where science meets art, and where the difference between a decent job and a spectacular one often lies.
First, let’s talk environment. Professional refinishers work in controlled spaces for good reason. Temperature, humidity, and dust control aren’t luxuries – they’re necessities. Aim for:
- Temperature between 65-75°F (18-24°C)
- Humidity between 40-60%
- As dust-free an environment as possible
If you’re DIYing, consider creating a makeshift spray booth using plastic sheeting and filters. A simple box fan drawing air outward through a furnace filter can dramatically reduce airborne particles. Trust me, nothing ruins a fresh finish faster than dust settling like unwelcome snow on your wet paint.
For primer application, use several light coats rather than one heavy one. Allow each coat to flash (partially dry) according to the manufacturer’s instructions before applying the next. The goal is even coverage that fills minor imperfections without runs or sags.
If using automotive paint, your base color coat requires even more finesse. Maintain a consistent distance (usually 6-8 inches) from the surface, use overlapping passes, and keep your hand moving at a steady pace. It’s like dancing – rhythm matters.
For metallic finishes, the final “control coat” makes all the difference. This lighter, drier pass allows the metallic flakes to orient themselves properly, preventing blotchiness and streaking. Think of it as giving the metallic flakes a chance to lie flat rather than standing on edge.
Clear coating is where the magic happens. This isn’t just for shine – it’s armor for your color coat. Apply 2-3 medium coats, allowing proper flash time between each. Too light, and you’ll get insufficient protection; too heavy, and you’ll create runs that require sanding and reapplication.
Throughout the process, proper wheel weight and balancing considerations should be kept in mind – excessive buildup of material in certain areas can actually affect how your wheel performs once reinstalled.
Remember that each product has its own specific application instructions. What works for one brand might cause failure with another. Read and follow manufacturer guidelines religiously – they’ve engineered these products to work in specific ways.

Curing and Final Steps: Patience Pays Off
In wheel refinishing, the finish line isn’t when you put down your spray gun – it’s when the chemistry has fully completed its complex dance. This is where patience transforms from virtue to necessity.
Most refinishing products go through two distinct phases:
- Flash drying: When the surface feels dry to the touch
- Full curing: When the chemical cross-linking is complete
That second phase is where magic happens, but it’s invisible to the eye. Rush this process, and you’ll compromise durability, chemical resistance, and hardness. Even if a wheel feels dry after 24 hours, most coatings aren’t fully cured for 5-7 days.
During curing, maintain the proper temperature range recommended by your product manufacturer. Too cold, and the chemical reactions slow to a crawl; too hot, and you risk improper curing that leads to brittleness. If possible, use a dedicated curing lamp or heat source to maintain optimal conditions.
Once fully cured, inspect your work under various lighting conditions. Look for any imperfections that might need addressing:
- Dust nibs (small raised particles)
- Orange peel texture
- Runs or sags
- Uneven metallic distribution
Minor imperfections can be corrected with careful wet-sanding (starting at 1500 grit and moving up) followed by polishing. This process, called “color sanding,” can elevate a good finish to an exceptional one, but it requires a delicate touch.
Before reinstallation, consider having your wheels professionally balanced. The refinishing process can subtly alter weight distribution, and proper balancing ensures a smooth ride without vibrations. As a mechanic who’s felt the difference a properly balanced wheel makes, I can tell you this step is worth every penny.
When reinstalling, always use a torque wrench set to the manufacturer’s specifications. It’s shocking how many beautiful wheel refinishing jobs are ruined by overtightened lug nuts that crack the new finish or, worse, warp the wheel itself.
Finally, develop a maintenance routine that preserves your investment. Use pH-neutral wheel cleaners rather than acidic products that can attack your finish. Apply a high-quality wheel sealant every few months for additional protection. Think of this sealant as sunscreen for your wheels – preventative protection that pays dividends.
Conclusion
Wheel refinishing represents one of the most dramatic visual improvements you can make to your vehicle. When done properly, it’s the automotive equivalent of a facelift – taking years off your car’s appearance while adding value and personal satisfaction.
Throughout my career working with thousands of wheels, I’ve found that success comes down to respecting the process. There are no shortcuts to excellence. Proper preparation lays the groundwork. Careful damage assessment ensures safety and durability. Selecting the right refinishing method matches the solution to your specific needs. Masterful application techniques bring your vision to life. And patient curing transforms chemistry into lasting beauty.
Whether you’re a DIY enthusiast with a garage full of tools or someone seeking professional services, understanding these five key aspects of wheel refinishing empowers you to make informed decisions and achieve results you’ll be proud of every time you park your car.
Remember that wheels aren’t just functional components – they’re the shoes on your automotive pride and joy. And just like the right pair of shoes can transform an outfit, properly refinished wheels can transform your entire vehicle from ordinary to extraordinary. The road may be rough, but your wheels don’t have to show it.
Frequently Asked Questions
How long does professional wheel refinishing typically last?
A professionally powder-coated wheel finish typically lasts 5-7 years under normal driving conditions. Paint-based refinishing generally lasts 2-4 years, depending on maintenance and environmental factors.
Can I refinish my wheels without removing them from my vehicle?
While possible, refinishing wheels on the vehicle severely compromises quality and longevity. Professional results require complete wheel removal to access all surfaces and prevent overspray on brakes and other components.
What’s the average cost of professional wheel refinishing?
Professional wheel refinishing typically costs $125-$200 per wheel for powder coating and $100-$175 per wheel for paint systems. Prices vary based on wheel size, complexity, repair needs, and your location.
Can chrome wheels be refinished?
True chrome wheels require specialized re-chroming processes different from standard refinishing. Many “chrome-look” wheels are actually clear-coated aluminum and can be refinished using standard methods after removing the original finish.
How soon can I drive on newly refinished wheels?
While wheels may feel dry within 24 hours, most finishes require 5-7 days to fully cure and develop maximum hardness. Limited, gentle driving is possible after 48 hours, but avoid harsh conditions and wheel cleaners during the full cure period.

