Overview
This article provides a detailed guide on cleaning particulate matter sensors in vehicles, covering identification of dirty sensors, step-by-step cleaning instructions, maintenance schedules, and prevention tips. Regular sensor cleaning can prevent check engine lights, improve fuel economy, and avoid costly repairs, as these sensors are crucial for monitoring exhaust particles and ensuring proper emissions system function.
Table of Contents
- What is a Particulate Matter Sensor?
- The Importance of Regular Sensor Cleaning
- 5 Warning Signs Your PM Sensor Needs Cleaning
- Essential Tools and Materials
- Step-by-Step Cleaning Guide
- Recommended Maintenance Schedule
- Preventing Sensor Contamination
- Common Mistakes to Avoid
- Conclusion
- Frequently Asked Questions
What is a Particulate Matter Sensor?
Let me tell you about one of the unsung heroes in your vehicle’s emissions system: the particulate matter sensor. This clever little device monitors the levels of microscopic particles in your exhaust stream and helps your car’s computer make adjustments to keep emissions in check and your engine running efficiently.
In simple terms, think of your PM sensor as a tiny detective that’s constantly on the lookout for soot and other particles that could indicate problems with your exhaust system. Modern vehicles, especially those with diesel engines, rely heavily on these sensors to ensure the diesel particulate filter regeneration process happens exactly when needed.
These sensors typically use light-scattering technology (similar to how smoke detectors work) to measure particle concentration. When exhaust gases pass through the sensor, a light source illuminates the particles, and photodetectors measure how much light gets scattered. It’s pretty impressive technology when you think about it!
What makes these sensors so important is their role in your vehicle’s overall health. They help maintain proper engine performance, ensure your emissions system works correctly, and even contribute to better fuel efficiency. Plus, they’re a key component in keeping your vehicle environmentally compliant with increasingly strict emissions regulations.
The Importance of Regular Sensor Cleaning
Here’s the thing about PM sensors that most drivers don’t realize: they get dirty. Really dirty. And when they do, all sorts of problems start popping up.
Imagine trying to take clear photos with a camera lens covered in mud – that’s essentially what your PM sensor is dealing with when it gets coated with soot, oil residue, and other contaminants. The readings become increasingly inaccurate, which throws off your entire emissions control system.
The consequences of a dirty sensor go beyond just inaccurate readings. Your engine control module relies on these readings to make adjustments to fuel mixture, timing, and other crucial parameters. With bad data coming in, your vehicle might enter limp mode, fail emissions tests, or trigger that dreaded check engine light. Not to mention the gradual decrease in fuel economy that hits you right in the wallet.
According to EPA guidelines on sensor maintenance, regular cleaning of environmental sensors is essential for accurate air quality monitoring. The same principle applies to your vehicle’s PM sensor.
I’ve seen countless cases where a simple cleaning resolved issues that customers feared would cost hundreds or even thousands to fix. Trust me when I say that 30 minutes of maintenance can save you major headaches down the road.

5 Warning Signs Your PM Sensor Needs Cleaning
Not sure if your particulate matter sensor is crying out for attention? Here are the telltale signs that it’s time to roll up your sleeves and give that sensor some TLC:
- Check Engine Light – Particularly with codes P24A0, P24A1, or anything mentioning “particulate sensor” or “soot sensor.” This is your vehicle’s most direct way of saying “Hey, we’ve got a problem here!”
- Reduced Engine Performance – If your vehicle feels sluggish or enters limp mode without explanation, a contaminated PM sensor might be feeding bad data to your engine control unit.
- Failed Emissions Test – When your normally reliable vehicle suddenly can’t pass emissions, the PM sensor is a prime suspect. It’s often overlooked in favor of more common culprits like oxygen sensors.
- Erratic Regeneration Cycles – For diesel vehicles, if your DPF is regenerating too frequently (or not at all), your PM sensor might be misreading soot levels.
- Decreased Fuel Economy – Notice you’re suddenly visiting the pump more often? When the PM sensor provides incorrect data, your fuel injection system may compensate by using more fuel than necessary.
I had a customer bring in his 2018 BMW diesel last month complaining about repeated DPF warnings and poor acceleration. Three other shops had recommended replacing the entire DPF system – a $2,000+ repair. Turns out, it was just a filthy PM sensor. After a thorough cleaning, his car ran like new again. The look on his face when I handed him a bill for just one hour of labor was priceless!
The trick is catching these issues early. By the time multiple symptoms appear, you might be dealing with secondary damage to other components. Regular inspection and cleaning as part of your maintenance routine can prevent these problems from developing in the first place.
Essential Tools and Materials
Before we get our hands dirty, let’s make sure you’ve got everything you need for a successful cleaning job. Nothing worse than getting halfway through a repair only to realize you’re missing something critical!
Here’s your particulate matter sensor cleaning shopping list:
- Safety First: Nitrile gloves, safety glasses, and a shop towel to protect yourself and catch any drips or spills
- Cleaning Solutions: Electronics-grade isopropyl alcohol (minimum 91% concentration) – this is crucial as lower concentrations contain too much water
- Precision Tools: Small, soft-bristled brushes (an old toothbrush can work in a pinch), cotton swabs, and microfiber cloths
- Specialized Equipment: Compressed air canister with a precision nozzle for blowing out loose debris
- Optional but Helpful: A small container to hold removed parts, a work light for better visibility, and a scanner tool to reset codes afterward
What you should absolutely avoid using: household cleaners, brake cleaners, carb cleaners, or any product containing harsh chemicals. These can damage the sensitive electronic components and optical elements of your PM sensor. Similarly, avoid paper towels or rough cloths that might leave behind fibers or scratch delicate surfaces.
Got everything? Great! Let’s set up a clean, well-lit workspace where you can access the underside of your vehicle safely. If you don’t have access to a lift, ramps or jack stands are fine, but never work under a vehicle supported only by a jack. Your safety comes first!
Pro tip: Take photos with your phone at each step of disassembly. This creates a visual guide for reassembly and helps ensure you don’t miss anything when putting it all back together.
Step-by-Step Cleaning Guide
Alright, let’s roll up our sleeves and get that particulate matter sensor clean! I’ll walk you through this process just like I would if you were standing next to me in my shop. Take your time, follow each step carefully, and you’ll have that sensor working like new again.
Step 1: Locate and Access the Sensor
First things first – you need to find your PM sensor. In most vehicles, it’s located in the exhaust stream, typically after the exhaust gas temperature sensor and before or after the diesel particulate filter. Check your vehicle’s service manual for the exact location, as it varies by make and model.
Ensure your vehicle is completely cool before beginning work. Working on a hot exhaust system is not only dangerous but can also damage the sensor during removal. Once located, disconnect the electrical connector by pressing the release tab and gently pulling it away from the sensor.
Step 2: Remove the Sensor
Using the appropriate socket or wrench (typically 22mm or 24mm), carefully loosen the sensor by turning counterclockwise. If it’s stubborn, apply a penetrating oil and let it sit for 15 minutes before trying again. Never force it, as you might damage the threads in the exhaust system.
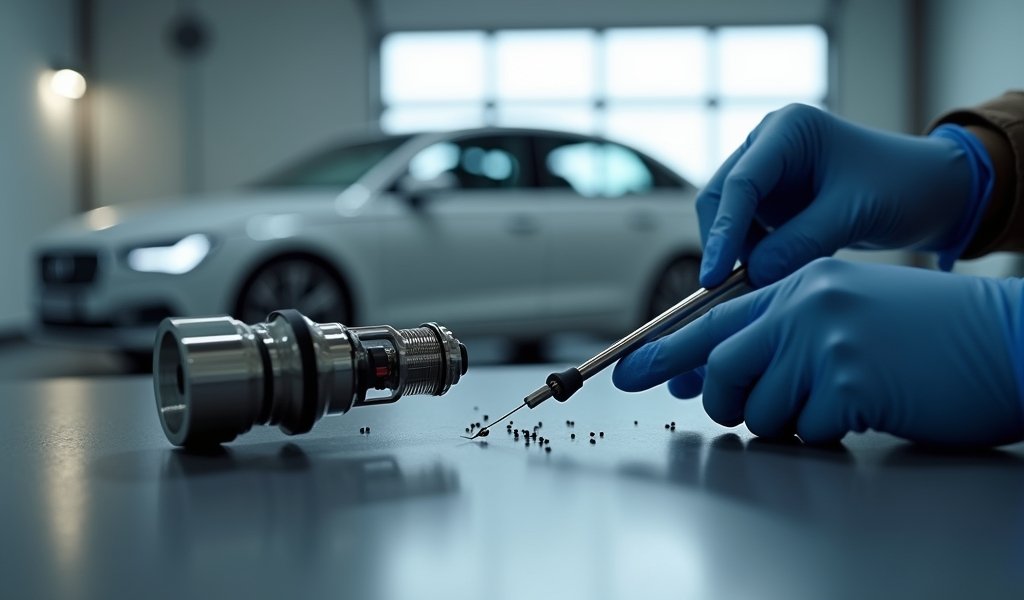
As you unscrew the sensor, be ready to catch any debris that might fall out. Once removed, place the sensor on a clean shop towel and take a moment to examine its condition. The sensing element (usually a small probe at the tip) is what we’ll focus on cleaning.
Step 3: Initial Debris Removal
Hold the sensor with the electrical connector facing up and the sensing element pointing down. Using short bursts from your compressed air can, blow away any loose soot and debris. Be gentle here – we’re trying to remove loose particles without forcing anything deeper into the sensor.
Next, using a soft brush, gently sweep away any stubborn debris from the exterior of the sensing element. Work from the top down, so gravity helps carry particles away from the sensor rather than into it.
Step 4: Deep Cleaning
Now for the precision work. Dampen (not soak) a cotton swab with isopropyl alcohol and carefully clean the sensing element. Use gentle, circular motions and replace the swab frequently as it becomes dirty. For sensors with a protective cage or screen, use the cotton swab to clean between the openings.
Follow this by lightly dampening a microfiber cloth with alcohol and wiping down the entire sensor body. Pay special attention to any vents or openings that might be clogged with soot.
Step 5: Drying and Inspection
Allow the sensor to air dry completely. This typically takes about 10-15 minutes, but I recommend giving it a full 30 minutes to be certain all alcohol has evaporated. Never use heat to speed up drying, as it can damage the sensitive electronics.
Once dry, inspect the sensor again. The sensing element should appear noticeably cleaner. If there’s still significant contamination, you can repeat steps 3-4, but be aware that some discoloration is normal and doesn’t affect function.
Step 6: Reinstallation
Apply a thin coat of anti-seize compound to the threads of the sensor (being careful not to get any on the sensing element). This will make future removal easier. Thread the sensor back into place by hand first to avoid cross-threading.
Once hand-tight, use your wrench to tighten to the manufacturer’s specification (typically about 1/4 turn past hand-tight). Don’t overtighten, as the sensor housing can crack. Reconnect the electrical connector until you hear or feel it click into place.
Step 7: Reset and Test
Using a scan tool, clear any stored codes related to the PM sensor. Start your vehicle and let it run through a complete drive cycle. This usually means driving at various speeds including highway speed for at least 15 minutes to allow the system to recalibrate.
If you cleaned the sensor because of a specific warning light or error code, verify that it doesn’t return after the drive cycle. You should notice improved performance almost immediately if a dirty sensor was indeed the culprit.

Recommended Maintenance Schedule
So how often should you be cleaning your PM sensor? Based on my 20+ years in the field, here’s what I recommend for different driving conditions:
- Normal Driving (Mixed City/Highway): Clean every 30,000 miles or every 2 years, whichever comes first
- Severe Conditions (Dusty areas, frequent short trips, stop-and-go traffic): Clean every 15,000-20,000 miles or annually
- Commercial/Fleet Vehicles: Clean every 10,000-15,000 miles due to higher operating hours and demands
- After DPF Regeneration Issues: Clean immediately if you experience multiple forced regenerations or regeneration failure warnings
I also strongly recommend inspecting your PM sensor whenever you change your oil. It only takes a minute to visually check for obvious contamination, and this quick habit can catch potential problems early.
The maintenance schedule also varies by vehicle manufacturer and model year. Newer vehicles with more advanced filtration systems might require less frequent cleaning, while older models or those with known sensor issues might need more attention. When in doubt, consult your service manual or ask a trusted mechanic familiar with your specific vehicle.
One customer of mine, Sarah, has a 2016 VW Jetta TDI that she uses for her daily 60-mile commute through rural areas. She cleans her PM sensor every spring and fall as part of her seasonal maintenance routine. In three years, she hasn’t had a single emissions-related check engine light – pretty impressive for a high-mileage diesel!
Preventing Sensor Contamination
While regular cleaning is important, wouldn’t it be nice to extend the intervals between cleanings? Here are my top tips for keeping your PM sensor cleaner for longer:
First, don’t underestimate the importance of your air filter. A clean air filter prevents excess debris from entering your engine, which means less soot in your exhaust system. I recommend checking it monthly and replacing it according to your manufacturer’s guidelines, or more frequently if you drive in dusty conditions.
Using high-quality fuel makes a significant difference too. Premium diesel fuels with cleaning additives help reduce carbon deposits throughout your entire fuel and exhaust system. If your manufacturer doesn’t specifically require premium fuel, at least try to use a top-tier fuel with good additive packages.
Driving habits play a huge role in sensor contamination. Short trips where the engine never reaches operating temperature are particularly harmful, as they don’t allow for complete combustion. Try to combine short errands into one longer trip when possible, and include at least 15-20 minutes of steady highway driving in your regular routine to help “clear out” the system.
For diesel vehicles, allow complete regeneration cycles to finish uninterrupted. Many drivers make the mistake of shutting off the engine mid-regeneration, which can leave excess soot in the system. If your vehicle indicates a regeneration cycle is in progress (usually through a dashboard light), continue driving until it completes if at all possible.
Finally, don’t ignore engine performance issues. Problems like faulty injectors, air leaks, or misfires can dramatically increase soot production, overwhelming your PM sensor. Address these issues promptly to prevent accelerated contamination.
Common Mistakes to Avoid
Over the years, I’ve seen plenty of well-intentioned DIYers make these common mistakes when cleaning particulate matter sensors. Learn from their errors to save yourself time, money, and frustration!
Using the wrong cleaning products tops my list of common mistakes. Brake cleaner, carburetor cleaner, or household cleaners can permanently damage the sensing elements. Stick with high-concentration isopropyl alcohol and nothing else. Similarly, using water-based cleaners can leave mineral deposits after drying, potentially causing more harm than good.
Many people get impatient and use excessive force when removing a stubborn sensor. This often results in broken sensors, stripped threads, or damaged exhaust components. A penetrating oil and a little patience go a long way here.
Another frequent mistake is cleaning the mass airflow sensor instead of the PM sensor. While both need regular cleaning, they’re entirely different components with different cleaning methods. Make sure you’re addressing the right sensor for your specific issue.
Rushing the drying process is surprisingly common. People use heat guns, hair dryers, or compressed air to speed things up, but this can damage the sensitive electronics. Always allow natural air drying, even if it takes a bit longer.
Finally, many DIYers forget to check for updates to their vehicle’s Engine Control Module (ECM) after cleaning. Sometimes, manufacturers release software updates specifically designed to improve PM sensor function or address known issues. Check with your dealer to see if any updates are available for your vehicle.
Conclusion
Taking care of your particulate matter sensor might seem like a small detail in the grand scheme of vehicle maintenance, but it can make a world of difference in your car’s performance, fuel economy, and environmental impact. What’s more, it’s one of those rare maintenance tasks where a small investment of time can save you hundreds or even thousands in unnecessary repairs.
Remember, your PM sensor is working tirelessly to monitor exhaust particulates and keep your emissions system running efficiently. By giving it a proper cleaning every 15,000-30,000 miles (depending on your driving conditions), you’re ensuring it can do its job accurately and reliably.
The best part? This is absolutely a DIY-friendly job that most car owners can handle with basic tools and a bit of patience. Just follow the step-by-step guide I’ve outlined, take your time, use the right cleaning materials, and you’ll be rewarded with improved performance and fewer warning lights.
So next weekend, why not set aside an hour or so to check and clean your PM sensor? Your vehicle (and your wallet) will thank you for it. And if you ever feel uncertain about tackling this job yourself, don’t hesitate to consult with a professional mechanic who can guide you through the process or handle it for you.
Here’s to cleaner sensors, cleaner emissions, and a smoother-running vehicle!
Frequently Asked Questions
How do I know if my car has a particulate matter sensor?
Most diesel vehicles manufactured after 2007 and many gasoline direct injection vehicles have PM sensors. Check your owner’s manual under the emissions control system section or consult your dealer if you’re unsure.
Can a dirty PM sensor cause a vehicle to fail emissions testing?
Absolutely! A contaminated sensor can report inaccurate readings that trigger emissions-related fault codes. These codes will cause an automatic fail during emissions testing in most jurisdictions.
Will cleaning the PM sensor improve my fuel economy?
In many cases, yes. When the sensor provides accurate readings, your engine management system can optimize fuel delivery and timing, potentially improving efficiency by 5-10% in severely affected vehicles.
Can I use electronic contact cleaner instead of isopropyl alcohol?
Electronic contact cleaner can be used as an alternative, but ensure it’s residue-free and safe for sensitive electronics. Isopropyl alcohol (91%+) remains the preferred and most reliable cleaning solution.
How much does professional PM sensor cleaning cost?
Professional cleaning typically costs between $75-150 depending on your location and vehicle type. Some dealerships may charge more, especially if they replace rather than clean the sensor.

