Overview
This article provides expert guidance on replacing leaf spring bushings, covering identification of worn bushings, proper tool selection, removal techniques, installation best practices, and post-installation testing. The author emphasizes that proper replacement delivers significant improvements in vehicle handling and ride quality while preventing further damage to suspension components.
Table of Contents
- Understanding Leaf Spring Bushings: The Unsung Heroes of Your Suspension
- When to Replace Your Leaf Spring Bushings: Signs You Shouldn’t Ignore
- Tip 1: Gather the Right Tools and Parts Before Starting
- Tip 2: Properly Prepare Your Vehicle for the Job
- Tip 3: Master the Art of Bushing Removal Without Damaging Components
- Tip 4: Follow Installation Best Practices for Long-Lasting Results
- Tip 5: Don’t Skip Post-Installation Testing and Break-In
- Conclusion: Smooth Riding Ahead
- Frequently Asked Questions
Understanding Leaf Spring Bushings: The Unsung Heroes of Your Suspension
After 25 years as a mechanic, I can tell you that leaf spring bushings are the unsung heroes of your vehicle’s suspension system. These small rubber components might not look impressive, but they’re absolutely crucial for a smooth, stable ride. When these bushings wear out, your entire driving experience suffers – and I’ve seen it happen thousands of times in my shop.
Leaf spring bushings serve as the vital connection points between your leaf springs and the vehicle’s frame. They allow necessary movement while preventing metal-on-metal contact that would cause excessive wear and that awful screeching noise nobody wants to hear coming from their vehicle.
Think of leaf spring bushings as the silent mediators in your suspension system. They absorb road shock, reduce vibration, and help maintain alignment – all while operating in some of the harshest conditions imaginable. They’re constantly exposed to road grime, moisture, extreme temperatures, and significant mechanical stress.
I remember one customer who came in with a truck that handled like it was driving on ice – all because his bushings had deteriorated to practically nothing. After replacement, he called it “getting a new truck for the price of bushings.” That’s the kind of transformation proper bushing replacement can deliver.
When to Replace Your Leaf Spring Bushings: Signs You Shouldn’t Ignore
Before diving into replacement tips, let’s talk about how to know when your leaf spring bushings need attention. In my decades working under vehicles, I’ve noticed these telltale signs that never lie:
- Unusual squeaking or clunking sounds when driving over bumps or dips
- Vehicle sagging noticeably on one side
- Uneven tire wear that can’t be explained by alignment issues
- Excessive bouncing after hitting bumps
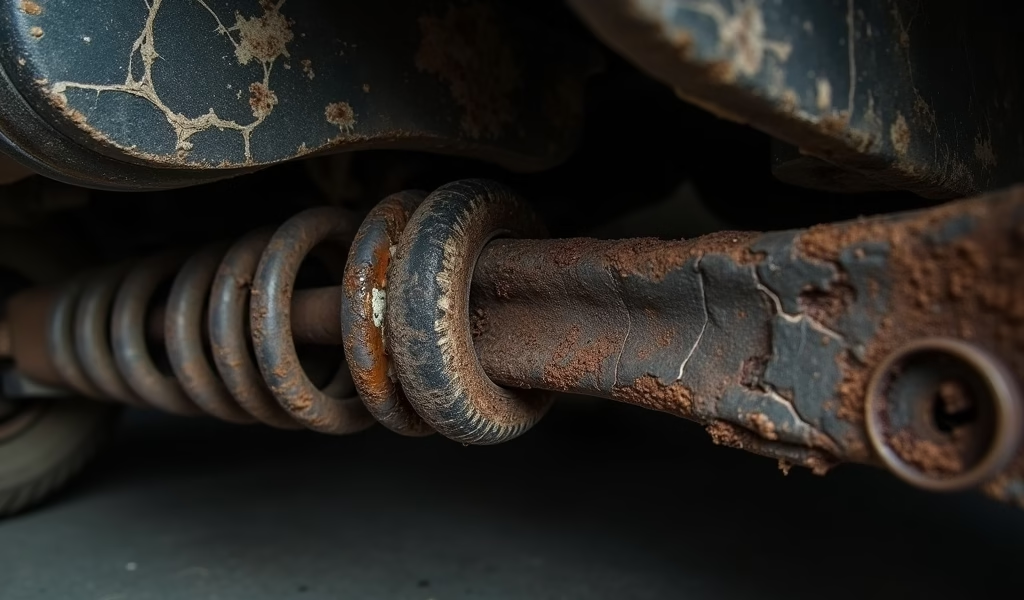
- Visible cracks, splits, or deterioration of the rubber bushings
- Play or movement in the leaf spring mounting points
Last month, Jim brought his F-250 in complaining about handling issues. “It just doesn’t feel right,” he said. One look underneath revealed bushings so worn they had practically disintegrated. The metal sleeve was directly contacting the mounting brackets, creating excessive play in his suspension. No wonder his truck handled poorly!
Most leaf spring bushings should last 50,000-100,000 miles, but this varies dramatically based on driving conditions. If you regularly haul heavy loads or drive on rough roads, expect to replace them more frequently. Vehicles in areas with extreme weather or road salt also tend to need bushing replacement sooner, as environmental factors accelerate rubber deterioration.

Tip 1: Gather the Right Tools and Parts Before Starting
Nothing derails a leaf spring bushing replacement faster than realizing you’re missing a critical tool halfway through the job. I’ve seen weekend warriors transform simple repairs into multi-day ordeals because they weren’t properly prepared. Let’s not let that happen to you.
For this job, you’ll need:
- Floor jack and jack stands rated for your vehicle’s weight
- Socket set and wrenches (including impact wrench if available)
- Penetrating oil (PB Blaster, Liquid Wrench, or similar)
- Rubber mallet
- Pry bar
- C-clamps or a bench vise
- Bushing removal tool or appropriately sized pipe
- Safety glasses and gloves
- Lubricant appropriate for your new bushings
When selecting replacement bushings, you’ll face a choice between OEM rubber bushings or aftermarket polyurethane options. Rubber provides quieter operation and absorbs more road vibration, while polyurethane bushings typically last longer and provide more precise handling. For most daily drivers, quality rubber bushings are the better choice. If you’re building a performance-oriented vehicle, consider polyurethane.
I recommend purchasing a complete kit rather than individual components. A quality kit from Moog, Energy Suspension, or Prothane will include all the bushings, sleeves, and necessary hardware. According to a comprehensive study by Suspension Secrets, polyurethane bushings can last up to three times longer than rubber in some applications, though they do transfer more road noise.
Before starting, verify you have the correct parts for your specific vehicle. I once had a customer waste an entire Saturday trying to install bushings meant for a different model year. An hour of research can save days of frustration.
Tip 2: Properly Prepare Your Vehicle for the Job
Proper preparation is the foundation of a successful bushing replacement. In my shop, we follow a methodical approach that minimizes surprises and maximizes safety.
Start by parking on a level, solid surface – ideally concrete rather than asphalt or gravel. Loosen (but don’t remove) your wheel lug nuts before jacking up the vehicle. This small step saves significant frustration later.
Using a floor jack, lift the vehicle and secure it with properly positioned jack stands. Never rely solely on a hydraulic jack – I’ve seen them fail, and the consequences can be devastating. Double-check that the vehicle is stable before crawling underneath.
Next, thoroughly clean the leaf spring mounting areas. Road grime and rust are your enemies here, often hiding critical components and making disassembly much more difficult. A wire brush and penetrating oil are invaluable tools at this stage.
One critical decision is whether to remove the entire leaf spring assembly or replace the bushings while the springs remain partially attached to the vehicle. For most DIYers, removing the complete assembly provides better access and control, though it requires more initial work.
Take photos before disassembly! I can’t stress this enough. Modern smartphones make it easy to document the original positions of components. These visual references can save hours of head-scratching during reassembly.
If you’re dealing with severely corroded components, apply penetrating oil generously and let it work for at least 30 minutes before attempting removal. The suspension components in your vehicle can be stubborn after years of exposure to the elements, so patience during preparation pays dividends.
Tip 3: Master the Art of Bushing Removal Without Damaging Components
Removing old bushings is where many DIYers go wrong. I’ve seen people destroy perfectly good components by rushing this critical step. Remember: this is a process of persuasion, not brute force.
Begin by thoroughly saturating the bushing area with quality penetrating oil. Apply it liberally to all contact points and allow it to penetrate for at least 15-30 minutes. For extremely stubborn bushings, I’ll sometimes apply heat from a propane torch – just enough to expand the metal slightly, not enough to damage any components.
The most common mistake I see is impatience leading to damaged eyes or mounting brackets. Rather than forcing components apart, use progressive, controlled pressure. If you have access to a hydraulic press, that’s ideal. If not, create a makeshift removal setup using sockets or pipes of the appropriate diameter.
Here’s my tried-and-true technique: Find a socket or pipe slightly smaller than the bushing’s outer diameter. Position it against one side of the bushing, then use a hammer to drive the bushing through the eye. Work slowly and keep the pressure as even as possible.
For especially difficult bushings where the rubber has bonded to the metal sleeve, you may need to destroy the old bushing to remove it. In these cases, carefully cut through the rubber with a utility knife, being extremely cautious not to damage the surrounding metal components. Once the rubber is cut, the metal sleeve often comes out more easily.
After removing the old bushings, carefully inspect the mounting eyes and brackets for damage. Look for cracks, elongated holes, or excessive wear. These issues need to be addressed before installing new bushings, or you’ll just be setting yourself up for premature failure again. According to Motor Trend’s suspension experts, approximately 15% of leaf spring eyes have damage that should be repaired before new bushings are installed.

Tip 4: Follow Installation Best Practices for Long-Lasting Results
Installing new bushings correctly is where the magic happens. This is the difference between a repair that lasts 100,000 miles and one that fails within months. Trust me – I’ve seen both outcomes countless times.
Start by thoroughly cleaning the mounting eyes to remove any rust, debris, or remnants of old bushings. I like to use a wire brush followed by brake cleaner to ensure a pristine surface. Any contamination can prevent proper bushing seating.
Alignment is absolutely critical. The bushings must sit perfectly centered in their mounting locations. Many professional mechanics (myself included) mark the alignment with a paint pen before removal to ensure proper positioning during reinstallation.
Apply the appropriate lubricant before installation. For rubber bushings, use a soap-based lubricant or the specific product recommended by the manufacturer. For polyurethane bushings, use the specialized grease typically included with the kit. Never substitute with petroleum-based lubricants on rubber bushings – they’ll cause premature deterioration.
When pressing in new bushings, apply pressure evenly and slowly. If using a press, advance in small increments to ensure the bushing enters straight. If using the socket-and-hammer method, tap lightly around the circumference rather than hammering on one spot.
Torquing hardware correctly is perhaps the most overlooked aspect of bushing replacement. Under-tightened fasteners allow excessive movement; over-tightened ones compress bushings inappropriately or strip threads. Always follow manufacturer torque specifications and tighten fasteners with the suspension at normal ride height – not while it’s hanging freely.
One technique I’ve refined over decades is to partially install all components before final tightening. This allows for minor adjustments to ensure everything aligns properly. Once you’re confident in the positioning, then follow the proper torque sequence.
If your vehicle uses ball joints alongside the leaf springs, inspect these components while you’re working in the area. These components often wear at similar rates, and replacing them during the same service can save significant labor time.
Tip 5: Don’t Skip Post-Installation Testing and Break-In
Your job isn’t complete until you’ve verified proper installation and allowed for proper break-in. This final step separates professional-quality work from amateur repairs.
After reinstallation, lower the vehicle to the ground and bounce each corner several times to help settle the suspension components. Visually inspect the bushings to ensure they’re seated properly and not showing signs of pinching or irregular compression.
Most replacement bushings require a break-in period of approximately 500 miles. During this time, the bushings will seat themselves properly and conform to your vehicle’s specific geometry. You might notice slightly different handling characteristics initially, particularly if you’ve switched from rubber to polyurethane.
For your first test drive, find a route with various road conditions – smooth pavement, rough sections, speed bumps, and turns. Pay close attention to any unusual noises or handling quirks. A properly completed bushing replacement should result in noticeably improved handling, reduced noise, and a more confident feel on the road.
After about 50 miles, re-torque all fasteners. Road vibration and initial settling can cause hardware to loosen slightly. This quick check can prevent problems down the road and is something we do for every vehicle that leaves our shop.
Keep an eye on your tire wear patterns over the next few thousand miles. Improved bushings often correct alignment issues that were causing uneven wear. If you notice any unusual wear patterns developing, have your alignment checked promptly.
Conclusion: Smooth Riding Ahead
Replacing leaf spring bushings might not be the most glamorous vehicle maintenance task, but few repairs deliver such noticeable improvements for relatively modest investment. When done correctly, you’ll enjoy improved handling, reduced road noise, more consistent braking, and even potentially better fuel economy due to reduced rolling resistance.
Throughout my career, I’ve seen countless vehicles transformed by this often-overlooked maintenance item. From work trucks that regain their hauling confidence to classic cars that recapture their original handling characteristics, proper bushing replacement delivers results you can feel with every mile.
While DIY replacement is entirely possible with the right tools and knowledge, don’t hesitate to seek professional help if you encounter excessive rust, seized components, or simply value your time more than the cost of shop labor. A professional mechanic can often complete the job in a fraction of the time it might take a DIYer, with specialized tools that make the process smoother.
Whether you tackle this job yourself or bring it to the professionals, knowing what goes into proper leaf spring bushing replacement ensures you’ll get the best possible results. Your suspension system works as a unified whole – when one component performs better, everything improves.
Happy wrenching, and enjoy that smooth ride you’ve been missing!
Frequently Asked Questions
How often should leaf spring bushings be replaced?
Most leaf spring bushings should be replaced every 50,000-100,000 miles, depending on driving conditions. Vehicles used for towing or frequently driven on rough roads may need replacement more frequently.
How much does leaf spring bushing replacement typically cost?
Professional replacement typically costs between $200-500, depending on vehicle type and labor rates. DIY costs are usually $40-100 for quality parts.
Can I drive with bad leaf spring bushings?
While possible, driving with worn bushings is unsafe and causes accelerated wear on other suspension components. It significantly compromises handling, especially during emergency maneuvers.
What’s better, rubber or polyurethane bushings?
Rubber bushings provide quieter operation and better vibration absorption, ideal for daily drivers. Polyurethane offers longer lifespan and improved handling precision, making it better for performance applications.
How long does it take to replace leaf spring bushings?
Professional mechanics typically complete the job in 2-4 hours. DIYers should allocate a full day, especially for first-time replacements.

