Overview
This article offers practical DIY methods for releasing stuck fuel line disconnects, including the zip tie technique, PVC pipe hack, penetrating oil application, and temperature manipulation strategies. It emphasizes safety precautions when working with fuel systems and provides detailed instructions for troubleshooting stubborn connections while avoiding damage to components.
Table of Contents
- Understanding Fuel Line Disconnects
- Why Fuel Line Disconnects Get Stuck
- Safety First: Precautions Before You Start
- Essential Tools for the Job
- The Zip Tie Method: A Mechanic’s Secret Weapon
- The PVC Pipe Hack: DIY Like a Pro
- The Penetrating Oil Technique
- The Heat and Cold Method
- The Compressed Air Trick
- Troubleshooting Extremely Stubborn Connections
- Post-Removal Care and Reassembly
- Conclusion
- Frequently Asked Questions
Understanding Fuel Line Disconnects
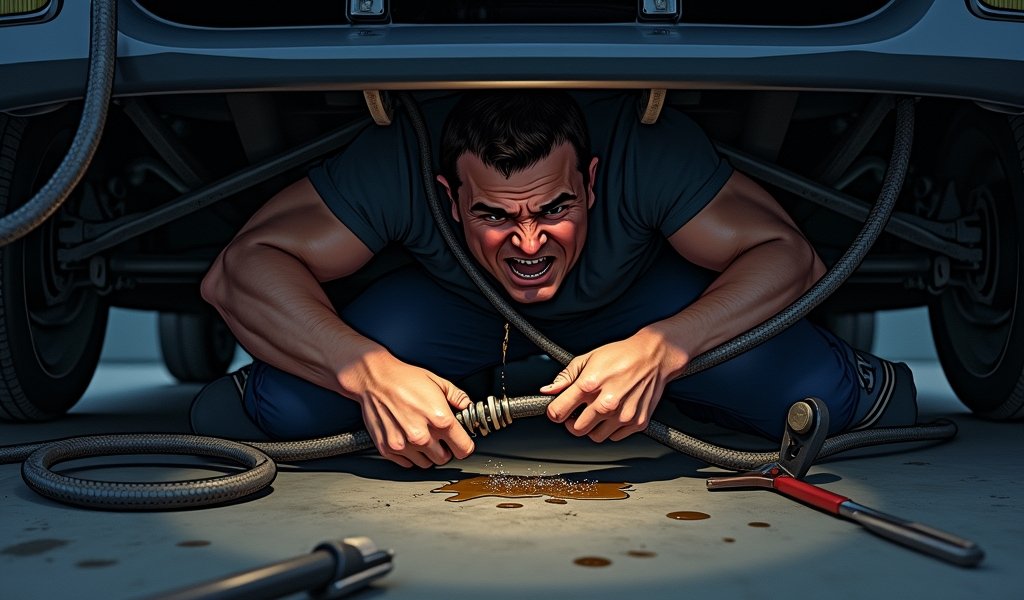
If you’ve ever found yourself under your vehicle muttering colorful phrases while wrestling with a stubborn fuel line, you’re in good company. Fuel line quick disconnects are those seemingly simple plastic and metal connectors that were supposed to make our lives easier. In theory, they should separate with just a gentle push of a tab or collar. In reality? Well, that’s why you’re here.
Quick disconnects use internal retention mechanisms—typically spring-loaded fingers or clips—that grip a ridge on the opposing fitting. They’re designed to hold tight against pressure while still allowing for relatively easy separation during maintenance. At least, that was the plan when engineers drew them up.
After years of heat cycles and exposure to the elements, these convenient connectors often decide to permanently bond, turning a 10-minute job into an afternoon-long battle. But before you reach for expensive specialty tools you might only use once, I’ve got some field-tested hacks that have saved countless mechanics (myself included) from hours of frustration.
Why Fuel Line Disconnects Get Stuck

Understanding why these connectors get so stubborn helps you approach the problem more effectively. Several factors work against us when dealing with aged fuel connections:
- Fuel deposits and varnish build-up that create a natural adhesive
- Rubber O-rings and seals that harden and lose elasticity with age
- Thermal cycling (repeated heating/cooling) causing microscopic material changes
- Corrosion from road salt, moisture, and environmental contaminants
- Plastic components that become brittle over time
Vehicles in regions with extreme temperatures or those that sit unused for extended periods are particularly prone to these issues. What once disconnected with thumb pressure might now resist your entire body weight. This is especially common when tackling a long-overdue fuel filter replacement.
The good news? Most stuck fuel line disconnects can be freed without damaging components or buying expensive tools. You just need the right approach and a bit of mechanical sympathy.
Safety First: Precautions Before You Start
Before we dive into removal techniques, let’s talk safety. Fuel systems remain pressurized even when the engine is off, and gasoline is extremely flammable. A few precautions will keep you safe and your vehicle intact:
- Relieve fuel system pressure by removing the fuel pump fuse/relay, then running the engine until it stalls
- Disconnect the battery’s negative terminal
- Work in a well-ventilated area away from ignition sources
- Keep a fire extinguisher within reach (better to have it and not need it)
- Wear safety glasses and fuel-resistant gloves
- Place absorbent materials under your work area to catch inevitable drips
Never attempt these procedures while smoking or near open flames. Even a small spark from nearby electrical equipment can ignite fuel vapors. According to the National Fire Protection Association, vehicle fires account for about 16% of reported U.S. fires, and many stem from fuel system work gone wrong.
Essential Tools for the Job
One of the beauties of these hacks is that they require minimal specialized equipment. Before diving underneath your vehicle, gather:
- Assorted plastic zip ties of various sizes and thicknesses
- Selection of flat-blade screwdrivers
- Needle-nose pliers
- Small pieces of PVC pipe (½” and ¾” diameters work for most applications)
- Penetrating oil (specifically formulated for fuel systems)
- Shop towels or rags
- Flashlight or work light (you can never have too much illumination)
- Safety glasses and gloves
Having these items ready before you begin will prevent mid-project trips to the hardware store and help maintain your momentum (and patience). Most of these items are probably already in your garage or tool box, making these hacks not just effective but economical.
The Zip Tie Method: A Mechanic’s Secret Weapon

This ingenious approach uses everyday zip ties to create a custom tool perfectly sized for your specific connector. It’s my go-to method for most quick disconnect challenges.
Here’s the step-by-step process:
- Select a zip tie that’s approximately twice the diameter of your fuel line
- Insert the pointed end of the zip tie into the space between the male and female connectors
- Guide it around the circumference until you feel it slip behind the retaining tabs
- Add a second zip tie if needed for additional reach or leverage
- While maintaining pressure on the retaining mechanism with the zip tie(s), gently pull the connectors apart
This method works best on connectors with external retaining clips and is particularly effective on Ford and GM vehicles. The most common mistake is using too large a zip tie, which can’t fit into the narrow gap. Start with thinner ties and work your way up if needed.
I’ve personally used this technique on everything from 1990s Chevy trucks to modern European imports. The beauty lies in its simplicity—no special tools, just a bit of patience and the right approach.
The PVC Pipe Hack: DIY Like a Pro
When dealing with enclosed disconnect fittings where zip ties can’t reach, a custom tool fashioned from PVC pipe becomes your new best friend. This is particularly effective for those cylindrical connectors common in Chrysler and many import vehicles.
Materials needed:
- 1/2″ or 3/4″ PVC pipe (choose based on your connector size)
- Hacksaw
- Sandpaper or file
Creation steps:
- Cut a 3-4″ length of PVC pipe
- Create a lengthwise slit about 1/3 of the way through the pipe
- Sand any sharp edges smooth to prevent damage to fuel line components
- Slide the pipe over the fuel line
- Position the slit portion to engage with the connector’s release mechanism
- Push the tool against the connector while pulling the line to separate
The homemade tool works by spreading pressure evenly around the release collar while allowing you to pull with more leverage than your fingers alone provide. You can customize the pipe diameter and slit width to perfectly match your specific connector type.
While commercial disconnect tools exist, this DIY version costs less than $2 and works just as effectively. I’ve found this particularly useful on those deeply recessed connectors on modern fuel-injected engines where fuel injector cleaning procedures require line disconnection.
The Penetrating Oil Technique
When dealing with particularly stubborn connections, a good penetrating oil can make all the difference. But not just any oil will do—especially around fuel systems.
Best practices:
- Choose fuel-system-safe formulations (standard WD-40 isn’t ideal here)
- Apply the penetrant precisely at the junction point using the included straw
- Tap the connection gently with a plastic tool to help the fluid penetrate
- Allow 15-30 minutes dwell time—patience is crucial
- Reapply and wait again if necessary
For maximum effectiveness, combine penetrating oil with gentle rotation of the connector. This helps distribute the lubricant around the entire circumference. Some mechanics swear by a 50/50 mix of acetone and automatic transmission fluid as a homemade penetrant, though commercial products formulated for fuel systems are typically safer.
According to independent laboratory testing, certain penetrating oils can reduce the force needed to free frozen fasteners by up to 50%. This same principle applies to stuck fuel line connectors, making this method particularly valuable for older vehicles.
The Heat and Cold Method
Strategic use of temperature changes can be surprisingly effective at freeing stuck connections by exploiting the fundamental properties of material expansion and contraction.
For heat application:
- Use a hair dryer (not an open flame heat source) to warm the female connector
- Apply heat for 1-2 minutes, rotating to ensure even heating
- While still warm, attempt to separate the connection using standard release methods
For cold application:
- Apply a commercial freeze spray or a cloth soaked in ice water to the male portion
- Allow 30-60 seconds for the metal to contract
- Quickly attempt separation while the temperature difference is greatest
The science behind this hack is straightforward—heat causes expansion while cold causes contraction. By heating the outer component while cooling the inner one, you temporarily increase the clearance between them. This technique is particularly useful for metal-to-metal connections.
I’ve had great success combining this method with the zip tie technique, especially on vehicles that have been sitting for extended periods. Just remember to use gentle heat—we want thermal expansion, not melted plastic components.
The Compressed Air Trick
For particularly stubborn connections, compressed air can provide the necessary force to overcome internal resistance. This method requires a bit more setup but can work miracles on those connections that have resisted other approaches.
Required setup:
- A portable air compressor or compressed air canister
- A blow gun attachment with a rubber tip
- Proper fittings to create a seal against the fuel line
Execution:
- Ensure the area is clean and dry
- Position the blow gun tip against one end of the disconnected fuel line
- Create a seal using your hand or a rubber adapter
- Apply short bursts of air pressure (no more than 30 PSI)
- Listen for a “pop” sound indicating the release of the connection
This technique works through two mechanisms: the air pressure helps push against the internal components, and the cooling effect of the expanding air can cause slight contraction of the metal parts. Use extreme caution with this method and never exceed safe pressure levels—you want to free the connection, not turn it into a projectile.
This method should be considered a last resort before more destructive approaches, but I’ve seen it work on connections that seemed permanently fused.
Troubleshooting Extremely Stubborn Connections
Sometimes, despite your best efforts, a connection refuses to budge. Before resorting to destructive methods, try these advanced troubleshooting techniques:
- If tabs or clips are visible but inaccessible, fashion a custom tool from a thin piece of metal (like a cut-down feeler gauge)
- Try combining methods—penetrating oil followed by the heat/cold technique often works where individual approaches fail
- Use a dental pick or small hook tool to carefully manipulate internal retaining mechanisms
- For plastic connectors, check if there’s a secondary locking tab that needs to be released first
Know when to call it quits—if you’re applying extreme force or considering destructive methods, you’re likely to cause more problems than you’re solving. Sometimes replacing both connected components is the most time-effective solution.
For connections with severe corrosion or damage, a clean cut and proper splice is often safer than risking damage to other components. Just make sure to use fuel-rated connectors and clamps appropriate for pressurized systems, as recommended by EPA guidelines for automotive repair.
Post-Removal Care and Reassembly
Once you’ve successfully separated the connection, take time for proper inspection and preparation before reassembly:
- Inspect both sides of the fitting for damage:
- Look for cracks, brittle plastic, or deformed metal
- Check O-rings for hardening, flattening, or deterioration
- Examine locking mechanisms for proper function
- Before reconnecting:
- Clean all mating surfaces thoroughly with approved cleaner
- Apply a tiny amount of fuel-resistant lubricant to O-rings
- Ensure proper alignment before pressing together
- When reinstalling:
- Listen for the audible “click” that indicates proper engagement
- Verify the connection is secure with a gentle tug test
- Check for leaks once the system is pressurized
If you notice significant damage to connectors, it’s wisest to replace them rather than risk future leaks or failures. Many modern fuel systems operate at high pressure (40-60 PSI or more), so connection integrity is critical for both safety and performance.
While a small investment in new connectors might seem unnecessary, it’s far cheaper than dealing with fuel leaks, fire hazards, or stranding issues down the road.
Conclusion
Tackling stubborn fuel line quick disconnects doesn’t require expensive specialty tools or superhuman strength—just a bit of mechanical know-how and these field-tested hacks. Whether you’re using the zip tie method on a Ford pickup or the PVC pipe trick on a Chrysler minivan, these approaches have helped countless mechanics and DIYers save time, money, and frustration.
Remember that patience almost always trumps brute force when dealing with these precision components. Take your time, work systematically through the methods outlined above, and prioritize safety at every step. Your fuel system—and your knuckles—will thank you.
These techniques demonstrate the beauty of mechanical problem-solving: sometimes the simplest solutions are the most effective. By understanding how fuel line disconnects work and why they stick, you can approach the problem strategically rather than desperately. That’s the difference between a frustrating repair experience and a satisfying one.
Next time you’re facing a stubborn fuel line, give these methods a try before reaching for expensive tools or resorting to destructive measures. You might be surprised at how easily those “impossible” connections come apart with the right approach.
Frequently Asked Questions
Can I use regular WD-40 on fuel line connections?
No, regular WD-40 isn’t ideal for fuel systems. Use penetrating oils specifically formulated to be fuel-system safe to prevent damage to O-rings and other components.
How much force should I use when trying to separate fuel line connections?
Use moderate, steady force rather than sudden jerks. If the connection requires excessive force, stop and try another method to avoid damaging components.
Do I need to replace O-rings after removing a fuel line connection?
While not always necessary, replacing O-rings is good practice, especially on older vehicles. Fresh O-rings ensure a proper seal and prevent potential leaks.
Can these methods damage fuel line components?
When performed carefully, these methods minimize the risk of damage compared to brute force approaches. Always inspect components after removal and replace any that show signs of damage.
How do I know if my quick disconnect is functioning properly after reassembly?
Listen for an audible “click” during reconnection and perform a gentle tug test to verify engagement. After starting the vehicle, check for leaks around the connection.

