Overview
This article details the fundamentals of double wishbone suspension systems, explaining key components and how to optimize geometry through camber, caster, and toe adjustments for improved vehicle handling across various applications from street driving to track performance. It provides practical guidance for measuring and modifying suspension settings while addressing common problems, emphasizing how proper setup can significantly enhance tire contact, cornering ability, and overall driving experience.
Table of Contents
- Understanding Double Wishbone Suspension
- Key Components and Terminology
- Optimizing Geometry for Performance
- Camber, Caster, and Toe Settings
- Roll Center and Instant Center Importance
- Common Geometry Problems and Solutions
- Measuring and Adjusting Your Suspension
- Application-Specific Considerations
- Conclusion
- Frequently Asked Questions
Understanding Double Wishbone Suspension
Double wishbone suspension systems stand as a cornerstone of superior vehicle handling, offering precise control and exceptional performance when properly set up. First and foremost, understanding the fundamentals of this sophisticated system allows you to unlock your vehicle’s true handling potential. The beauty of double wishbone designs lies in their ability to maintain optimal tire contact throughout suspension travel, something simpler setups simply can’t match.
Unlike MacPherson struts or trailing arms, double wishbone configurations provide independent control over multiple geometry factors. This separation of functions means you can fine-tune handling characteristics without unwanted compromises. Moreover, this design excels at keeping your tires planted firmly on the road during aggressive cornering, hard braking, and rapid acceleration.
The double wishbone layout originated in racing applications, but its benefits have trickled down to performance street cars and even some luxury vehicles. Additionally, enthusiasts often convert to this suspension type specifically for its superior adjustability and consistent tire contact. When tuned correctly, the difference in handling precision is immediately noticeable – turns become more responsive, grip levels increase, and the vehicle feels more connected to the road.
Key Components and Terminology
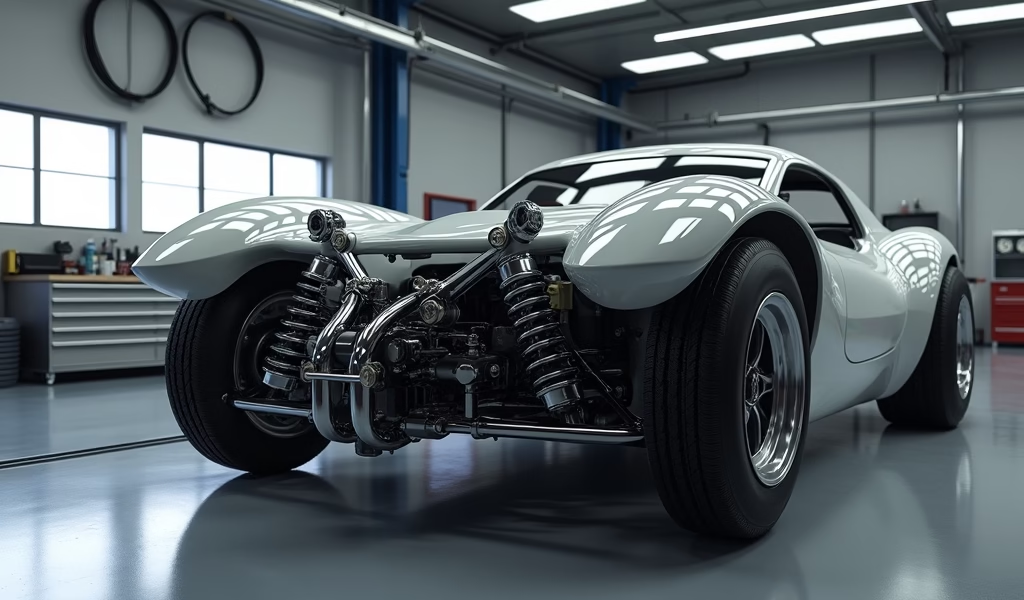
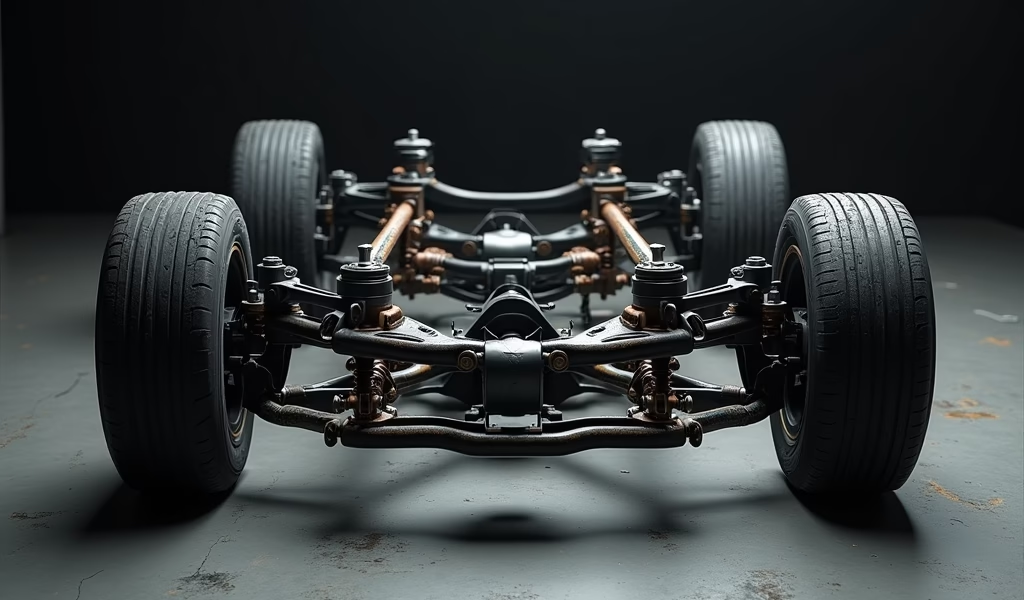
Before diving into adjustments, let’s familiarize ourselves with the main parts that make up a double wishbone system. The “wishbones” themselves are the A-shaped control arms (both upper and lower) that connect the wheel hub to the chassis. These arms work together with ball joints, which allow for the necessary pivoting movement while maintaining precise control.
Connecting everything together is the steering knuckle (sometimes called an upright), which holds the wheel hub and attaches to both control arms. Furthermore, bushings play a crucial role by providing the right balance of movement and firmness – too soft and handling suffers, too rigid and ride quality deteriorates. Springs and dampers (shock absorbers) round out the system, controlling the rate of suspension movement and absorbing road imperfections.
Some key terms you’ll need to understand include “scrub radius” (the distance between the steering axis and tire contact center), “motion ratio” (the relationship between wheel movement and spring/damper movement), and “anti-dive/anti-squat” (geometric properties that resist suspension compression during braking or acceleration). Meanwhile, terms like “bump steer” describe unwanted toe changes during suspension movement – something a well-designed double wishbone setup minimizes effectively.

Optimizing Geometry for Performance
Getting the most from your double wishbone suspension requires understanding how geometry affects handling. First off, control arm length and mounting angles determine camber gain characteristics – how much the wheel tilts inward (negative camber) during compression. Ideally, you want increased negative camber when cornering to maximize the tire’s contact patch as the body rolls.
Control arm mounting points directly influence the suspension’s “instant center” and, consequently, the roll center height. A properly positioned roll center reduces body roll while maintaining grip. Similarly, the relationship between upper and lower arm lengths affects camber change rates – typically, a shorter upper arm creates beneficial camber gain during compression.
When optimizing your setup, consider how changes affect multiple parameters simultaneously. For instance, adjusting the upper control arm mounting point for more negative camber gain will also shift the roll center and potentially change caster. Therefore, making incremental adjustments followed by testing is the wisest approach. Many enthusiasts install camber adjustment bolt kits to fine-tune these settings without requiring complete disassembly.
According to research from the Society of Automotive Engineers, optimizing double wishbone geometry can improve lateral grip by up to 15% compared to poorly set up systems. This underscores the importance of getting your geometry right – it’s not just about theory but translates directly to measurable performance gains.
Camber, Caster, and Toe Settings
Camber, caster, and toe form the holy trinity of wheel alignment that dramatically impacts handling. Camber refers to the inward or outward tilt of your tires when viewed from the front – negative camber (top of tire leaning inward) improves cornering grip but can accelerate tire wear if excessive. For street driving, -1° to -1.5° typically offers a good balance, while track setups might run -2° to -3° up front.
Caster represents the forward or backward tilt of the steering axis when viewed from the side. Greater positive caster improves straight-line stability and creates dynamic negative camber when turning. However, it also increases steering effort. Measuring and adjusting caster angle through proper procedure ensures you get the benefits without excessive steering heaviness.
Toe settings – the inward or outward angle of the tires when viewed from above – affect straight-line stability and turn-in response. Toe-in (front of tires pointing slightly inward) increases straight-line stability but can make turn-in feel sluggish. Conversely, toe-out quickens turn-in but might make the car feel nervous on highways. For most street applications, minimal toe-in (1/16″ to 1/8″) provides a good balance, while track setups might run zero toe or slight toe-out up front.
Interestingly, these settings interact with each other – more positive caster automatically creates dynamic negative camber during steering, potentially allowing for less static negative camber. This kind of synergistic thinking separates good suspension setup from great ones.
Roll Center and Instant Center Importance
The roll center represents the theoretical point around which your car’s body rotates during cornering. Its height significantly affects how your vehicle handles – too low and you’ll experience excessive body roll, too high and the suspension might feel harsh or unpredictable. With double wishbone systems, you have remarkable control over roll center positioning through control arm mounting angles.
Connected to roll center geometry is the concept of instant centers – the theoretical points where the control arms’ projected lines intersect. These instant centers determine how camber changes throughout suspension travel and directly influence the roll center location. Furthermore, proper instant center positioning minimizes scrub (lateral tire movement) during suspension compression and extension.
For most performance applications, a front roll center height of 2-3 inches above ground provides a good balance of body control without compromising ride quality. Additionally, keeping the roll center relatively consistent throughout suspension travel prevents handling unpredictability. Advanced suspension designers sometimes deliberately allow the roll center to migrate slightly upward during compression to progressively resist body roll as cornering forces increase.

Common Geometry Problems and Solutions
Bump steer – unwanted toe changes during suspension movement – ranks among the most common double wishbone geometry issues. This phenomenon makes your car feel nervous and unpredictable over bumps. To fix it, ensure your tie rods are parallel to the lower control arms when viewed from the side, and that the tie rod’s instant center aligns with the control arm instant centers.
Another frequent problem is binding during suspension travel, where components reach their movement limits before full travel is achieved. This typically manifests as a sudden harshness at a particular point in the suspension travel. The solution usually involves checking for interference between components and ensuring all ball joints and bushings have adequate range of motion throughout the suspension’s travel.
Improper control arm bushing replacement often leads to unexpected geometry changes. Using incorrect bushings or improperly installing them can affect camber, caster, and even introduce unwanted toe changes. When replacing bushings, always use components designed specifically for your suspension and follow proper installation procedures.
Excessive scrub radius creates steering kickback over bumps and can lead to torque steer in front-wheel-drive applications. Reducing scrub radius typically involves wheel offset adjustments, though significant changes might require redesigned steering knuckles. According to research published in Vehicle System Dynamics, minimizing scrub radius significantly reduces steering sensitivity to road disturbances.
Measuring and Adjusting Your Suspension
Before making adjustments, establish a baseline by measuring your current geometry. Start with the vehicle at proper ride height on level ground. For camber, a digital inclinometer against the wheel or brake rotor provides accurate readings. Meanwhile, caster measurement requires turning the wheels to specific angles while monitoring camber changes – special caster/camber gauges simplify this process.
For DIY enthusiasts, string alignment methods offer surprisingly accurate measurements of toe settings. Stretch string along both sides of the car, ensuring they’re perfectly parallel, then measure the distances from string to wheel at front and rear of each tire. The difference between these measurements indicates your toe setting.
Most double wishbone systems offer several adjustment points. Camber typically adjusts via eccentric bolts or adjustable upper control arms. Caster might adjust through similar means or via shims between the subframe and chassis. Toe adjusts through tie rod length changes – threading them in or out provides fine control over toe settings.
When making adjustments, change one parameter at a time and recheck all other settings afterward, as they often affect each other. Also, always follow up with a road test to ensure the changes provided the desired effect without introducing new issues. Keep detailed records of your adjustments and resulting handling characteristics – this documentation proves invaluable as you fine-tune your setup.
Application-Specific Considerations
Track-focused setups benefit from more aggressive geometry settings than street applications. For track use, consider running more negative camber (-2° to -3.5°), increased caster (6° to 8°), and minimal toe settings. Additionally, track applications often use stiffer bushings or spherical bearings to eliminate unwanted compliance, though this comes at the expense of noise and harshness.
Street performance setups require balancing handling improvements with everyday drivability. More moderate settings work better here – perhaps -1° to -2° of camber, 5° to 7° of caster, and slight toe-in for stability. Furthermore, quality rubber bushings or hybrid bushings (with stiffer materials but not full spherical bearings) maintain handling precision while filtering out unwanted noise and vibration.
Off-road applications flip many performance car principles upside down. Here, longer suspension travel and softer springs take priority over precise camber control. Moreover, off-road suspensions often deliberately introduce anti-dive and anti-squat characteristics to maintain ground clearance during acceleration and braking.
Daily drivers benefit most from conservative settings that maximize tire life while still improving handling over stock. Mild negative camber (-0.5° to -1°), moderate caster (5° to 6°), and slight toe-in (1/16″) typically provide noticeable handling improvements without accelerating tire wear or making the car feel darty on the highway.
Conclusion
Mastering double wishbone suspension geometry transforms your driving experience by unlocking the full potential of your vehicle’s handling capabilities. Through proper understanding and careful adjustment of camber, caster, toe, and roll center geometry, you can create a setup perfectly tailored to your driving style and intended use. Moreover, the ability to precisely control these parameters throughout suspension travel gives double wishbone systems their renowned handling advantages.
Remember that suspension setup is as much art as science – while the principles remain constant, finding the perfect balance for your specific vehicle and driving needs requires patience and methodical testing. Furthermore, small, incremental changes often yield better results than dramatic adjustments. Whether you’re building a track weapon, enhancing your daily driver, or creating an off-road beast, applying these double wishbone geometry principles will yield significant improvements in handling, grip, and driver confidence.
Ready to take your vehicle’s handling to the next level? Start by measuring your current geometry, then make targeted adjustments based on the principles we’ve covered. Additionally, consider consulting with suspension specialists for complex modifications or if you’re unsure about certain aspects. With the right approach, your double wishbone suspension will deliver that perfect balance of grip, responsiveness, and control that makes driving truly enjoyable.
Frequently Asked Questions
What advantages does double wishbone suspension have over MacPherson strut designs?
Double wishbone designs offer better camber control throughout suspension travel, maintaining optimal tire contact during cornering. They also typically provide more precise handling due to reduced flex and greater adjustability for fine-tuning performance characteristics.
How much negative camber should I run for street driving?
For daily street driving, -0.5° to -1.5° of negative camber typically provides a good balance between cornering grip and even tire wear. Performance-oriented street setups might run toward the more aggressive end of this range without excessive tire wear.
Will adjusting camber affect my toe settings?
Yes, camber adjustments often change toe settings as well, especially when made through control arm adjustments. Always check and reset toe after making camber changes.
How often should I check my suspension geometry?
Check your suspension geometry after any suspension modifications, component replacements, or significant impacts. For performance vehicles, a twice-yearly inspection ensures optimal handling and prevents premature tire wear.
Can I adjust double wishbone suspension geometry at home?
Basic adjustments can be performed at home with proper tools like an inclinometer, string alignment setup, and wrenches. Complex adjustments or comprehensive alignments are best performed with professional equipment for precise measurements.


Pingback: Coil Spring Free Height Specification?! - knowsyourcar.com
Pingback: bump stop compression measurement 5 Tips - knowsyourcar.com
Pingback: Caster Trail Measurement: 5 Proven Tips - knowsyourcar.com