Overview
This article provides a detailed guide to crankshaft journal polishing, explaining why this process is crucial for engine performance and longevity through reduced friction, improved oil film retention, and minimized heat generation. It covers the essential tools, step-by-step polishing techniques, common mistakes to avoid, professional versus DIY considerations, and proper maintenance procedures to ensure optimal results.
Table of Contents
- Understanding Crankshaft Journals
- Why Journal Polishing Matters
- Essential Tools for Crankshaft Polishing
- Step-by-Step Polishing Process
- Common Mistakes to Avoid
- Professional vs DIY Polishing
- Maintenance After Polishing
- Conclusion
- Frequently Asked Questions
Understanding Crankshaft Journals
Crankshaft journal polishing might sound like just another maintenance task, but it’s actually a crucial procedure that can significantly extend your engine’s life. As a mechanic with over 15 years in the field, I’ve seen firsthand how properly polished journals can transform an engine’s performance. These cylindrical surfaces on your crankshaft are where the bearings ride, transferring power while enduring incredible pressures and temperatures.
Think of crankshaft journals as the backbone of your engine’s rotating assembly. Main journals support the crankshaft in the block, while rod journals connect to the connecting rods that drive the pistons. The surface finish of these journals is critical—too rough, and you’ll face excessive wear; too smooth, and proper oil film may not develop.
Most production crankshafts come with a factory finish between 10-20 microinches Ra (roughness average). This might sound smooth, but performance engines often benefit from surfaces polished to 4-8 microinches Ra. The difference might seem minute, but it’s like comparing a country road to a freshly paved highway—both will get you there, but one offers a smoother, more efficient journey.
Why Journal Polishing Matters
You might wonder, “If my engine’s running fine, why bother with journal polishing?” Good question. The answer lies in understanding the microscopic world where metal meets oil. When journals aren’t properly polished, even tiny imperfections can become focal points for wear, creating a domino effect of problems throughout your engine.
Properly polished journals provide several critical benefits. First, they reduce friction dramatically, which directly translates to more horsepower reaching your wheels instead of being lost as heat. In high-performance applications, this can mean the difference between winning and losing a race. But even in everyday vehicles, that efficiency means better fuel economy and longer engine life.
Second, polished journals improve oil film retention. Oil doesn’t just lubricate—it creates a protective barrier between metal components. A properly polished surface holds this film more effectively, preventing metal-to-metal contact even under extreme conditions. According to research from the Society of Automotive Engineers, optimized surface finishes can reduce bearing wear by up to 30% under identical load conditions.
Finally, well-polished journals minimize heat generation. Every imperfection that causes friction generates heat—your engine’s worst enemy. By eliminating these hot spots, your bearings, oil, and ultimately your entire engine will run cooler and last longer. It’s preventative maintenance at its finest.

Essential Tools for Crankshaft Polishing
Getting the right tools before starting isn’t just convenient—it’s essential for achieving professional results. I’ve seen too many DIYers damage expensive crankshafts by improvising with inadequate equipment. Here’s what you’ll need:
- Polishing stones (320, 400, and 600 grit at minimum)
- Flexible polishing belts (different grits from 320 to 1200)
- Crankshaft polishing fixtures or a lathe
- Dial indicator or micrometer for measurement
- Clean lint-free rags
- Polishing oil or WD-40
- Eye protection and rubber gloves
Don’t skimp on quality here. Cheap abrasives often contain inconsistent grit sizes that can leave scratches deeper than the finish you’re trying to achieve. I recommend Flex-Hone® tools for final polishing—they create the perfect crosshatch pattern that retains oil while providing minimal surface friction.
For measurement, a quality dial indicator can spot taper and out-of-round conditions that might escape the naked eye. Remember, we’re working in the realm of ten-thousandths of an inch—precision matters. The Mitutoyo digital micrometers are industry standards for a reason: they’re reliable, accurate, and worth every penny for serious engine builders.
Storage and cleanliness are equally important. Once polished, journals should be wrapped in oil-soaked paper and plastic to prevent corrosion. Even a fingerprint can start corrosion that undoes your hard work. Dedicated storage containers or engine rotation stands are ideal for keeping your crankshaft safe between polishing and installation.
Step-by-Step Polishing Process
Now, let’s get our hands dirty with the actual polishing process. I’ll walk you through this step-by-step, just as I would guide a new technician in my shop.
First, inspection is critical. Examine each journal carefully under bright light, looking for scoring, pitting, or damage. Measure diameters with a micrometer in multiple positions to check for out-of-round or taper conditions. If journals show significant damage or are undersized by more than 0.002 inches, consider having them ground and using undersized bearings instead of polishing.
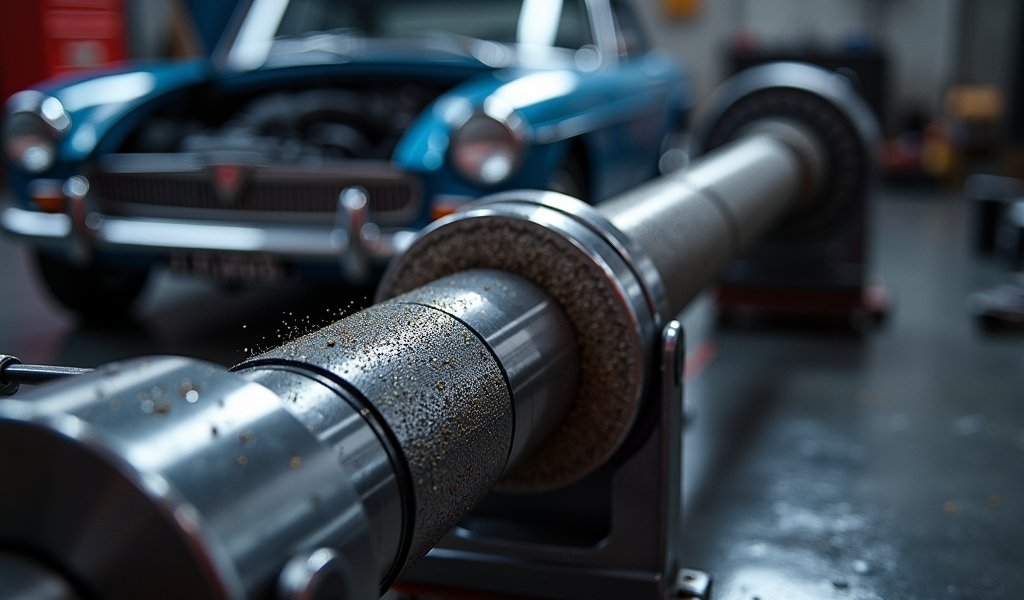
Next, secure the crankshaft properly. In a professional shop, we use a crankshaft polishing machine or lathe. For DIYers, dedicated crankshaft stands work well. Never clamp directly onto journals—always support the crankshaft at the counterweights or use proper fixtures.
Now for the actual polishing sequence:
- Start with the coarsest stone or belt needed (usually 320 grit for minor imperfections)
- Apply light, even pressure while rotating the crankshaft (or moving the stone if using a lathe)
- Keep the abrasive moving constantly—dwelling in one spot causes uneven material removal
- Use plenty of polishing oil to prevent loading the abrasive and reduce heat
- Progress through finer grits (400, 600, 800, 1000, 1200) cleaning thoroughly between each
- Finish with a specialized crankshaft polishing belt for the final mirror finish
The key is patience and consistency. Each grit should completely remove the scratch pattern from the previous grit. Typically, I’ll spend 5-7 minutes per journal per grit—rushing this process is a recipe for disappointment. Watch for a consistent color and reflectivity across the entire journal surface.
Between grits, clean thoroughly with solvent and a lint-free cloth. Any remaining abrasive particles from previous grits will contaminate your finer abrasives and leave deeper scratches. I typically use brake cleaner for this step—it evaporates quickly and leaves no residue.
For the final polish, I recommend a specialized crankshaft polishing kit with emery cloth or a fine polishing belt. The goal is to achieve a mirror finish with a fine crosshatch pattern (visible under magnification) that will retain oil film during engine operation.
Common Mistakes to Avoid
After supervising countless crankshaft rebuilds, I’ve witnessed some common mistakes that can turn a potential masterpiece into a costly lesson. Let me help you avoid these pitfalls.
Inconsistent pressure is perhaps the most frequent error. When you apply more pressure to one side of the journal than another, you create a taper that can lead to uneven bearing wear. Always use light, even pressure and let the abrasives do the work. If you’re struggling to remove a particular imperfection, it’s better to spend more time than to increase pressure dramatically.
Skipping grits is another common shortcut that leads to poor results. Each abrasive leaves its own unique scratch pattern that must be removed by the next finer grit. Jumping from 320 to 800 might seem time-efficient, but the 800 grit won’t remove the deeper scratches from the 320. The result? A surface that looks polished but retains microscopic valleys that will accelerate bearing wear.
Contamination between grits can undo your hard work instantly. A single grain of coarse abrasive that finds its way onto your fine polishing belt can leave a deep scratch across your nearly finished journal. I maintain separate cleaning rags, solvent containers, and work areas for each grit range to prevent cross-contamination.
Another mistake is neglecting the edges of the journals. These transition areas between the journal surface and the crankshaft throws need to be properly radiused and polished. Sharp edges can cut into bearings and disrupt oil flow. Use a small piece of sandpaper wrapped around a dowel to carefully blend these edges to a smooth radius.
Finally, inadequate cleaning after completion has ruined many otherwise perfect jobs. Metal particles embedded in the journal surface can act like miniature cutting tools once the engine starts running. After final polishing, I thoroughly clean with solvent, compressed air, and then wipe with a tack cloth to remove every last particle before applying the protective oil coating.

Professional vs DIY Polishing
When should you tackle crankshaft journal polishing yourself, and when should you call in the pros? This question comes down to your experience level, available tools, and what’s at stake.
Professional polishing offers several advantages. Machine shops have specialized equipment like dedicated journal polishers that maintain perfect geometry while removing material. They also have precision measuring tools to verify dimensions to 0.0001″ accuracy. Most importantly, experienced technicians have developed the “feel” that comes from polishing hundreds of crankshafts.
The cost for professional polishing typically ranges from $150-300 for a standard V8 crankshaft, depending on your location and the condition of the journals. This might seem steep compared to buying some polishing stones, but consider it insurance. A single mistake on a performance crankshaft worth $1,000 or more can be costly indeed.
That said, DIY polishing has its place. If you’re working on a non-critical rebuild, have mechanical aptitude, and are willing to invest in proper tools, polishing your own crankshaft can be rewarding. It’s also an excellent skill to develop if you’re serious about engine building. Just remember that successful DIY polishing requires patience, attention to detail, and a willingness to start over if things don’t look right.
I generally recommend that beginners start with less critical projects—perhaps an old crankshaft from a parts engine—before tackling the crankshaft for their prized vehicle. The skills transfer, but the stakes are lower while you’re learning. Online tutorials from reputable engine builders can also provide valuable visual guidance that complements written instructions.
Maintenance After Polishing
Your work isn’t done once the polishing is complete. Proper storage, installation, and break-in procedures are essential to preserve your beautifully polished journals.
For storage, immediately coat the freshly polished journals with engine assembly lube or a dedicated storage oil. Never leave polished surfaces exposed to air, even briefly. I wrap each journal in oil-soaked paper and then cover the entire crankshaft with plastic wrap or place it in a dedicated storage container. Climate-controlled storage is ideal—humidity is the enemy of polished metal.
When it’s time for installation, handle the crankshaft with clean gloves. The oils in your fingerprints can etch into polished surfaces and create corrosion points. Verify bearing clearances meticulously; properly polished journals may have slightly different dimensions than before.
The break-in period is particularly critical for newly polished crankshafts. Use high-quality break-in oil with ZDDP additives that provide additional protection during these crucial first hours. Avoid extended idling during break-in; varying RPM helps distribute oil and completes the “wearing in” process between the microscopic peaks of the journal surface and the bearing material.
For the first 500 miles, keep RPMs below 3,000 and avoid heavy loads. Change the oil and filter after this initial period to remove any microscopic particles that were generated during break-in. This first oil change is your insurance policy against premature wear.
Following these procedures will ensure your polishing work translates into thousands of miles of trouble-free operation. Remember that the quality of your engine assembly is just as important as the quality of your polishing work—they’re links in the same chain of reliability.
Conclusion
Crankshaft journal polishing isn’t just a maintenance task—it’s an art form that blends mechanical precision with craftsmanship. When done correctly, it can transform your engine’s performance, efficiency, and longevity. Those mirror-like surfaces you’ve created provide the foundation for everything that happens in your engine, from daily commuting to high-performance applications.
The process demands patience, attention to detail, and proper tools, but the results are worth every minute invested. Whether you choose the DIY approach or enlist professional help, understanding what makes for a quality polishing job empowers you to make better decisions about your engine build.
Remember that surface finish is about more than aesthetics—it’s about creating the optimal environment for your bearings to do their job. A properly polished journal minimizes friction, maximizes oil film retention, and distributes load evenly across bearing surfaces. These benefits translate directly to power, efficiency, and durability.
So the next time you’re rebuilding an engine or restoring a classic car, give crankshaft journal polishing the attention it deserves. Your engine will thank you with years of smooth, reliable performance—and isn’t that what we’re all after?
Frequently Asked Questions
How often should crankshaft journals be polished?
Crankshaft journals typically only need polishing during engine rebuilds or when addressing specific bearing issues. Most crankshafts will last the entire life of an engine without requiring additional polishing if properly maintained.
Can I polish crankshaft journals without removing the crankshaft?
No, proper journal polishing requires complete removal of the crankshaft from the engine. Access to all journal surfaces and precise control of the polishing process is impossible with the crankshaft installed.
What’s the difference between grinding and polishing journals?
Grinding removes significant material to restore severely damaged journals or change journal size for undersized bearings. Polishing is a more precise process that improves surface finish without significantly altering journal dimensions.
How much does professional crankshaft journal polishing cost?
Professional polishing typically costs between $150-300 for a standard V8 crankshaft. The price varies based on the number of journals, crankshaft material, and extent of repair work needed.
Can polishing fix a damaged crankshaft journal?
Polishing can fix minor imperfections like light scratches and slight wear patterns. Significant damage like deep scoring, pitting, or material loss requires grinding to an undersized dimension rather than simple polishing.

