Overview
This guide explains how to calibrate active suspension sensors at home, covering the complete process from understanding suspension systems to testing and maintenance. DIY calibration can save hundreds in repair costs while restoring proper vehicle handling, ride comfort, and preventing premature wear of related components.
Table of Contents
- Introduction
- Understanding Active Suspension Systems
- Tools and Materials Needed
- Preparation Steps
- Calibration Process
- Testing Your Work
- Maintenance Tips
- Conclusion
- Frequently Asked Questions
Introduction
Ever felt your once-smooth riding luxury vehicle start to feel more like a farm tractor? That cushy active suspension system might be crying out for sensor calibration. As a master tech who’s spent 20+ years under the hood, I can tell you that active suspension sensors are the unsung heroes that keep your ride floating like a cloud instead of bouncing like a pogo stick.
When these sensors fall out of whack, your vehicle might develop a noticeable lean to one side, bottom out unexpectedly, or handle corners like a ship in stormy seas. The good news? You don’t need to shell out hundreds at the dealership for this fix.
Active suspension sensor calibration might sound complicated, but with the right tools and a bit of patience, it’s a job many DIY mechanics can tackle in their own garage. Think of it as teaching your car to stand up straight again – something your vehicle (and your passengers) will thank you for.
This guide walks you through the entire process of DIY active suspension sensor calibration, from understanding the system to testing your handiwork. So roll up those sleeves – we’re about to save you some serious cash while bringing back that magic carpet ride.
Understanding Active Suspension Systems

Active suspension systems are like the attentive butlers of the automotive world – constantly adjusting your vehicle’s stance to deliver optimal comfort and handling. Unlike passive suspensions that can only react to road conditions after you’ve hit that pothole, active systems anticipate and adapt in real-time.
At the heart of any active suspension setup are four key components:
- Electronic Control Unit (ECU) – The brains of the operation
- Actuators or adaptive dampers – The muscles that adjust suspension stiffness
- Height/position sensors – The eyes that monitor vehicle stance
- Acceleration sensors – The balance centers that detect body movement
The height sensors constantly measure the distance between your vehicle’s body and axles, while acceleration sensors detect pitch, roll, and vertical movement. Together, they feed data to the ECU, which then commands the actuators to make split-second adjustments.
When these sensors drift out of calibration (which happens naturally over time), it’s like trying to navigate with a broken compass. Your stability control system receives faulty information, leading to a suspension that’s either too soft, too firm, or unevenly balanced.
You might need sensor calibration if you notice:
- Vehicle sits noticeably higher or lower on one side
- Warning lights on your dashboard (often showing suspension system)
- Unusually harsh or excessively soft ride quality
- Excessive body roll during cornering
- Suspension that doesn’t adjust properly with different loads
According to research from the Society of Automotive Engineers, properly calibrated active suspension systems can improve ride comfort by up to 40% while enhancing handling dynamics. That’s not just comfort – it’s safety.
Tools and Materials Needed
Before diving under your vehicle like a surgeon into an operation, let’s make sure you’ve got all the right tools. Calibrating active suspension sensors doesn’t require a garage full of specialized equipment, but you will need some specific items:
Diagnostic Tools:
- OBD-II scanner capable of accessing suspension systems (basic $50 scanners often won’t cut it)
- Digital multimeter for testing sensor outputs and connections
- Manufacturer-specific diagnostic software (sometimes available through subscription services)
Basic Hand Tools:
- Socket set and wrenches (metric or standard, depending on your vehicle)
- Screwdriver set (both flathead and Phillips)
- Pliers and wire cutters
- Trim removal tools (to access interior sensors without damaging panels)
Specialized Equipment:
- Laser level or straight edge for precise height measurements
- Digital angle gauge for acceleration sensor calibration
- Factory service manual (worth its weight in gold for this job)
Safety Equipment:
- Jack stands (never rely solely on a hydraulic jack!)
- Wheel chocks
- Mechanic gloves
- Safety glasses
Having the right tools isn’t just about convenience – it’s about safety and success. I’ve seen plenty of DIYers make the mistake of attempting this job with inadequate equipment, only to end up making expensive calls to a tow truck.
If you’re planning to work on active suspension systems regularly, consider investing in a higher-quality scanner with bidirectional controls. These allow you to not just read data, but also command the system to perform specific actions – incredibly useful for testing your work.
Preparation Steps
As my old mentor used to say, “Rushing into a suspension job is like jumping into a swimming pool before checking if there’s water.” Proper preparation will save you hours of frustration and possibly hundreds in unnecessary parts.
Find the Right Documentation
Start by hunting down your vehicle’s service manual. Factory service manuals provide exact specifications and procedures, but quality aftermarket manuals can also do the trick. Many manufacturers now offer digital manuals online, sometimes for free through owner portals.
Don’t underestimate the value of model-specific forums and YouTube tutorials from qualified mechanics. I’ve often found that fellow owners have discovered shortcuts and tricks that even the factory manuals miss.
Safely Elevate Your Vehicle
- Park on a level, solid surface – concrete is ideal, avoid gravel or asphalt on hot days
- Engage the parking brake and chock wheels that will remain on the ground
- Use a hydraulic jack at manufacturer-recommended lift points
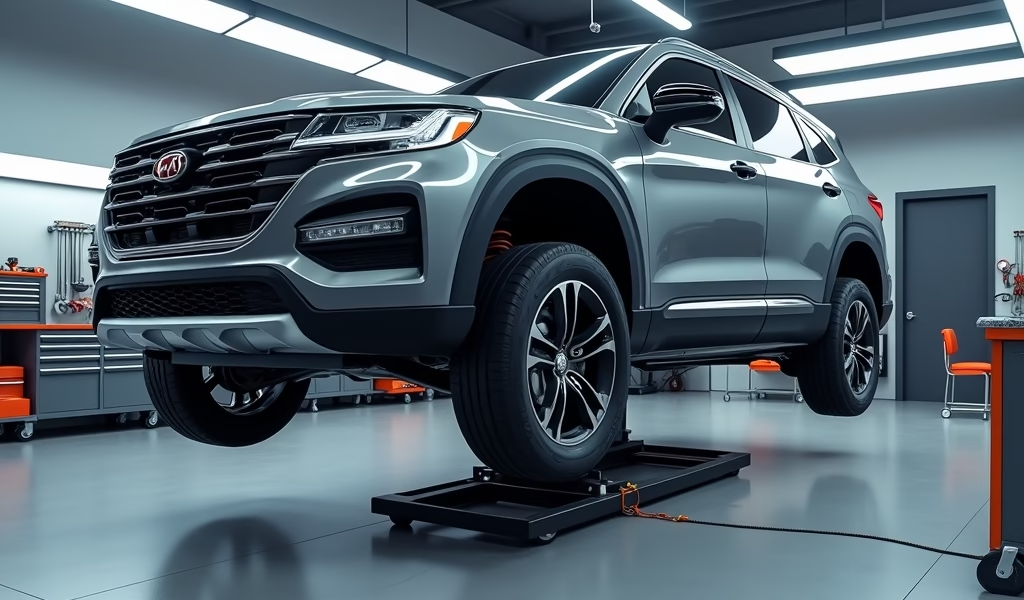
- Always secure the vehicle with jack stands before crawling underneath
- Consider raising all four corners if you’re calibrating the entire system
This isn’t the time to cut corners on safety. I’ve witnessed too many close calls from inadequately supported vehicles.
Accessing Suspension Components
Depending on your vehicle, you might need to:
- Remove wheel well liners to access height sensors
- Disconnect underbody shields
- Remove interior trim pieces to access control modules
- Create workspace around acceleration sensors (sometimes under seats or in the trunk)
Take photos of everything before disassembly. What looks obvious now might become a puzzle when it’s time to reassemble. Trust me on this one – I learned it the hard way.
Backing Up Current Settings
If your vehicle and diagnostic tool allow it, save the current suspension settings before making changes. This gives you a baseline to return to if things go sideways. Think of it as creating a system restore point for your suspension.
For vehicles with advanced multi-link rear suspensions, I recommend documenting the current physical position of sensors using a marker or tape before making any adjustments.
Calibration Process

Now comes the main event. The exact procedure varies by vehicle make and model, but the fundamental principles remain consistent. I’ll outline the general process while highlighting the crucial points where manufacturer-specific details matter most.
Locating the Suspension Sensors
Height sensors typically reside between the vehicle body and lower control arms or axles. They often resemble small arms with connecting rods. Acceleration sensors may be mounted centrally on the chassis or at strategic points around the vehicle.
Your service manual will show exact locations, but generally:
- Front height sensors: Near the front suspension struts or springs
- Rear height sensors: Near the rear axle or control arms
- Acceleration sensors: Often under the center console, under seats, or in the trunk
Disconnecting Electrical Components Safely
- Disconnect the vehicle’s battery negative terminal
- Allow the system to power down completely (5-10 minutes)
- Carefully unplug sensor connectors by pressing release tabs (never pull on wires)
- Inspect connectors for corrosion or damage – a common cause of sensor issues
Testing Sensor Functionality
Before diving into calibration, verify your sensors are actually working:
- Reconnect the battery temporarily for testing
- Use your multimeter to check voltage outputs as you manually move height sensors through their range of motion
- Readings should change smoothly without jumps or flat spots
- Replace any faulty sensors before proceeding with calibration
A height sensor typically outputs between 0.5V and 4.5V depending on position. If yours reads outside this range or shows erratic readings, you’ve likely found your culprit.
Calibration Procedure for Height Sensors
- Set vehicle to “calibration mode” using your diagnostic tool
- Ensure vehicle is on level ground with proper tire pressure
- Remove any excessive weight from vehicle (empty the trunk!)
- Manually adjust sensors to manufacturer-specified positions
- Some vehicles require setting the suspension at a specific ride height
- Follow on-screen prompts from your diagnostic tool to save new calibration
This is where manufacturer-specific procedures are critical. Some German luxury vehicles require precise measurements from the wheel center to the fender lip, while some American SUVs need adjustments based on specific bolt positions.
Calibration Procedure for Acceleration Sensors
- These sensors require calibration with the vehicle perfectly level
- Use a digital angle gauge on a flat surface of the vehicle
- Some systems require the vehicle to remain completely still during calibration
- Follow diagnostic tool procedures which often include a “zeroing” function
- Confirm changes are accepted by the system
Acceleration sensor calibration is particularly important for vehicles with advanced traction control systems, as these rely on accurate pitch and roll information to function properly.
Resetting the System
- Use your diagnostic tool to clear any fault codes
- Command the system to initialize with new calibration data
- Disconnect and reconnect the battery as a final reset
- Allow the system to go through its startup routine
Some vehicles perform a self-test where you’ll see and hear the suspension cycling through its range of motion. This is normal and actually a good sign that the system is responding to your calibration.
Testing Your Work
The proof, as they say, is in the pudding. No calibration job is complete without thorough testing.
Road Testing Procedures
- Start with a slow drive around the parking area or quiet street
- Gradually introduce different road surfaces and gentle maneuvers
- Progress to highway speeds if everything feels normal
- Test suspension in different modes if your vehicle offers them
- Try driving over speed bumps at various speeds to test damping
What to Look For
- Vehicle should sit level when parked
- Suspension should respond appropriately to load changes
- No warning lights should appear on dashboard
- Ride quality should be consistent with manufacturer intentions
- Vehicle should handle corners without excessive lean
Pay special attention to how the vehicle behaves during transitions – braking, accelerating, and cornering. These dynamic situations are where properly calibrated sensors make the biggest difference.
Common Issues and Troubleshooting
If your vehicle still isn’t riding right, here are some common culprits:
- If vehicle still sits unevenly, recheck height sensor positions and mechanical linkages
- Warning lights may indicate you need to clear codes again or address another issue
- Harsh ride might mean sensors are calibrated too low
- Excessive body roll could indicate acceleration sensors need adjustment
- Strange noises might point to mechanical issues beyond calibration
Remember that even perfect calibration can’t compensate for worn mechanical components. If your vehicle has high mileage, consider a full suspension inspection while you’re at it.
According to AAA’s automotive research, properly functioning suspension components aren’t just about comfort—they can reduce stopping distances by up to 10% in emergency situations.
Maintenance Tips
An ounce of prevention is worth a pound of cure, especially when it comes to sophisticated suspension systems.
Recommended Calibration Intervals
Mark your calendar for these important checkpoints:
- After suspension component replacement
- Following significant impact (like hitting a large pothole)
- When load-carrying requirements change dramatically
- Every 50,000 miles as preventative maintenance
- Whenever uneven tire wear appears
Preventative Maintenance for Suspension Sensors
- Keep sensors clean from road debris and salt
- Inspect electrical connections for corrosion regularly
- Look for signs of physical damage or binding in moving parts
- Apply dielectric grease to connections in harsh environments
- Check for software updates from the manufacturer
In my experience, sensor failures often start with corroded connections long before the sensor itself fails. A little dielectric grease and regular cleaning can add years to your system’s life.
When to Seek Professional Help
Even the most dedicated DIYer should know when to wave the white flag:
- If diagnostic equipment shows internal sensor failure
- When specialized programming is required
- If calibration repeatedly fails to resolve issues
- When dealing with newer vehicles under warranty
- If air suspension components need replacement
Don’t let pride get in the way of knowing when to call in the cavalry. Some newer European luxury vehicles have such complex integrated systems that specialized dealer equipment becomes necessary.
Conclusion
Successfully calibrating your active suspension sensors is like giving your vehicle a new lease on life. Beyond the immediately noticeable improvement in ride quality, you’re also protecting other components from excessive wear and improving overall safety.
By tackling this project yourself, you’ve not only saved a significant chunk of change (professional calibration can cost anywhere from $200-600), but you’ve also gained valuable knowledge about how your vehicle functions. That understanding pays dividends every time you get behind the wheel.
Remember that patience is key with suspension work. Rush the job, and you’ll likely find yourself doing it twice. Take your time, follow manufacturer specifications, and test thoroughly before declaring victory.
The next time you glide over a pothole that would have jarred your teeth loose before, you’ll know your efforts were worthwhile. Your vehicle doesn’t just transport you—it should do so with comfort and confidence. A properly calibrated active suspension delivers exactly that.
Happy wrenching, and enjoy that smooth ride you’ve earned!
Frequently Asked Questions
How often should active suspension sensors be calibrated?
Most manufacturers recommend calibration every 50,000 miles or after any suspension work. You should also consider calibration if you notice uneven vehicle stance or unusual ride characteristics.
Can I calibrate active suspension sensors without special tools?
No, you’ll need at minimum an OBD-II scanner with suspension system capabilities. Some luxury vehicles require manufacturer-specific diagnostic equipment for proper calibration.
How much does professional active suspension calibration cost?
Professional calibration typically costs between $200-600 depending on vehicle make and model. Luxury European vehicles tend to be on the higher end of this range.
What happens if suspension sensors aren’t properly calibrated?
Improper calibration can cause uneven ride height, poor handling, premature tire wear, and warning lights. In extreme cases, it can affect other vehicle systems that rely on suspension data.
Can bad suspension sensors damage other components?
Yes, improperly calibrated sensors can cause uneven load distribution that stresses other suspension components. This commonly leads to premature wear of bushings, ball joints, and even tires.

