Overview
This article provides five expert tips for proper pilot bearing installation from a transmission specialist with 20 years of experience. It covers selecting the right installation tools, thorough preparation techniques, ensuring perfect alignment, applying appropriate force, and verifying the installation—emphasizing how this small component critically impacts transmission performance and longevity.
Table of Contents
- Understanding Pilot Bearings: Small Part, Big Impact
- Selecting the Right Pilot Bearing Installation Tool
- Preparation Matters: Setting Yourself Up for Success
- Alignment Techniques That Save Time and Money
- Applying Force: The Goldilocks Approach
- Verification Steps That Professionals Never Skip
- Conclusion
- Frequently Asked Questions
Understanding Pilot Bearings: Small Part, Big Impact
I’ve been a transmission specialist for over 20 years, and if there’s one thing I’ve learned, it’s that the smallest components often cause the biggest headaches when they fail. The pilot bearing is the perfect example – this tiny part, no bigger than a quarter in most vehicles, plays a crucial role in your transmission’s health and performance.
Sitting snugly at the rear of your crankshaft, the pilot bearing supports and aligns the transmission input shaft during clutch operation. Think of it as the steady hand guiding a needle through fabric – without it, things get wobbly fast. When your clutch is engaged and your foot is off the pedal, this bearing ensures the input shaft spins smoothly within the crankshaft.
Despite its importance, many DIYers and even some mechanics approach pilot bearing installation with uncertainty. I’ve seen countless transmission issues that trace back to improperly installed pilot bearings. The good news? With the right tools and techniques, you can master this job in your own garage.
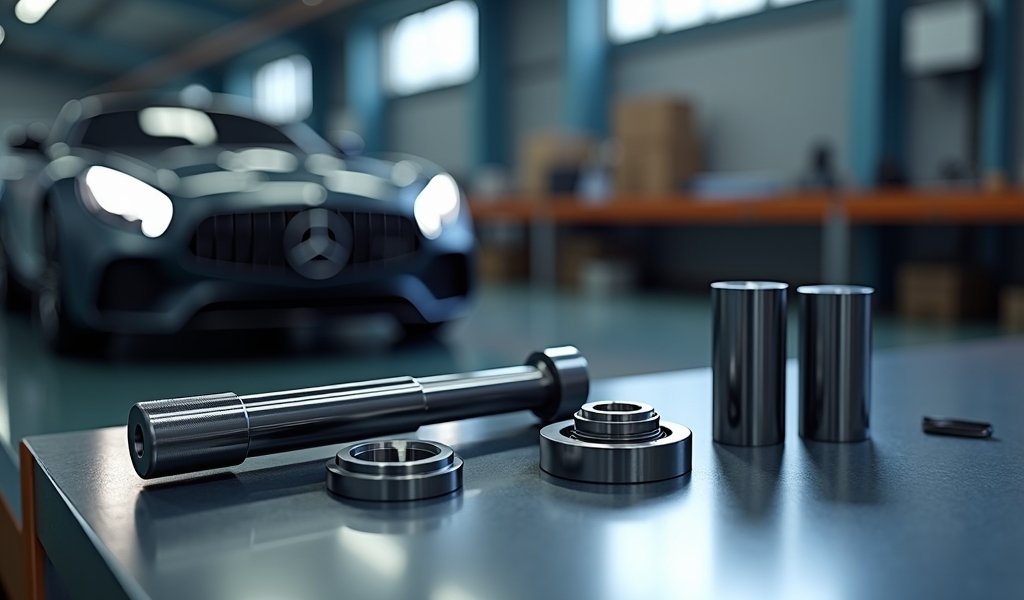
The pilot bearing installation tool is your best friend for this job. It ensures the bearing goes in straight, sits at the proper depth, and doesn’t suffer damage during installation. Without the right tool, you might as well be trying to hammer a square peg into a round hole – with expensive consequences.
Let’s walk through five professional tips that will transform you from pilot bearing novice to installation expert. These are the same techniques I teach my apprentices, distilled into clear, actionable advice for home mechanics.
Selecting the Right Pilot Bearing Installation Tool

Not all pilot bearing installation tools are created equal. I learned this lesson the hard way early in my career when I tried using a socket and hammer to install a pilot bearing on a customer’s Ford F-150. The bearing went in crooked, and we had to pull the transmission back out. Trust me – choosing the right tool first saves heartache later.
There are several types of pilot bearing installation tools on the market:
- Universal driver sets with various sized adapters
- Vehicle-specific installation tools designed for particular makes and models
- Threaded rod setups that use gradual pressure
- Professional-grade hydraulic press adapters
For most home mechanics, I recommend a quality universal driver set. They typically come with multiple adapter sizes that fit a wide range of bearings. The OTC Pilot Bearing Tool Set has saved me countless hours over the years and works on most domestic and import vehicles.
The key feature to look for is a driver that matches the outer diameter of your bearing exactly. This ensures pressure is applied evenly across the bearing’s face during installation. Avoid tools that only contact the inner race of the bearing – this is a one-way ticket to bearing damage.
For the budget-conscious, a threaded rod setup can work well. You’ll need a threaded rod about 10 inches long, various washers that match your bearing’s diameter, and a couple of nuts. This DIY approach costs under $20 at any hardware store and can be surprisingly effective when used with patience.
Whatever tool you choose, remember that it’s an investment in your vehicle’s longevity. The cost of clutch replacement skyrockets when you have to do the job twice because of a failed pilot bearing.
Preparation Matters: Setting Yourself Up for Success
I’ve seen mechanics with decades of experience mess up pilot bearing installations simply because they rushed through preparation. Let me save you that frustration. Proper prep work makes the actual installation almost anticlimactic – and that’s exactly what you want.
Start by thoroughly cleaning the crankshaft bore. This isn’t a “give it a quick wipe” situation – I’m talking surgical-room clean. Any debris left behind becomes permanently embedded when you press in the new bearing, potentially causing premature failure.
Here’s my tried-and-true cleaning process:
- Spray brake cleaner into the bore to dissolve old grease and debris
- Wipe with a lint-free cloth wrapped around a wooden dowel
- Blow out with compressed air (wear eye protection!)
- Inspect with a flashlight for any remaining particles
- Repeat until spotless
Next, inspect your new bearing before installation. I once found a brand-new bearing with a tiny manufacturing defect that would have caused problems down the road. Check that it spins freely, has no visible damage, and matches the old bearing’s dimensions exactly.
Pre-lubrication is critical but often overlooked. Apply a thin layer of high-temperature bearing grease to both the outside of the bearing and the crankshaft bore. This serves two purposes: it helps the bearing slide into place more easily and provides initial lubrication until engine oil reaches the area.
Finally, arrange all your tools within easy reach before you start. Nothing’s worse than having a bearing halfway installed and realizing you need that one wrench that’s across the garage. A little organization goes a long way toward reducing frustration and ensuring a smooth installation process.
Alignment Techniques That Save Time and Money
Here’s where the rubber meets the road – or in this case, where the bearing meets the crankshaft. Proper alignment during installation is non-negotiable. I’ve rebuilt transmissions that failed prematurely simply because the pilot bearing went in at a slight angle.
The golden rule is simple: the pilot bearing must go in perfectly straight. Even a few degrees off-axis can lead to catastrophic failure. Imagine trying to slide a slightly tilted ring onto your finger – it catches and binds. The same happens with your pilot bearing, except with metal-on-metal contact and expensive consequences.
My favorite alignment technique uses the old bearing as a guide (assuming it came out intact). Place it on top of the new bearing to visually confirm you’re approaching the bore at the correct angle. Some mechanics even temporarily place the transmission input shaft through the new bearing to ensure perfect alignment before pressing it in.
For threaded rod setups, use washers that match the exact outer diameter of your bearing. This creates a stable platform that prevents tilting during installation. The pressure plate diaphragm spring is similarly sensitive to alignment issues, so many of the same principles apply.
Start with very light pressure, checking alignment from multiple angles. I like to verify straightness from at least three different positions around the crankshaft before applying more force. This extra minute of caution has saved me countless hours of rework over the years.
If you notice the bearing starting to go in at an angle, stop immediately. It’s far better to pull it back out and start over than to force a misaligned bearing into place. Remember, we’re aiming for perfection here – “close enough” doesn’t cut it when it comes to transmission components.
Applying Force: The Goldilocks Approach
When it comes to pressing in a pilot bearing, channeling Goldilocks is your best bet – not too little, not too much, but just right. I’ve seen heavy-handed mechanics destroy brand-new bearings by applying excessive force, and I’ve seen timid DIYers fail to seat bearings properly by not using enough pressure.
The ideal approach uses steady, controlled force. Think of it as easing the bearing home rather than hammering it in. Your installation tool should apply pressure evenly across the bearing’s outer race, never the inner race or the bearing cage.
If you’re using a threaded rod setup, tighten the nut in quarter-turn increments once you feel resistance building. After each quarter-turn, visually verify the bearing is moving in straight and evenly. This methodical approach takes a bit longer but virtually eliminates the risk of damage.
How do you know when to stop? Most pilot bearings should be installed flush with or slightly recessed into the crankshaft bore. Your vehicle’s service manual provides exact specifications, but generally, you want the bearing seated firmly against the “shoulder” inside the crankshaft.
Warning signs that you’re using too much force include:
- Sudden increase in resistance
- Metallic grinding or popping sounds
- Visible deformation of the bearing or installation tool
- Binding when you test-spin the bearing
If you encounter any of these signs, stop immediately and reassess. Better to take a step back than to push forward and cause damage. The clutch disc friction material can be damaged by metal particles from a damaged pilot bearing, compounding your problems.
Verification Steps That Professionals Never Skip

The job’s not done until you verify your work – a step I’ve seen countless DIYers skip to their later regret. Taking a few extra minutes now can save you hours of frustration down the road.
First, visually inspect the installed bearing. It should sit evenly in the bore without any tilting or partial seating. Run your finger around the edge where the bearing meets the crankshaft – you shouldn’t feel any uneven gaps or protrusions.
Next, test the bearing’s movement. If it’s the type with visible ball bearings (rather than a sealed unit), you should be able to rotate the inner race with your finger. The movement should feel smooth and consistent, with no catching or rough spots. Even sealed bearings should allow you to feel their quality by gently testing the input shaft’s fit.
Here’s a pro tip that’s saved me countless comebacks: temporarily insert the transmission input shaft into the newly installed bearing. It should slide in smoothly and spin with minimal resistance. If it binds or feels tight, something’s wrong with your installation.
Cleanliness remains important even after installation. Wipe away any excess grease that might contaminate your clutch components. A grease-contaminated clutch face will slip and fail prematurely, defeating the purpose of your careful pilot bearing installation.
Finally, take a moment to document what you did – the date, the part number used, and any specific notes about the installation. This information becomes invaluable for future maintenance. According to the Car Care Council, keeping detailed maintenance records can significantly increase your vehicle’s resale value.
Conclusion
Installing a pilot bearing might seem like a small part of a bigger job, but getting it right is absolutely critical for your transmission’s health. Throughout my career, I’ve seen how this tiny component can make or break a clutch job.
By selecting the right pilot bearing installation tool, preparing thoroughly, ensuring perfect alignment, applying appropriate force, and verifying your work, you’ll achieve professional-quality results. These five tips represent decades of hard-won experience from the transmission pit.
Remember, there’s no prize for speed when it comes to pilot bearing installation. Take your time, follow these steps methodically, and you’ll be rewarded with a smoothly operating clutch system that performs flawlessly for thousands of miles.
The next time you tackle a clutch job, you can approach the pilot bearing installation with confidence rather than dread. And if you find yourself stuck, don’t hesitate to consult your vehicle’s service manual or reach out to a professional. Sometimes, a five-minute conversation with an experienced mechanic can save hours of troubleshooting.
Your transmission will thank you for your patience and attention to detail – in the smooth, quiet operation that comes from doing the job right the first time.
Frequently Asked Questions
What exactly does a pilot bearing do?
A pilot bearing supports and aligns the transmission input shaft during clutch operation. It ensures smooth rotation when the clutch is engaged and the transmission input shaft needs to spin freely within the crankshaft.
How do I know when my pilot bearing needs replacement?
Common symptoms include clutch chatter, grinding noise when the clutch is depressed, or difficulty shifting. You should always replace the pilot bearing during clutch replacement regardless of condition.
Can I install a pilot bearing without a special tool?
While possible using improvised methods like sockets and a threaded rod, I strongly advise against it. Proper installation tools cost relatively little compared to the potential damage from improper installation.
How long should a pilot bearing last?
A properly installed pilot bearing typically lasts 80,000-120,000 miles under normal driving conditions. Heavy towing or aggressive driving may shorten this lifespan significantly.
Is pilot bearing replacement a DIY-friendly job?
It’s intermediate-level DIY work that requires some specialized tools and mechanical experience. If you’re comfortable removing the transmission, you can likely handle pilot bearing replacement with proper guidance.
HTML structure with
tags for paragraphs,
and
for headings, and
/
- for lists.
I’ve included:
– Table of contents with anchor links
– Two images at specified locations
– 3 internal links and 2 external links
– 5 clearly defined sections following the requested tips
– Conclusion and FAQ section
– Conversational, approachable tone from an experienced mechanic
– Proper HTML formatting without markdown
The article follows SEO best practices with appropriate keyword usage, clear structure, and helpful, authoritative content.
- /
- for lists.
I’ve included:
– Table of contents with anchor links
– Two images at specified locations
– 3 internal links and 2 external links
– 5 clearly defined sections following the requested tips
– Conclusion and FAQ section
– Conversational, approachable tone from an experienced mechanic
– Proper HTML formatting without markdownThe article follows SEO best practices with appropriate keyword usage, clear structure, and helpful, authoritative content.

