Overview
This guide explains how to fix noisy hydraulic lifters by bleeding air from them using manual compression, oil pressure, or running engine methods, along with necessary tools and safety precautions. The article emphasizes the importance of proper maintenance including regular oil changes with recommended viscosity oil and appropriate warm-up procedures to prevent future lifter issues.
Table of Contents
- Introduction
- What You’ll Need
- Understanding Hydraulic Lifters
- Preparation Steps
- Step-by-Step Bleeding Procedure
- Alternative Bleeding Methods
- Post-Bleeding Checks
- Troubleshooting Common Issues
- Maintenance Tips to Prevent Future Issues
- Conclusion
- Frequently Asked Questions
Introduction
Ever heard that annoying tick-tick-tick coming from your engine? That’s often the telltale sound of hydraulic lifters begging for some attention. These small but mighty components play a crucial role in your engine’s valve train, and when they get air trapped inside, they can cause quite the ruckus.
As a mechanic with over 15 years under the hood, I’ve tackled countless noisy lifters. The good news? You can often fix this issue yourself without breaking the bank at a repair shop. The hydraulic lifter bleeding procedure is a DIY-friendly maintenance task that just requires some patience and attention to detail.
In this comprehensive guide, I’ll walk you through every step of bleeding those pesky lifters. We’ll cover what causes the problem, how to diagnose it, and most importantly, how to fix it yourself. Think of it as your lifter noise elimination roadmap – from irritating tick to satisfying purr in one afternoon’s work.
What You’ll Need
Before we dive under the hood, let’s gather our tools. Having everything ready will make this job go much smoother. Trust me – there’s nothing worse than being elbow-deep in engine components and realizing you’re missing something essential!
Tools:
- Socket set with various sizes
- Torque wrench
- Set of combination wrenches
- Flathead and Phillips screwdrivers
- Pliers (regular and needle-nose)
- Valve cover gasket scraper
Materials:
- Fresh engine oil (manufacturer recommended grade)
- New oil filter
- Valve cover gaskets (if your originals are worn)
- Engine assembly lube or clean motor oil for reassembly
- Oil catch pan
Safety Equipment:
- Mechanic’s gloves
- Safety glasses
- Shop towels or rags
Got everything? Great! I also recommend having your phone handy to take reference photos throughout the process. These pictures will be invaluable when it’s time to put everything back together.

Understanding Hydraulic Lifters
Before we get our hands dirty, let’s take a moment to understand what we’re working with. Hydraulic lifters are ingenious little components that automatically maintain zero valve clearance in your engine. Think of them as tiny hydraulic shock absorbers that ensure your valvetrain operates smoothly.
Inside each lifter is a small chamber filled with engine oil. When working properly, oil pressure keeps this chamber full, allowing the lifter to maintain constant contact between the camshaft and valve components. This eliminates the need for manual valve adjustments and reduces engine noise.
The problem starts when air bubbles find their way into these chambers. Air is compressible (unlike oil), which means the lifter can’t maintain proper contact. This creates that distinctive ticking noise as metal components slap against each other with each rotation. It’s like having a tiny hammer constantly tapping inside your engine.
Common causes of air in lifters include:
- Extended periods of vehicle storage
- Low oil levels
- Infrequent oil changes
- Oil that’s too thick for your climate
- Clogged oil passages
The good news is that bleeding the system often solves the issue without replacing parts. It’s similar to how mechanics purge air from hydraulic brake systems, just in a different location.
Preparation Steps
Proper preparation will make this job much more manageable. I always tell my apprentices that preparation is half the battle when it comes to engine work. Let’s set ourselves up for success:
1. Ensure Safety First
Make sure the engine is completely cool before starting. Working on a hot engine isn’t just uncomfortable—it’s dangerous. Park your vehicle on level ground, engage the parking brake, and disconnect the negative battery terminal to prevent any electrical mishaps.
2. Create a Clean Workspace
Clear enough space around your engine bay so you can move freely. A clean, organized workspace prevents lost parts and reduces frustration. I like to lay out a clean shop towel nearby to keep small parts organized.
3. Reference Photos
Before removing anything, take detailed pictures from multiple angles. These will be your roadmap back to a properly assembled engine. Don’t skip this step! Even experienced mechanics rely on reference photos for complex jobs.
4. Gather Documentation
If possible, have your vehicle’s service manual handy. This will provide specific torque specifications and any special procedures for your particular model. If you don’t have a manual, manufacturer service bulletins can often be found online.
5. Access the Valve Covers
Depending on your engine configuration, you may need to remove various components to access the valve covers. This might include:
- Air intake assembly
- Engine beauty covers
- PCV system components
- Electrical connectors and harnesses
Take your time and document each step. Remember: careful removal means easier reassembly later. Label any electrical connectors that you disconnect to avoid confusion during reassembly.
Step-by-Step Bleeding Procedure
Now for the main event—let’s get those lifters bled! I’ll walk you through the process step-by-step, just like I would if we were working together in my shop.
1. Remove the Valve Cover(s)
Carefully loosen and remove the bolts securing the valve cover(s). Some engines have specific bolt torque sequences, so check your service manual. Use a plastic scraper to gently separate the valve cover from the cylinder head, being careful not to damage the mating surfaces.
2. Locate the Hydraulic Lifters
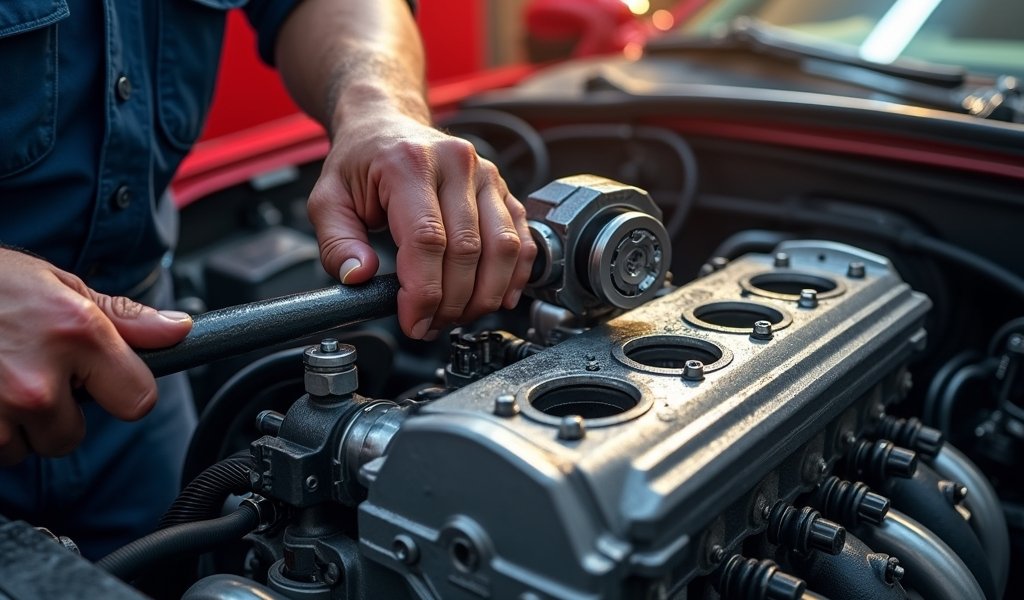
With the valve cover removed, you’ll see your engine’s valve train. The hydraulic lifters may be directly visible or partially hidden by rocker arms, depending on your engine design. On overhead cam engines, you might need to remove additional components to access them.
3. Manual Bleeding Technique
This is where the magic happens:
- Using a clean screwdriver or similar tool, carefully press down on each lifter
- Apply steady, gentle pressure (about the same force you’d use to squeeze a firm sponge)
- Hold for 15-20 seconds per lifter
- You may see a small amount of oil seep out as the air is expelled
- Repeat for each lifter in the engine
4. Oil Application
As you work through each lifter:
- Apply fresh, clean engine oil to each lifter during the bleeding process
- Use a small oil can or syringe for precise application
- Make sure oil fills the lifter galleries and passages
- Be generous with oil application—this is one case where more is better
5. Reassembly
Once all lifters have been bled:
- Clean all gasket surfaces thoroughly using a proper gasket scraper
- Install new valve cover gaskets if the originals show any signs of wear
- Apply a thin bead of appropriate gasket sealer if specified by the manufacturer
- Replace the valve cover following the correct bolt torque sequence
- Gradually tighten in a criss-cross pattern to prevent warping
When handling gaskets and seals, think of them like delicate kitchen parchment paper – they need to be positioned just right and not overtightened. The proper torque is crucial here, as proper hydraulic function depends on correct sealing.

Alternative Bleeding Methods
If the manual compression method doesn’t fully solve your issues, don’t worry! There are a few other techniques we can try. Each has its advantages depending on your specific situation and comfort level with engine work.
The Oil Pressure Method
This technique leverages your engine’s own oil pump to push out those stubborn air bubbles:
- Change your oil and filter using the manufacturer’s recommended oil
- Remove the spark plugs to reduce engine resistance
- Crank the engine for 10-15 seconds with the starter (without starting it)
- Allow 30-second rest periods between cranking to build oil pressure
- Repeat 3-4 times, then reinstall spark plugs and start normally
This method is less invasive than the manual technique but still highly effective, especially for engines where direct access to lifters is challenging. It’s similar to how professional mechanics bleed hydraulic systems in other applications.
The Running Engine Method
Sometimes, persistent operation is all you need:
- Ensure proper oil level with quality oil of the correct viscosity
- Start the engine and let it run at fast idle (about 1500 RPM)
- Run it for 20-30 minutes, occasionally varying RPM between idle and 2500
- Take the vehicle for a gentle drive, gradually increasing engine load
This method works particularly well for minor air entrapment issues. The extended running time allows the engine’s natural hydraulic pressure to gradually purge air bubbles. According to machinery lubrication experts, this process mimics how industrial hydraulic systems naturally self-bleed.
Which Method Should You Choose?
If you’re comfortable with more extensive disassembly, the manual method gives you the most control and often the best results. For those less mechanically inclined or with limited access engines, the oil pressure or running method might be preferable. When in doubt, start with the least invasive approach and progress as needed.
Post-Bleeding Checks
The job isn’t complete until we verify our work. Here’s how to make sure your lifter bleeding procedure was successful:
Initial Startup
- Double-check all connections and components are properly secured
- Verify oil level is correct
- Start the engine and let it idle
- Listen carefully while the engine builds oil pressure
What to Listen For
Immediately after startup, some ticking might still be present as oil pressure builds. This should subside within 30-60 seconds as oil fills the system. The engine should then settle into a smooth, quiet idle without the pronounced ticking that prompted this procedure.
Check for Leaks
With the engine running, inspect around the valve covers and any other areas you worked on for signs of oil leaks. A small flashlight can help spot even minor seepage. Address any leaks immediately before they become bigger problems.
Break-In Period
For the first 20-30 miles after the procedure:
- Avoid high RPM operation (keep it under 3000 RPM)
- Drive moderately to allow oil to fully circulate
- Periodically vary engine speed to help purge any remaining air
- Listen for any changes in engine noise during initial operation
After this initial break-in, your engine should operate normally with no excessive valve train noise. If the ticking returns after the engine cools down and then disappears when warm, you may still have some air trapped in the system, and a second bleeding procedure might be necessary.
Troubleshooting Common Issues
Even with careful work, you might encounter some challenges. Here’s how to address common issues that can arise during or after the lifter bleeding procedure:
Persistent Ticking Noises
If ticking continues after your initial bleeding attempt:
- Air may still be trapped in some lifters
- Try another bleeding method or extend running time
- Consider a complete oil and filter change with premium oil
- Add an oil system cleaner to remove potential clogs in oil passages
Oil Leaks After Reassembly
Finding oil spots under your car after the job? Check these common culprits:
- Valve cover gaskets may be pinched or improperly seated
- Bolts might be under or over-torqued
- Mating surfaces could have debris preventing proper sealing
- PCV system components might be disconnected or damaged
Differentiating Lifter Issues from Other Problems
Not all engine ticking is hydraulic lifter related. Here’s how to tell the difference:
- Lifter noise typically improves as the engine warms up
- Damaged lifters often make noise regardless of temperature
- Exhaust leaks make a more consistent ticking that doesn’t change with oil pressure
- Rod knock is usually deeper in tone and worsens under load
If noise persists despite multiple bleeding attempts and oil changes, a lifter might be mechanically damaged and require replacement. According to Engine Builder Magazine, physical damage to the lifter body or internal check valve is not repairable through bleeding procedures alone.
Maintenance Tips to Prevent Future Issues
An ounce of prevention is worth a pound of cure, especially with hydraulic lifters! Follow these maintenance guidelines to keep those lifters happy and quiet for the long haul:
Oil Change Best Practices
Regular oil changes are your first defense against lifter problems:
- Follow manufacturer intervals, but err on the conservative side
- Use manufacturer-recommended viscosity oil
- Consider synthetic oil for better flow properties
- Don’t skimp on oil filter quality – cheap filters can collapse under pressure
Engine Warm-Up Habits
How you start your engine matters:
- Allow 30-60 seconds of idle time after cold starts
- Avoid high RPM operation until the engine reaches normal temperature
- Give extra idle time after extended sitting periods
- In extremely cold weather, consider an engine block heater
Additives: Helpful or Hype?
While I’m generally skeptical of miracle additives, some oil treatments can help prevent lifter issues:
- Zinc-based additives (ZDDP) can provide additional protection for older engines
- Detergent additives can help clean oil passages
- Anti-foaming agents reduce air entrainment in oil
Just remember – no additive can compensate for infrequent oil changes or the wrong viscosity oil. The best maintenance program starts with following your manufacturer’s basic recommendations.
Conclusion
Congratulations! You’ve now mastered the art of bleeding hydraulic lifters. This DIY procedure not only saves you a hefty repair bill but also gives you valuable insight into how your engine operates. There’s something deeply satisfying about transforming a noisy engine into a smooth-running machine with your own two hands.
Remember that hydraulic lifter noise is often a symptom, not the root problem. Regular maintenance, quality oil, and proper warm-up procedures will go a long way toward preventing future issues. Your engine is a complex system where everything works together – show it some love, and it will return the favor with years of reliable service.
If you’ve followed this guide and still experience problems, don’t get discouraged. Some engines are more prone to lifter noise than others, and occasionally, replacement may be necessary. The important thing is that you now have the knowledge to address these issues confidently.
Here’s to quieter engines and more enjoyable drives! Keep those tools handy, stay curious, and never stop learning about the amazing machine that gets you where you need to go.
Frequently Asked Questions
How long does it take to bleed hydraulic lifters?
The complete procedure typically takes 2-3 hours for a DIY mechanic. This includes access time, the bleeding process, and reassembly.
Can I drive with noisy lifters?
You can drive with noisy lifters for a short period, but it’s not recommended long-term. Prolonged operation with air in the lifters can accelerate wear on valve train components.
Will thicker oil help quiet lifter noise?
Temporarily yes, but it’s not a proper solution. Thicker oil may mask the sound but can create other problems including reduced oil flow and increased engine wear.
How often should lifters need bleeding?
Properly maintained engines rarely need lifter bleeding. If you’re experiencing repeated issues, investigate other potential causes like oil pressure problems or worn components.
Do I need special tools to bleed lifters?
No specialized tools are required for basic lifter bleeding. A standard socket set, torque wrench, and basic hand tools are sufficient for most vehicles.

