Overview
This article provides guidance on backup camera grid line calibration, covering how to recognize misalignment, DIY calibration methods for various vehicle makes, and when professional help is needed. It emphasizes that properly calibrated grid lines are crucial for parking safety and accuracy, with maintenance tips to ensure continued performance after achieving correct alignment.
Table of Contents
- Introduction
- How Backup Camera Grid Lines Work
- Signs Your Grid Lines Need Calibration
- DIY Calibration Methods
- Vehicle-Specific Calibration Tips
- When to Seek Professional Help
- Maintaining Proper Calibration
- Conclusion
- Frequently Asked Questions
Introduction
Ever backed into a spot feeling certain you were perfectly aligned, only to step out and find your car looking like it parked itself after a night at the pub? Trust me, we’ve all been there. As a mechanic with 15 years under my belt, I’ve seen countless drivers baffled by their backup camera grid lines leading them astray.
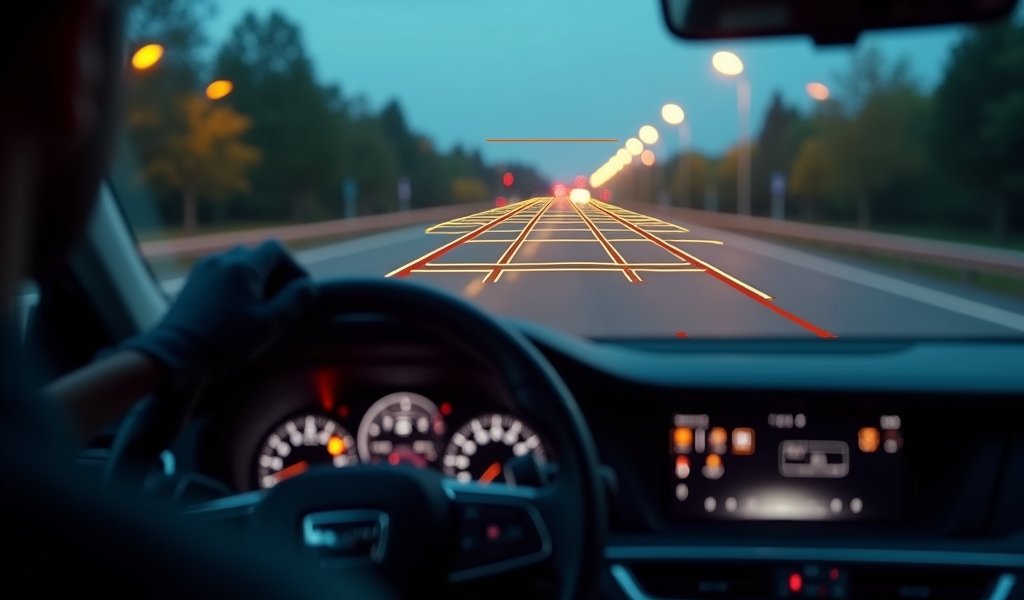
Backup camera grid line calibration might sound like technical jargon, but it’s actually a simple concept with a huge impact on your daily driving. Those colorful lines on your screen aren’t just there to look pretty—they’re sophisticated guides designed to help you park with precision and avoid obstacles. When they’re spot-on, they’re your best friend. When they’re off-kilter? Well, that’s when the frustration begins.
In this comprehensive guide, we’ll dive into everything you need to know about backup camera grid line calibration. From understanding how these lines should function to DIY calibration techniques and knowing when to call in the pros, I’ll walk you through it all with the same patience I’d offer if you were standing in my shop.
Properly calibrated grid lines aren’t just about making your parking job Instagram-worthy—they’re a crucial safety feature that can prevent accidents, save your bumper from scratches, and spare you the embarrassment of taking three attempts to back into a spot while others wait.
How Backup Camera Grid Lines Work

Before we jump into calibration, let’s understand what we’re working with. Backup camera systems typically feature two types of grid lines that appear on your display:
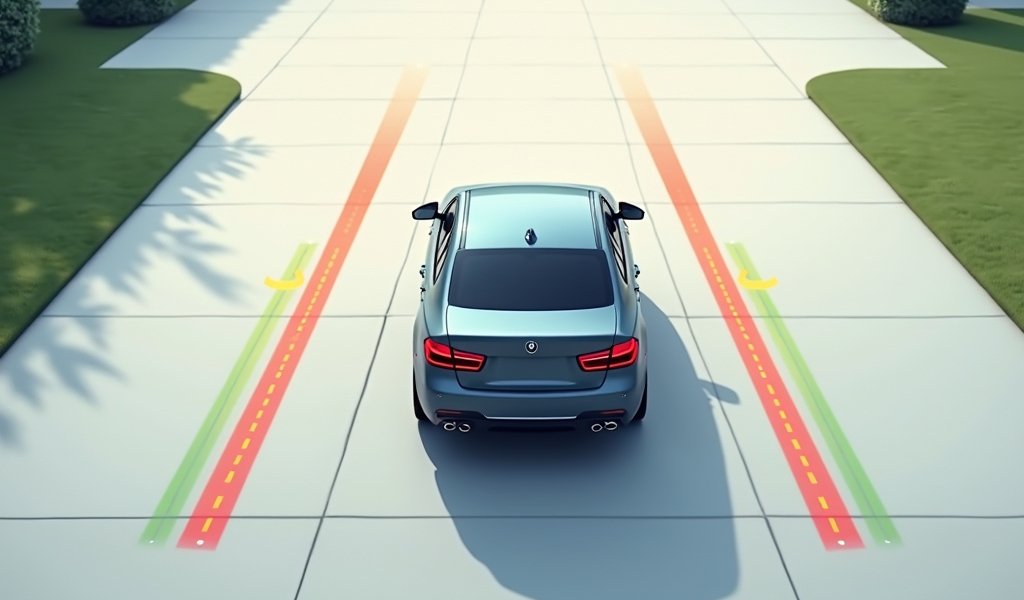
- Static grid lines: These remain fixed regardless of your steering wheel position. They project a straight path backward based on your current position and are common in basic camera systems.
- Dynamic grid lines: These adjust in real-time as you turn your steering wheel, showing your projected path. They’re particularly helpful for complex parking maneuvers and come standard in many newer vehicles.
Those colorful lines on your screen actually serve as distance markers. While colors may vary between manufacturers, they generally follow this pattern:
- Green: Indicates a safe distance (typically 3+ feet from obstacles)
- Yellow: Caution zone (usually 1-3 feet away)
- Red: Danger zone (less than 1 foot from potential contact)
Your backup camera is part of a sophisticated system that combines input from various sensors with your vehicle’s dimensions. Modern vehicles often integrate backup cameras with their blind spot monitoring systems and other driver assistance technologies for comprehensive awareness.
According to the National Highway Traffic Safety Administration, backup cameras have significantly reduced back-over accidents since becoming mandatory in 2018. But this safety benefit depends heavily on proper calibration—misaligned grid lines can give drivers false confidence about clearances and paths.
Signs Your Grid Lines Need Calibration
How do you know if your grid lines need a tune-up? It’s not always obvious, but here are the telltale signs that something’s amiss:
- Your actual path doesn’t match the predicted path. If you follow the grid lines perfectly but end up way off target, your system needs calibration.
- The lines appear crooked or tilted. Grid lines should be symmetric and properly aligned with your vehicle’s center and width.
- Distance markers seem inaccurate. If objects appear much closer or farther than what your grid lines suggest, calibration is needed.
- Lines don’t align with parking space markings. When backing into a spot, your grid lines should roughly match standard parking space dimensions.
- The camera was recently disturbed. Any rear-end collision, bumper replacement, camera adjustment, or even a significant jolt can throw calibration off.
I once had a customer who swore her backup camera was possessed—it kept guiding her to park slightly to the right in every space. Turns out, her camera had been knocked askew when a shopping cart bumped her bumper. After a quick recalibration, her parking confidence returned.
These symptoms might seem minor, but they can have major consequences. Misaligned grid lines can lead to scraped bumpers, fender benders, or worse if you’re relying on them to judge distance from pedestrians or obstacles.
DIY Calibration Methods
Before you rush to the dealership and prepare to part with your hard-earned cash, try these DIY calibration methods. Many minor alignment issues can be resolved without professional help.
Method 1: Settings Menu Adjustment
Many newer vehicles allow you to adjust grid line calibration through the infotainment system:
- Park your vehicle on a flat, level surface with plenty of space behind it.
- Access your vehicle’s settings menu (typically found in the display settings or camera settings section).
- Look for options like “Camera Settings,” “Grid Line Adjustment,” or “Parking Guidance.”
- Follow the on-screen prompts to adjust horizontal and vertical alignment.
- Make small adjustments, then test by backing up toward a fixed reference point.
Not all vehicles offer this level of user control, so check your owner’s manual first. Toyota and some Ford models are particularly user-friendly with these adjustments.
Method 2: The Parking Lot Method
This hands-on approach works well for most vehicles:
- Find an empty parking lot with clearly marked spaces.
- Position your vehicle at the entrance to a parking space.
- Shift into reverse and note how your grid lines align with the parking space lines.
- Back up slowly, following your grid lines precisely.
- Check your position once parked—if you’re centered in the space, your grid lines are likely calibrated properly. If not, note the discrepancy for adjustment.
This method helps you understand exactly how your specific grid lines translate to real-world positioning. It’s especially useful for static grid line systems.
Method 3: Tape Measure Verification
To check distance marker accuracy:
- Place objects at precise distances behind your vehicle (traffic cones work great).
- Position cones at 1 foot, 3 feet, and 6 feet from your bumper.
- Compare how these distances appear on your camera display relative to your colored grid lines.
- If your red line doesn’t align with the 1-foot cone (or whatever distance your vehicle specifies for the red line), you need calibration.
I often recommend using a friend to help position objects while you observe the display—it’s much easier than running back and forth to check alignments yourself!
For those with vehicles that have adaptive cruise control systems, remember that camera calibration can sometimes affect other driver assistance features. Proceed cautiously and consult your manual if you notice any unusual behavior in these systems.
Vehicle-Specific Calibration Tips

Different manufacturers approach camera calibration in unique ways. Here’s a breakdown of what to expect with popular makes:
Toyota/Lexus
Toyota vehicles often allow basic calibration through the multimedia system. Access the camera settings while in reverse, then look for grid line adjustment options. For more precise calibration, Toyota uses a specialized tool that dealerships have access to. Some newer models with advanced parking assist features require professional calibration after any camera disturbance.
Honda/Acura
Honda typically requires dealer-level calibration, especially for vehicles with LaneWatch or multi-angle rearview cameras. Some basic adjustment can be made through the Display Audio system on newer models by pressing and holding the settings button while the camera is active. The process varies significantly between model years, so consult your owner’s manual.
Ford/Lincoln
Ford offers some of the most user-adjustable backup camera systems. Through the SYNC system, many Ford vehicles allow you to access camera settings and make grid line adjustments. Look for “Camera Settings” in the vehicle personalization menu. The F-150 and Explorer are particularly accommodating for DIY calibration.
GM Vehicles (Chevrolet, GMC, Buick, Cadillac)
General Motors vehicles typically need a dealer visit for proper calibration. While some basic visual checks can be performed using the parking lot method described earlier, the actual calibration process requires specialized equipment. However, some adjustment may be possible through the MyLink/IntelliLink systems on newer models.
German Luxury Brands (BMW, Mercedes, Audi)
These manufacturers generally lock down camera calibration, requiring dealer equipment or specialized diagnostic tools. Their camera systems are often integrated with complex sensor arrays that control multiple driver assistance features. DIY adjustments are generally not recommended for these vehicles.
Regardless of your vehicle make, one universal tip applies: consult the owner’s manual before attempting any calibration. Manufacturers have specific procedures that, when followed correctly, yield the best results. The experts at Edmunds note that incorrect calibration can sometimes be worse than no calibration at all.
When to Seek Professional Help
While I’m all for DIY solutions, sometimes you need to wave the white flag and call in the pros. Here are situations where professional calibration is recommended:
- After camera replacement or repositioning. Any time the camera itself has been disturbed, professional calibration ensures precise alignment.
- Following rear-end collision repair. Even minor fender benders can affect camera positioning.
- When DIY methods haven’t resolved the issue. If you’ve tried the methods above and still notice misalignment, it’s time for professional help.
- For vehicles with integrated advanced driver assistance systems (ADAS). Modern vehicles with lane-keeping assist, adaptive cruise control, or automatic emergency braking often share sensors with backup cameras. Improper calibration could affect these safety systems.
- When your vehicle manual specifically recommends professional calibration. Some manufacturers have designed systems that require specialized equipment for proper adjustment.
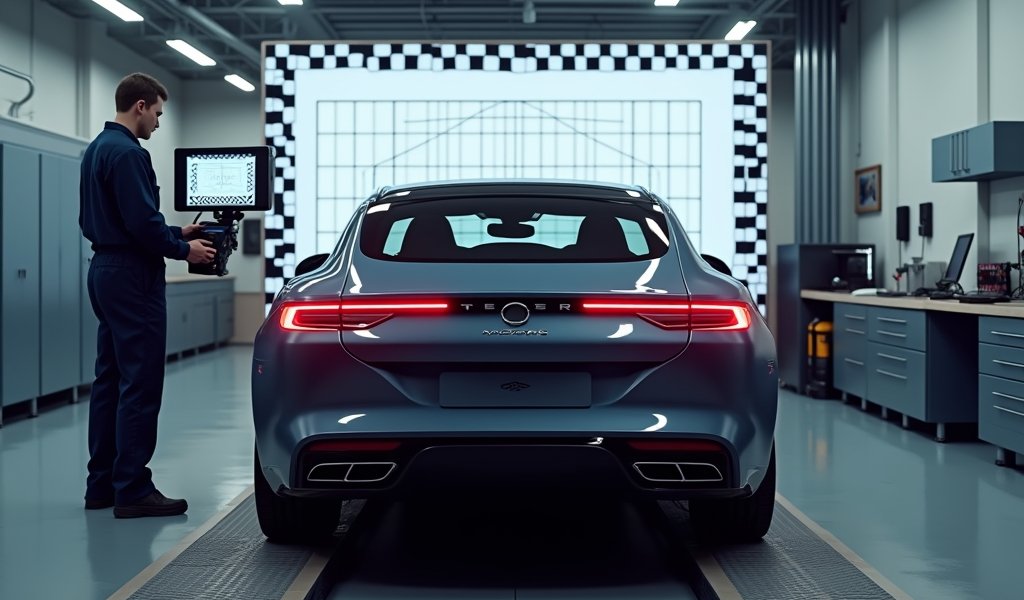
What should you expect when seeking professional help? Typically, a dealership or specialized shop will:
- Perform a diagnostic scan to check for any camera or sensor fault codes
- Set up calibration targets at precise distances from your vehicle
- Use manufacturer-specific software to adjust both physical and digital alignment
- Test the system in real-world conditions to verify accuracy
- Ensure all integrated systems are functioning properly
Professional calibration typically costs between $50-$250 depending on your vehicle make, model, and the complexity of its camera system. Vehicles with 360-degree camera systems or multiple integrated sensors will be on the higher end of that range. If you’ve recently had your backup camera installed as an aftermarket addition, the installer should calibrate it as part of the service.
When scheduling service, ask if the shop has experience with your specific make and model. Camera calibration procedures vary widely between manufacturers, and you want a technician who knows the quirks of your particular system.
Maintaining Proper Calibration
Once your grid lines are properly calibrated, a bit of regular maintenance will help keep them that way. Here are my top tips for maintaining accurate backup camera alignment:
- Keep your camera lens clean. A dirty lens can make it difficult to see reference points needed for accurate parking. A microfiber cloth works perfectly for this.
- Perform periodic checks. Every few months, use the parking space method described earlier to verify your grid lines are still accurate.
- Be cautious with automatic car washes. High-pressure sprays can sometimes nudge cameras out of position, particularly on vehicles with cameras mounted in the bumper rather than integrated with the trunk/hatch handle.
- After any impact (even minor ones). Bumper damage, fender benders, or even backing into a snow bank can affect camera position.
- Following any rear-end service work. If your bumper, trunk, or hatch has been removed for service, verify calibration afterward.
Remember that temperature extremes can sometimes temporarily affect camera performance. If you notice slight discrepancies during very hot or cold weather that weren’t present before, let your vehicle return to moderate temperature before determining if recalibration is truly needed.
One often overlooked aspect of maintaining proper function is protecting the camera’s wiring harness. When having rear-end service performed, make sure technicians properly secure any camera wiring to prevent it from getting pinched or strained, which can lead to intermittent camera issues.
Conclusion
Properly calibrated backup camera grid lines transform a good feature into a great one. They enhance safety, make parking a breeze, and help prevent those embarrassing moments when you have to readjust multiple times while someone impatiently waits for your spot.
Remember that backup cameras, even perfectly calibrated ones, are tools to assist your driving—not replace your attention. Always perform a quick visual check around your vehicle before backing up, and use your mirrors in conjunction with your camera for the safest reversing experience.
Whether you choose the DIY route or seek professional calibration, the important thing is recognizing when your grid lines need attention. That slight misalignment might seem minor, but it can make a significant difference in parking precision and safety.
The next time you back up and follow those colorful lines on your display, you’ll appreciate knowing they’re guiding you accurately. And for those who’ve been struggling with misaligned grid lines, I hope this guide helps you resolve the issue and restore your parking confidence.
Has this guide helped solve your backup camera calibration concerns? Or do you have additional questions about your specific vehicle? Drop a comment below—I’m happy to help fellow drivers get the most out of their automotive technology!
Frequently Asked Questions
How often should backup camera grid lines be calibrated?
Backup camera grid lines typically only need calibration when they show signs of misalignment or after camera disturbance. There’s no fixed schedule, but checking alignment every 6-12 months is good preventative maintenance.
Can I drive with misaligned backup camera grid lines?
Yes, but it’s not recommended as it increases your risk of parking accidents and collisions. Misaligned grid lines give false information about your vehicle’s position and clearance.
Will a software update fix my misaligned grid lines?
Sometimes, especially if the issue is software-related rather than physical camera misalignment. Check with your dealer about available software updates for your specific make and model.
How much does professional backup camera calibration cost?
Professional calibration typically costs between $50-$250 depending on your vehicle make and system complexity. Luxury vehicles and those with advanced driver assistance systems tend to be on the higher end of this range.
Can weather conditions affect backup camera grid line accuracy?
Yes, extreme temperatures can temporarily affect camera performance and display accuracy. Allow your vehicle to reach normal operating temperature before determining if recalibration is truly needed.

