Overview
This guide explains that sway bar links—crucial components connecting your vehicle’s anti-roll bar to the suspension—typically need replacement every 50,000-100,000 miles when they show signs of failure like knocking noises or handling issues. The article provides a detailed DIY replacement process that can save $80-250 compared to professional service, along with maintenance tips to extend their lifespan and recommendations for choosing between OEM, aftermarket, and performance replacement parts.
Table of Contents
- Understanding Sway Bar Links: The Unsung Heroes
- When to Replace Your Sway Bar Links
- Signs Your Sway Bar Links Are Failing
- Typical Replacement Intervals: What the Data Shows
- DIY Sway Bar Link Replacement Guide
- Choosing the Right Replacement Parts
- Cost Comparison: DIY vs. Professional Service
- Maintenance Tips to Extend Sway Bar Link Life
- Conclusion
- Frequently Asked Questions
Let’s talk about one of those often-overlooked parts of your car that quietly keeps you safe on every drive – the sway bar links. As a mechanic who’s replaced hundreds of these humble components, I can tell you they’re worth understanding, especially if you enjoy handling your car’s maintenance yourself.
Sway bar links are critical connectors in your vehicle’s suspension system that help keep your tires planted firmly on the road during turns. When they wear out (and they will), your car’s handling becomes compromised, potentially creating unsafe driving conditions.
The good news? Replacing sway bar links is one of the more accessible DIY jobs that can save you a trip to the shop and put some money back in your pocket. Let’s dive into everything you need to know about sway bar link replacement intervals and how to handle this repair yourself.
Understanding Sway Bar Links: The Unsung Heroes
Imagine taking a sharp corner without a proper sway bar system. Your car would lean dramatically toward the outside of the curve, potentially lifting the inside wheels off the ground. Not exactly the stability you want when navigating traffic!
Sway bar links (also called stabilizer links) connect your anti-roll bar to the suspension components. They’re the vital connectors that allow the sway bar to do its job – reducing body roll during cornering and keeping your tires in contact with the road.
These links typically consist of a metal rod with ball joints at each end, often protected by rubber or polyurethane bushings. They allow for necessary articulation as your suspension moves while maintaining the sway bar’s connection to both sides of your vehicle.
Several factors influence how quickly your sway bar links will wear out:
- Road conditions (rough roads accelerate wear significantly)
- Driving style (aggressive cornering puts more stress on them)
- Weather conditions (road salt and extreme temperatures speed deterioration)
- Vehicle weight (heavier vehicles place more stress on suspension components)
- Part quality (OEM vs. aftermarket differences can be substantial)
While they may be small, sway bar links play a crucial role in your car’s suspension performance. When they begin to fail, they usually let you know through several clear symptoms.

Signs Your Sway Bar Links Are Failing
Your car is pretty good at telling you when something’s wrong – you just need to know how to listen. Here are the telltale signs that your sway bar links are ready for replacement:
Distinctive Noises
The most common symptom is a knocking or clunking noise, particularly when driving over bumps, dips, or through corners. This noise happens because worn ball joints in the links develop play, causing metal-on-metal contact with each suspension movement.
If you hear these sounds primarily during low-speed turns or when navigating speed bumps, your sway bar links should be high on your suspect list. The noise is often more pronounced first thing in the morning or in cold weather when lubricants are less effective.
Handling Issues
Notice your car feeling less stable during cornering? Excessive body roll, a “loose” feeling in the steering, or unpredictable handling during lane changes can all indicate failing sway bar links.
Since the primary job of the sway bar system is to reduce body roll during cornering, any compromise in these components directly affects how your car handles. This isn’t just an annoyance – it’s a safety concern that deserves prompt attention.
Visual Indicators
During your regular maintenance checks, take a moment to visually inspect your sway bar links. Look for:
- Torn or deteriorated bushings
- Visible rust or corrosion
- Bent or damaged link components
- Excessive grease leaking from the ball joints
According to AAA’s automotive experts, checking for excessive play in the links can also help identify wear before it leads to complete failure. With the vehicle safely raised, try to move the sway bar link with your hand – any noticeable movement suggests worn joints.
Typical Replacement Intervals: What the Data Shows
Unlike oil changes or timing belts, most manufacturers don’t specify exact replacement intervals for sway bar links in their maintenance schedules. Instead, they typically recommend replacement based on inspection results.
That said, industry experience and data from fleet vehicles suggest most sway bar links last approximately 50,000 to 100,000 miles. This wide range exists because of the variables we discussed earlier – driving conditions, climate, and vehicle type all play significant roles.
Here’s what real-world experience tells us about replacement intervals:
- Vehicles in areas with rough roads or harsh winters: 40,000-60,000 miles
- Average conditions with mixed driving: 60,000-80,000 miles
- Primarily highway driving in mild climates: 80,000-100,000+ miles
Luxury and performance vehicles tend to need replacements on the earlier end of these ranges, while economy vehicles might last longer. This difference stems partly from suspension design – performance-oriented suspension systems put more strain on sway bar components during cornering.
Research from Carfax’s maintenance database indicates that vehicles with regular suspension inspections catch failing sway bar links before they cause secondary damage, saving owners an average of $300 in related repairs.
As a mechanic who’s worked on everything from economy cars to performance vehicles, I recommend inspecting your sway bar links:
- Every 50,000 miles
- Whenever you notice handling changes
- During tire rotations or brake service
- After significant impacts (like hitting large potholes)
- Before embarking on long road trips
Prevention is always cheaper than cure when it comes to high-mileage car maintenance. Regular inspections can catch problems before they lead to more expensive repairs or compromise your safety.
DIY Sway Bar Link Replacement Guide
Ready to tackle this job yourself? Replacing sway bar links is one of the more accessible suspension repairs for DIY enthusiasts. Here’s how to do it right the first time.
Tools You’ll Need
- Jack and jack stands
- Lug wrench
- Socket set and ratchet
- Combination wrenches
- Penetrating oil (WD-40, PB Blaster, or similar)
- Wire brush for cleaning rust
- Torque wrench
- Safety glasses and gloves
Step-by-Step Process
1. Preparation
Park on a flat, level surface and engage the parking brake. Consult your vehicle’s manual for proper jacking points – using the wrong lifting point can damage components.
2. Access
Loosen (but don’t remove) the lug nuts while the tire is still on the ground. Safely raise and support the vehicle with jack stands – never rely solely on a hydraulic jack! Remove the wheel completely for better access.
3. Assessment
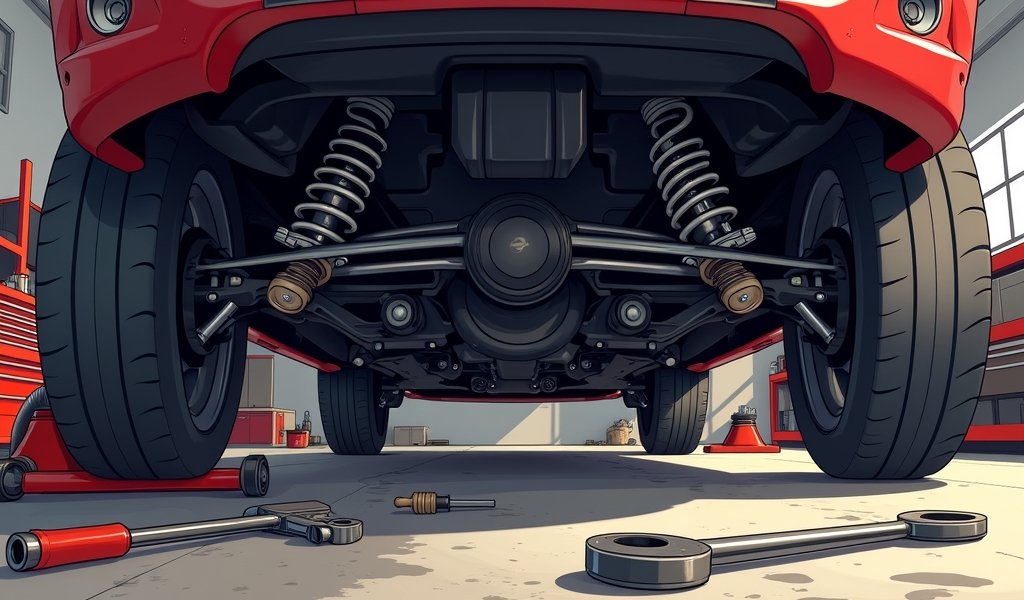
Identify the sway bar links. They typically run vertically between the sway bar (a horizontal bar running across the width of the vehicle) and the control arm or strut. Take a moment to see how they’re oriented – it’ll make reinstallation easier.
4. Removal
Spray penetrating oil on all fasteners and give it 10-15 minutes to work its magic. Depending on your vehicle, you’ll encounter one of two common designs:
- Bolt and nut design: Hold the center portion with a wrench while loosening the nut with a socket
- Stud design: Remove the retaining nut where the stud inserts into the sway bar or control arm
Stubborn fasteners are common, especially in rust-prone regions. If they won’t budge, apply more penetrating oil and try tapping the wrench with a hammer to break the rust seal. If all else fails, cutting them off may be necessary.
5. Installation
Compare your new links to the old ones to ensure they’re the correct length. Install the new links following the reverse order of removal. Hand-tighten all fasteners first, then torque to manufacturer specifications once everything is aligned.
Some designs require compressing the suspension slightly to align components properly. This is where a helper can be invaluable – one person to apply weight to the vehicle while the other tightens the fasteners.
6. Reassembly
Replace the wheel, hand-tighten the lug nuts, lower the vehicle, and torque the lug nuts to specification in a star pattern. Don’t overtighten – use your torque wrench and follow the manufacturer’s specs.
7. Testing
Take a short test drive at low speeds in a safe area to ensure there are no unusual noises or handling issues. If everything feels good, gradually test at higher speeds and during cornering.
Common Challenges
Even experienced mechanics encounter difficulties with sway bar links. Here are some common challenges and how to overcome them:
- Seized fasteners: More penetrating oil, careful application of heat, or cutting tools may be needed
- Spinning studs: Some links have studs that spin freely – use vice grips to hold them while loosening the nut
- Alignment issues: The suspension sometimes needs to be at “ride height” to properly align components
For the average DIYer, expect this job to take about 1-2 hours per side your first time through. Once you’ve done it once, you’ll likely cut that time in half for future replacements.

Choosing the Right Replacement Parts
Not all sway bar links are created equal. The market offers several options, each with distinct advantages and disadvantages:
OEM (Original Equipment Manufacturer)
These are the same parts that came with your vehicle from the factory. They typically offer excellent fit and quality but come at a premium price. I recommend OEM parts for newer vehicles still under warranty or for owners who prioritize factory-equivalent performance.
Pros: Perfect fit, known quality standard
Cons: Highest cost option, sometimes overkill for older vehicles
Name-Brand Aftermarket
Companies like Moog, TRW, Delphi, and Lemförder offer high-quality alternatives to OEM parts. These often equal or exceed OEM quality while costing 20-40% less. For most vehicles over 5 years old, this is my go-to recommendation.
Pros: Excellent quality, wide availability, reasonable cost
Cons: Slight variations in design might exist
Economy Aftermarket
These budget-friendly options work well for older vehicles or temporary repairs. While they’ll get the job done, don’t expect the same longevity as premium options. I typically only recommend these for vehicles approaching the end of their service life.
Pros: Lowest cost, readily available
Cons: Shorter lifespan, potential for premature failure
Performance Upgrades
For enthusiasts looking to improve handling, performance-oriented sway bar links offer enhanced durability and reduced flex. These components work especially well for those into rallycross or performance driving.
Pros: Superior durability, enhanced handling
Cons: Higher cost, potentially firmer ride
When selecting replacement links, look for:
- Proper fit for your specific vehicle make, model, and year
- Quality materials (forged components generally outperform cast ones)
- Corrosion protection appropriate for your climate
- Warranty period (longer warranties typically indicate manufacturer confidence)
Cost Comparison: DIY vs. Professional Service
One of the most compelling reasons to tackle sway bar link replacement yourself is the significant cost savings. Let’s break down what you can expect to pay either way:
DIY Costs
- Economy parts: $20-40 per pair
- Mid-range parts: $40-80 per pair
- Premium/OEM parts: $80-150 per pair
- Tools (one-time investment if you don’t already own them): $50-200
Professional Service Costs
- Parts: Same as above, often with 15-30% markup
- Labor: $60-130 per hour, typically billed at 1-2 hours
- Total professional cost: $140-350+ depending on vehicle and part quality
Potential savings with DIY: $80-250 per replacement
Beyond the immediate financial savings, DIY work builds your mechanical knowledge and confidence. Each successful repair makes the next one easier and expands your capabilities.
That said, professional help might be worth considering if:
- You don’t have a safe place to work on your vehicle
- Your vehicle has severe rust issues that might complicate the job
- You encounter complications during your DIY attempt
- Your time is at a premium
Maintenance Tips to Extend Sway Bar Link Life
While sway bar links will eventually wear out, several practices can help maximize their service life:
Preventative Measures
Regular cleaning of your suspension components pays dividends, especially after winter driving or exposure to road salt. A simple underbody rinse can prevent corrosion that leads to seized fasteners and deteriorated components.
Consider applying a rust inhibitor to metal parts in corrosion-prone environments. Products like Fluid Film or CRC Marine Heavy Duty Corrosion Inhibitor create a protective barrier that significantly extends component life.
Driving Habits That Reduce Wear
How you drive directly impacts how long your sway bar links will last:
- Slow down for speed bumps and potholes
- Take corners at reasonable speeds
- Reduce vehicle load when possible (excess weight increases stress)
- Be gentle when driving over rough roads
These simple adjustments can add thousands of miles to your suspension components’ lifespan. Think of it as preventative maintenance that costs nothing but a little attention.
Regular Inspection
Make it a habit to visually check your sway bar links during oil changes. Look for signs of wear like torn boots, rust buildup, or grease leakage. Testing for play or movement annually can catch problems before they lead to component failure.
When you hear unusual noises, don’t ignore them – investigate promptly. Early intervention often prevents more extensive (and expensive) repairs down the road.
Conclusion
The humble sway bar link might be small, but its impact on your vehicle’s handling and safety is substantial. By understanding when these components need replacement and how to tackle the job yourself, you’re not just saving money – you’re ensuring your vehicle handles predictably in emergency situations when you need it most.
A properly functioning suspension system with fresh sway bar links will corner more confidently, respond more predictably, and provide a safer driving experience. The DIY replacement process is straightforward enough for most home mechanics and offers significant cost savings over professional service.
Remember to inspect your suspension components regularly, especially after rough driving conditions. When it’s time for replacement, choose parts that balance quality and value based on your vehicle’s age and your performance expectations.
With the knowledge and confidence to maintain your sway bar links, you’re well-equipped to keep your car handling safely for years to come – and perhaps tackle even more ambitious DIY repairs in the future.
Frequently Asked Questions
How often should sway bar links be replaced?
Most sway bar links last between 50,000-100,000 miles depending on driving conditions and vehicle type. Replace them when you notice clunking noises, excessive body roll, or visible damage during inspections.
Can I drive with a broken sway bar link?
While you can technically drive with a broken sway bar link, it’s not recommended for safety reasons. Your vehicle will experience excessive body roll during cornering and unpredictable handling, especially in emergency maneuvers.
How much does it cost to replace sway bar links professionally?
Professional replacement typically costs between $140-350, depending on your vehicle make and the quality of parts used. Labor usually accounts for about 60% of this cost.
What tools do I need to replace sway bar links myself?
Basic tools include jack and jack stands, socket set, combination wrenches, penetrating oil, and a torque wrench. The exact socket sizes will depend on your specific vehicle.
Will new sway bar links improve my car’s handling?
If your old links were worn or damaged, new links will restore your vehicle’s handling to factory specifications. They won’t improve handling beyond the original design, but they will eliminate excessive body roll and unpredictable cornering behavior.

