Overview
This article provides expert guidance on wheel bearing hub assemblies, covering diagnosis of failing bearings, proper installation techniques, and maintenance strategies to extend their lifespan. It emphasizes the importance of selecting quality replacement parts, using proper tools, and following manufacturer torque specifications to ensure safety and longevity of this critical component that connects wheels to vehicles.
Table of Contents
- Understanding Wheel Bearing Hub Assemblies
- Signs of a Failing Wheel Bearing Hub
- Pro Tip 1: Proper Diagnosis Techniques
- Pro Tip 2: Choosing Quality Replacement Parts
- Pro Tip 3: Essential Tools and Preparation
- Pro Tip 4: Installation Best Practices
- Pro Tip 5: Maintenance and Longevity Strategies
- Conclusion
- Frequently Asked Questions
Understanding Wheel Bearing Hub Assemblies
The wheel bearing hub assembly might sound like just another part in your car’s complicated puzzle, but it’s more like the unsung hero of your vehicle’s smooth operation. Think of it as the faithful shoulder joint that connects your wheel to the car while allowing it to spin freely. Without a properly functioning wheel bearing hub assembly, your Sunday drive would feel more like riding a wooden cart down a cobblestone road.
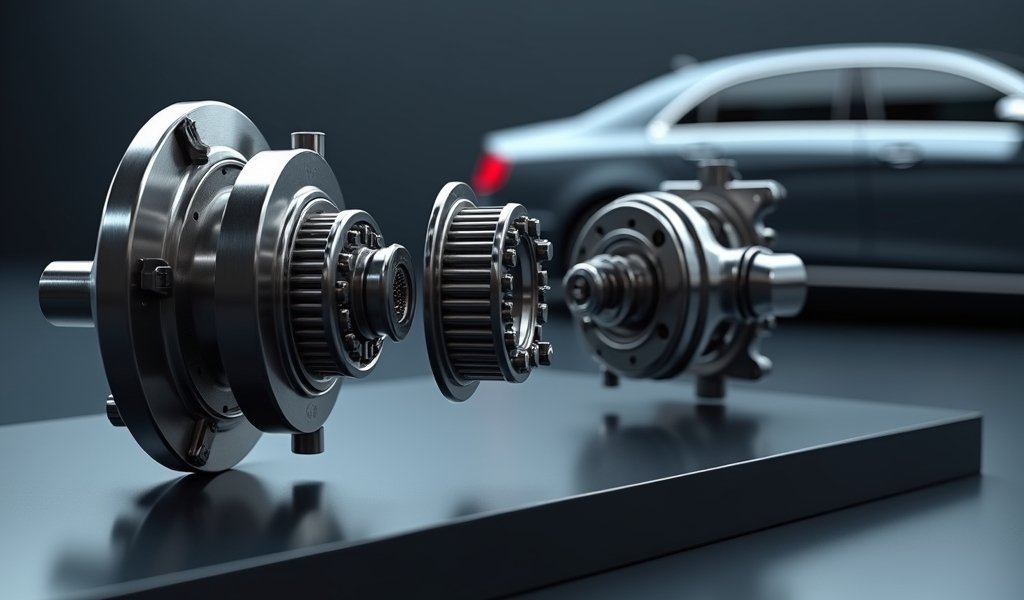
At its core, this assembly consists of precision-engineered steel balls or rollers housed in a metal ring, working together to reduce friction as your wheels turn. It’s a beautifully simple yet critical component that bears the entire weight of your vehicle while simultaneously handling both vertical and horizontal forces during turning, acceleration, and braking.
Modern vehicles typically use sealed hub assemblies that combine the bearing, hub, and often the ABS sensor into one convenient unit. This integration is a bit like getting a smartphone instead of carrying separate devices for calls, photos, and navigation – it’s more efficient, but when one part fails, the whole assembly usually needs replacing.
Understanding how this critical component functions is the first step in proper maintenance. Just as you wouldn’t ignore a persistent pain in your shoulder, you shouldn’t dismiss the warning signs of a deteriorating wheel bearing hub assembly. Let’s explore what these signs look like in the real world.
Signs of a Failing Wheel Bearing Hub
When a wheel bearing hub assembly starts to fail, your car has a language all its own to tell you something’s wrong. The most common symptom is a mysterious humming, growling, or rumbling noise that seems like it’s coming from one of your tires. This sound often changes as you accelerate, decelerate, or turn, like a grumpy old man whose complaints get louder when he’s forced to move.
Many drivers describe the noise as similar to driving over rumble strips on the highway, except the vibration continues even on smooth pavement. This sound typically increases with speed but might temporarily diminish during certain turns, giving you valuable diagnostic clues about which bearing is affected.
Beyond the symphony of strange sounds, you might notice your steering wheel developing a wobble or your vehicle pulling slightly to one side during straight-line driving. In more severe cases, you’ll feel a noticeable vibration through the floor or steering wheel – similar to an unbalanced tire, but with a different character to the vibration.
Perhaps the most alarming sign is excessive play or looseness in the wheel. If you can grab your tire at the 12 and 6 o’clock positions and rock it back and forth (with the vehicle safely supported off the ground), you’re likely looking at a bearing that’s reaching the end of its road.
Heat is another telltale indicator. A failing bearing generates significant friction, which translates to heat. After driving, if one wheel hub feels noticeably hotter than the others (use caution when checking!), you’ve got another piece of evidence pointing toward bearing failure.
Recognizing these symptoms early can save you from more expensive repairs and potentially dangerous driving conditions. Like most car suspension components, wheel bearings rarely fail catastrophically without warning. They’ll usually give you plenty of hints before complete failure occurs.

Pro Tip 1: Proper Diagnosis Techniques
Diagnosing wheel bearing issues is a bit like being a detective – you need to gather evidence methodically and rule out similar-sounding culprits. Start with the simplest test: the road test. Drive your vehicle at various speeds, making gentle turns in both directions while listening carefully for changes in noise. A bad wheel bearing typically makes more noise when weight is applied to it, so the noise often intensifies when turning in the opposite direction of the affected bearing.
Once you’ve narrowed down the suspect, it’s time for the jack test. Safely raise and support the vehicle, then spin the wheel by hand. A wheel with a bad bearing might feel rough, create noise, or exhibit resistance when rotated. Next, grasp the tire at the top and bottom and try to rock it. Any noticeable movement or clunking suggests bearing wear.
Don’t be too quick to blame the bearing for every wheel-related noise. Tire issues, brake problems, CV joints, and even suspension components can create similar symptoms. As professional mechanics, we’ve seen countless cases where customers replaced perfectly good bearings because they misdiagnosed the source of noise.
One particularly effective diagnostic technique is to use an automotive stethoscope – think of it as giving your car a proper medical examination. By placing the probe at various points around the hub assembly while an assistant slowly rotates the wheel, you can pinpoint exactly where that troublesome noise is coming from.
Remember that some wheel bearings can be partially disassembled for inspection (though this is becoming less common with sealed units). If you have a serviceable bearing, you might be able to check the condition of the races and rollers directly, looking for pitting, scoring, or discoloration that indicates heat damage or wear.
The most important aspect of diagnosis is thoroughness and patience. Rushing to conclusions can lead to unnecessary parts replacement and frustration. As we often tell apprentices in the shop, “Measure twice, cut once” applies just as much to diagnosis as it does to physical work.
Pro Tip 2: Choosing Quality Replacement Parts
When it comes to wheel bearing hub assemblies, the old adage “you get what you pay for” couldn’t be more true. These aren’t components where cutting corners makes sense. Think of it this way: your wheel bearings are quite literally what keeps your wheels attached to your car while allowing them to spin freely – not exactly where you want to pinch pennies.
OEM (Original Equipment Manufacturer) parts typically offer the best fit and reliability, having been designed specifically for your vehicle. However, high-quality aftermarket options from reputable manufacturers can provide excellent performance, sometimes with enhanced durability or even extended warranties. Brands like Timken, SKF, and Moog have established strong reputations in the bearing industry with decades of engineering expertise.
Be wary of suspiciously cheap hub assemblies. The market is flooded with low-quality counterfeits that might look identical to premium parts but use inferior materials and manufacturing processes. These bargain-bin bearings often use lower-grade steel, fewer or smaller ball bearings, and substandard seals – all recipes for premature failure.
When selecting a replacement, pay attention to the complete assembly specifications. Modern wheel bearing hub assemblies often integrate multiple components, including:
- The bearing itself (ball or roller type)
- The hub flange where the wheel attaches
- ABS sensor rings or components
- Mounting hardware and studs
Make sure your replacement matches not just the physical dimensions but all the functional aspects of the original. For vehicles equipped with anti-lock brakes, choosing a hub assembly with properly functioning ABS components is crucial for safety.
Consider your driving conditions and vehicle usage when selecting replacement parts. If you frequently tow heavy loads, travel on rough roads, or have modified your vehicle for performance, upgrading to heavy-duty bearings might be a wise investment. Some premium wheel configurations may benefit from upgraded bearing assemblies that can handle increased lateral loads.
Lastly, check the warranty terms. Quality manufacturers stand behind their products with solid warranties, often 3-5 years or longer. This confidence in their product speaks volumes about the expected durability and should give you peace of mind with your purchase.
Pro Tip 3: Essential Tools and Preparation
Replacing a wheel bearing hub assembly isn’t a job you want to start only to realize you’re missing a crucial tool halfway through. It’s like setting out to bake a cake and discovering you have no eggs when the batter’s already mixed. Proper preparation prevents this frustration and ensures a smooth repair process.
The basic toolkit for most wheel bearing replacements includes:
- Socket set and breaker bar (including axle nut socket)
- Torque wrench (this is non-negotiable for proper installation)
- Hydraulic jack and secure jack stands
- Wheel chocks for safety
- Rubber mallet or dead-blow hammer
- Penetrating oil for rusty or seized components
- Wire brush for cleaning mounting surfaces
- Anti-seize compound and thread locker
Depending on your specific vehicle, you might also need specialized tools like a hub puller, press kit, or bearing separator. Popular Mechanics suggests that researching your exact model’s requirements before starting can save hours of frustration.
Before you begin, ensure your workspace is adequate. You’ll need a solid, level surface with enough room to maneuver around the vehicle. Good lighting is essential – trying to distinguish between components in poor light is a recipe for mistakes. A proper workspace setup is often overlooked but tremendously important for both safety and efficiency.
Take time to thoroughly clean the area around the hub assembly before disassembly. Road grime, rust, and debris can contaminate the new bearing during installation or make it difficult to properly seat components. This cleaning step might seem tedious, but it’s crucial for a long-lasting repair.
Preparation also means having replacement ancillary parts on hand. Items like split pins (cotter pins), clip retainers, seals, or even brake components might need replacement during the job. Having these ready prevents the dreaded mid-job parts store run.
Finally, consult a vehicle-specific repair manual or reputable online resource for torque specifications and any special procedures your particular model might require. According to the American Automobile Association, following manufacturer specifications is crucial for safety-critical components like wheel bearings.

Pro Tip 4: Installation Best Practices
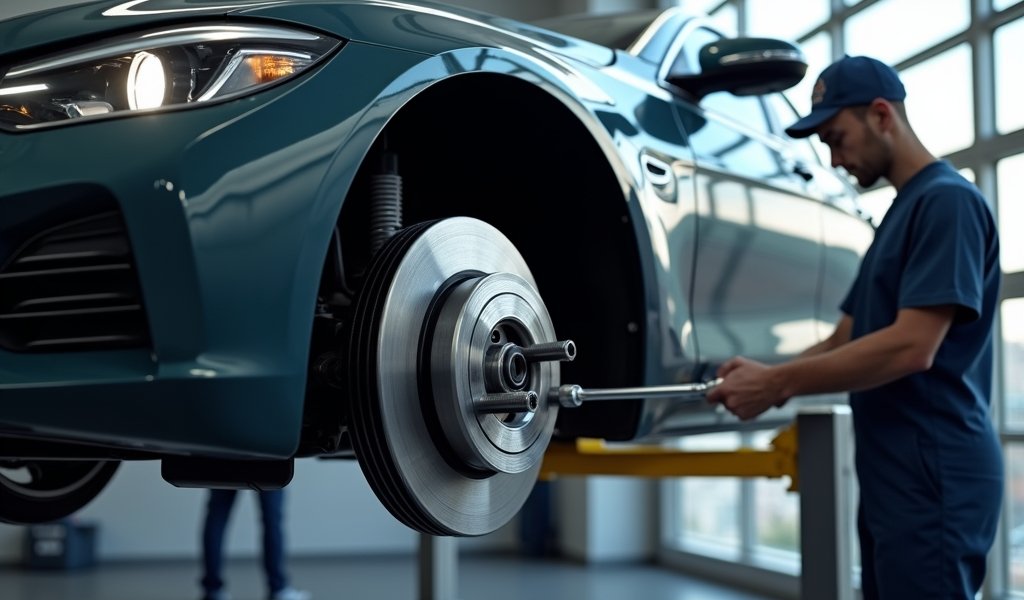
Installing a wheel bearing hub assembly is a bit like performing surgery on your vehicle – precision and cleanliness are paramount. The first golden rule is to never force components together. If something doesn’t fit smoothly, stop and reassess rather than reaching for a bigger hammer. Excessive force during installation is the leading cause of premature bearing failure.
Start with meticulously clean mounting surfaces. Use a wire brush and appropriate solvent to remove all rust, old gasket material, and debris from both the steering knuckle and the hub mating surfaces. Even a tiny particle trapped between these surfaces can cause misalignment, leading to uneven bearing wear.
When positioning the new hub assembly, ensure it seats flush against the knuckle before installing any fasteners. A slight misalignment here can cascade into serious problems later. Think of it like hanging a door – if it’s not square in the frame from the start, no amount of adjustment will make it work properly.
Torque specifications are non-negotiable when it comes to wheel bearings. Too loose, and the assembly may develop play; too tight, and you’ll cause premature wear or even immediate damage. Always follow a three-stage torque sequence:
- Initial snug-down of all fasteners in a crossing pattern
- First torque pass at approximately 60-70% of specification
- Final torque to exact manufacturer specification
For the axle nut (if your vehicle uses one), the proper torque is absolutely critical. This nut sets the bearing preload, which determines how freely the wheel rotates while maintaining the correct amount of internal pressure. Many modern vehicles require a specific tightening procedure that might include rotating the hub during tightening or setting a specific torque angle.
Never reuse self-locking nuts, cotter pins, or other one-time-use fasteners. These components are designed to provide secure retention only on their first installation, and reusing them compromises safety. This isn’t a place to save a few dollars.
After installation, perform a proper bearing break-in by taking a gentle test drive, avoiding hard braking or aggressive cornering for the first 100 miles or so. This allows the bearing components to properly seat and the lubricant to distribute evenly throughout the assembly.
Finally, recheck all fasteners after this break-in period. It’s not uncommon for components to settle slightly, and this final check ensures everything remains properly secured for the long haul.
Pro Tip 5: Maintenance and Longevity Strategies
Modern sealed wheel bearing hub assemblies are often marketed as “maintenance-free,” but that doesn’t mean “neglect-free.” While these units don’t require the regular greasing that serviceable bearings once did, there are still several practices that can dramatically extend their lifespan and performance.
The most influential factor in bearing longevity is proper installation, which we’ve already covered. Beyond that, regular inspection becomes your best maintenance tool. During routine tire rotations or brake services, take a moment to check for early warning signs like slight looseness, uneven tire wear, or seeping grease around the hub – these are like whispers from your vehicle before the problem starts shouting.
Water is the natural enemy of wheel bearings. If you regularly ford streams in your off-road adventures or even just drive through deep puddles, consider checking your bearings more frequently. Some enthusiasts with dedicated off-road vehicles even modify their hubs with supplementary seals or regular greasing ports, though this isn’t necessary for most drivers.
Extreme temperatures also affect bearing life. Those living in regions with harsh winters should be particularly vigilant, as road salt and water intrusion can accelerate corrosion. Similarly, in very hot climates, the grease inside sealed units can break down more quickly. Neither scenario necessarily demands preventive replacement, but awareness helps you catch problems early.
Driving habits significantly impact bearing longevity. Hard cornering, frequent high-speed driving, and aggressive launches all increase lateral loads on your wheel bearings. If you enjoy spirited driving or participate in track days, consider upgrading to performance-oriented bearings designed for these conditions.
Perhaps surprisingly, extended periods of inactivity can also harm wheel bearings. Vehicles that sit unused for months can develop flat spots on the bearing races or experience seal degradation. If you store a vehicle long-term, consider putting it on jack stands to relieve constant pressure on one spot, or at minimum, move it periodically to distribute lubricant and change the bearing position.
Pay attention to what other components tell you about your wheel bearings. Uneven brake wear, for instance, might indicate a bearing that’s allowing too much hub movement. Similarly, ABS warning lights can sometimes be triggered by failing wheel bearing sensors or excessive movement in the hub assembly.
Finally, don’t overlook the basics: maintaining proper tire inflation and balance helps reduce unnecessary stress on your bearings, as does regular wheel alignment. These fundamental maintenance tasks contribute significantly to the overall health of your entire suspension system, including those critical wheel bearing hub assemblies.
Conclusion
Wheel bearing hub assemblies may not be the most glamorous components in your vehicle, but they’re certainly among the most hardworking and critical for safe operation. Like the quiet professional in any field, they do their job best when you don’t notice them at all – silently enabling the smooth, controlled rotation of your wheels mile after mile.
By understanding the fundamentals of how these assemblies function, recognizing the early warning signs of failure, and following the five pro tips we’ve outlined – proper diagnosis, quality part selection, thorough preparation, meticulous installation, and preventative maintenance – you’ll ensure these unsung heroes continue performing reliably for tens of thousands of miles.
Remember that while DIY replacement is certainly possible for many vehicle owners with mechanical inclination, there’s no shame in seeking professional help if you’re uncertain. The cost of professional installation is often justified when weighed against the potential consequences of improper bearing installation, which can range from premature replacement to dangerous driving conditions.
Whether you’re a weekend warrior tackling your first bearing replacement or a seasoned home mechanic adding another successful repair to your resume, taking the time to do the job right pays dividends in safety, performance, and long-term reliability. Your vehicle will thank you with that perfect silence that comes only from properly functioning wheel bearings – the kind of silence that lets you enjoy the road ahead without worry or distraction.
Frequently Asked Questions
How long do wheel bearing hub assemblies typically last?
Most quality wheel bearing hub assemblies last between 85,000 to 100,000 miles under normal driving conditions. Factors like road quality, driving habits, and environmental conditions can significantly impact this lifespan.
Can I drive with a bad wheel bearing hub assembly?
While your car may still operate with early-stage bearing failure, it’s unsafe to continue driving with a known bad wheel bearing. Complete failure could result in wheel separation and loss of vehicle control.
How much does it cost to replace a wheel bearing hub assembly?
Professional replacement typically costs between $250-$500 per wheel, including parts and labor. DIY replacement costs around $100-$200 for the part alone, depending on vehicle make and model.
Are wheel bearings replaced in pairs like brakes?
Unlike brakes, wheel bearings don’t need to be replaced in pairs unless both are showing signs of wear. Replace only the specific bearing that’s failing unless both sides have similar mileage and conditions.
Can hitting a pothole damage my wheel bearing hub assembly?
Yes, severe impacts from potholes or curbs can damage wheel bearings by causing immediate physical damage or misalignment. After significant impacts, listen for new noises or vibrations that might indicate bearing damage.


Pingback: Wheel Balancing Weight Placement: 5 Tips - knowsyourcar.com
Pingback: Front Wheel Hub Bearing Assembly: 4 Tips - knowsyourcar.com