Overview
This guide provides a complete walkthrough for diagnosing and replacing failing universal joints in a vehicle’s drivetrain, covering symptoms of failure, required tools, step-by-step replacement instructions, troubleshooting common challenges, and maintenance tips to extend service life. The article emphasizes that timely u-joint replacement is critical for preventing catastrophic driveshaft failure and can save significant repair costs when performed as a DIY project with proper tools and quality replacement parts.
Table of Contents
- What is a Universal Joint?
- Signs of Failing U-Joints
- Tools and Materials Needed
- Preparation
- Step-by-Step Replacement Guide
- Common Challenges
- Post-Replacement Testing
- Maintenance Tips
- Conclusion
- Frequently Asked Questions
What is a Universal Joint?
A universal joint (u-joint) is the unsung hero of your vehicle’s drivetrain system. This cross-shaped component performs the critical job of transferring power from your transmission to your wheels while accommodating constant changes in angle as your suspension moves. Think of it as a flexible connector that allows your driveshaft to keep spinning smoothly even as it bends with the movement of your vehicle.
Without properly functioning u-joints, your driveshaft couldn’t handle the twisting forces created when your suspension compresses and extends during normal driving. Most vehicles use what we call Cardan or cross-type joints, which feature a cross-shaped center piece with bearings at each end. These bearings fit into caps held in place by snap rings inside your driveshaft’s yokes.
Over years of service, these joints endure tremendous stress. They’re constantly flexing, spinning, and transferring the full power of your engine. A typical u-joint will give you 50,000-100,000 miles of service, but this varies dramatically based on your driving conditions, maintenance habits, and the quality of the original part.
Signs of Failing U-Joints
Your vehicle will usually give you plenty of warning before a u-joint completely fails. Catching these symptoms early can save you from being stranded—or worse, experiencing a catastrophic driveshaft failure at highway speeds.
The most common symptom is a distinctive “clunk” when shifting from drive to reverse or when accelerating from a stop. This happens because worn bearings allow too much play in the joint, causing momentary hesitation as power transfers through the drivetrain.
You might also notice vibrations that change with speed, particularly vibrations that get worse during acceleration. This happens because a failing u-joint can’t maintain proper driveshaft balance at higher RPMs. A squeaking or chirping noise that changes with vehicle speed (not engine speed) is another telltale sign—this is the sound of dry bearings begging for grease.
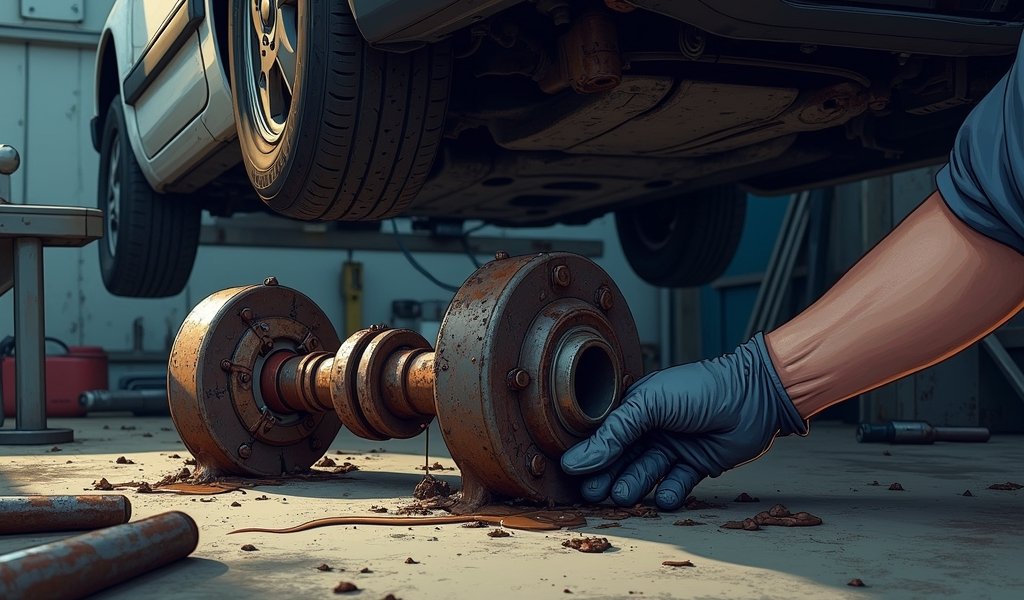
In advanced stages of failure, you might spot rust-colored powder around the joint seals or even visible movement in the joint when the driveshaft is pushed by hand. If you see these signs, don’t delay the repair. A completely failed u-joint can cause your driveshaft to detach from your vehicle, potentially causing severe damage or even accidents.

Tools and Materials Needed
Successful driveshaft universal joint replacement depends on having the right tools and materials at hand. Here’s what you’ll need to get the job done right:
Essential Tools:
- Socket set and ratchet (including deep sockets)
- U-joint press tool (can be rented from most auto parts stores)
- Hammer
- Punch set
- Needle-nose pliers
- Pry bar
- Torque wrench
- Jack and jack stands rated for your vehicle’s weight
- Bench vise (if available)
Materials:
- Replacement u-joints (exactly matched to your vehicle)
- Penetrating oil
- High-quality grease (if your new joints have grease fittings)
- Shop rags
- Marker or paint pen
Safety Equipment:
- Safety glasses
- Mechanic’s gloves
- Wheel chocks
The most important item on this list is the correct replacement u-joint. U-joints come in various sizes and configurations, and using the wrong one can lead to premature failure or driveline vibration. I always recommend bringing your old joint to the parts store for precise matching or consulting a transmission specialist if you’re unsure.
A proper u-joint press tool will save you hours of frustration. While you can attempt this job with a bench vise and sockets, the specialized tool makes the process much smoother. According to a Motor & Equipment Manufacturers Association study, using proper tools reduces repair time by up to 60% and significantly lowers the risk of component damage.
Preparation
Before diving in with wrenches flying, proper preparation will save you headaches later. Start by parking on a flat, level surface with plenty of workspace around your vehicle. Set the parking brake and chock the wheels you won’t be lifting.
Consult your vehicle’s manual to locate the recommended jacking points. Raise the vehicle and secure it properly on jack stands—never rely solely on a hydraulic jack for support while you’re working underneath. I can’t stress this enough: your safety depends on proper vehicle support.
Before removing anything, take a moment to examine your driveshaft orientation. Use your marker to make alignment marks where the driveshaft connects to the transmission and differential. These marks will ensure you reinstall everything exactly as it was, preventing driveline vibration issues.
Take photos from multiple angles as well—your future self will thank you during reassembly. A quick smartphone picture beats trying to remember “which way did that go?” an hour later with greasy hands.
If your vehicle has been driven recently, allow time for it to cool down. Exhaust components and the transmission can retain heat that could cause burns. This cooling period is also a good time to spray penetrating oil on any rusty bolts or connections you’ll need to disconnect.
Step-by-Step Replacement Guide
With preparation complete, let’s dive into the actual driveshaft universal joint replacement process:
1. Driveshaft Removal
Start by loosening (but not removing) the bolts at the rear differential yoke. Then remove the bolts securing the driveshaft to the transmission output shaft. You may need to rotate the driveshaft to access all the bolts.
Once all bolts are removed, carefully slide the driveshaft backward to disengage it from the transmission. Lower it down and pull it completely out of the vehicle. Have a drain pan ready—some transmission fluid might drip out when the driveshaft is disconnected.
If your vehicle has a two-piece driveshaft with a center support bearing, you’ll need to remove the bolts holding this bearing to the chassis as well.
2. Identify the Worn Joint
With the driveshaft on your workbench, inspect each universal joint. Grasp opposite ends of the joint and try to move them in opposite directions. Any noticeable play indicates wear. Also check for roughness when rotating the joint—healthy u-joints should turn smoothly without resistance or grittiness.
Look for rust, damaged seals, or discoloration around the bearing caps. While you have the driveshaft out, it’s often wise to replace all u-joints even if only one shows obvious wear. The labor is the same, and the additional part cost is minimal compared to having to do the job again in a few months.
3. Remove the Old U-Joint
Using needle-nose pliers, remove the snap rings that hold the bearing cups in place. If they’re difficult to remove, tap gently around the bearing cap with a hammer to relieve pressure on the rings.
Set up your u-joint press tool according to its instructions. The basic principle is to press one bearing cup through the yoke while supporting the opposite side. As you press out two opposing cups, the cross portion of the joint can be removed. Repeat for the other axis of the joint until all bearing cups are removed.
If you don’t have a press tool, you can use a bench vise with appropriately sized sockets. Place a socket slightly larger than the bearing cup on the open side of the yoke, and a smaller socket against the opposite bearing cup. Close the vise slowly to press the cup through.
4. Install the New U-Joint
Before installation, compare your new u-joint to the old one to ensure it’s an exact match. Check that the grease fittings (if present) will be accessible after installation.
Start by inserting the cross portion of the new u-joint into the yoke. Place a bearing cup over one arm of the cross and press it into the yoke until you can install the snap ring. If the cup doesn’t want to seat fully, tap gently around the outside of the yoke with a hammer.
Rotate the assembly and install the opposite bearing cup. Finally, position the second yoke over the remaining two arms of the cross and install those bearing cups and snap rings. Each bearing cup should be seated deep enough for its snap ring to fit properly in the groove.
5. Grease the New Joint
If your new u-joint has grease fittings, use a grease gun to apply high-quality chassis grease. Pump until you see fresh grease appear at all four bearing seals. This ensures complete lubrication and helps establish a grease barrier against contaminants.
6. Reinstall the Driveshaft
Clean the splines on both the transmission output shaft and the driveshaft. Apply a thin layer of grease to the splines to ensure smooth engagement and prevent future seizing.
Align your previously made marks and slide the driveshaft into the transmission first, then raise the rear end to connect it to the differential. Install all bolts hand-tight, then torque them to manufacturer specifications using your torque wrench. This is crucial—undertightened bolts can work loose, while overtightened bolts can strip threads or damage components.

Common Challenges
Even experienced mechanics encounter difficulties with driveshaft universal joint replacement. Here’s how to overcome the most common challenges:
Stubborn Snap Rings
Old snap rings can be a real pain to remove, especially if they’re rusted. Apply penetrating oil and let it soak for 15-30 minutes. If they still won’t budge, try using snap ring pliers instead of needle-nose pliers for better leverage. As a last resort, you can carefully grind a notch in the snap ring, but be extremely careful not to damage the yoke.
Stuck Bearing Cups
Bearing cups that refuse to press out are usually held by corrosion. Try tapping around the perimeter of the yoke with a hammer while applying pressure with your press tool. Sometimes the vibration helps break the corrosive bond. If that fails, applying controlled heat with a propane torch to the yoke (not the bearing!) can help—just be careful not to overheat and damage the hardened steel.
Yoke Damage
If you notice cracks or significant wear in the yoke itself, you may need more extensive repairs. Damaged yokes shouldn’t be reused as they can lead to premature failure of your new u-joints. In these cases, you’ll need to replace the entire driveshaft section or have it professionally rebuilt at a driveline shop.
Driveline Vibration After Replacement
If you experience vibration after completing the repair, first check that all bolts are properly torqued. Next, verify that your alignment marks were followed correctly. If vibration persists, your driveshaft may need professional balancing—an imbalance as small as a few grams can cause noticeable vibration at highway speeds.
When dealing with persistent issues, consulting with a professional driveline specialist can save you time and frustration. Sometimes special tools like driveshaft balancers are needed to fully resolve complex driveline vibrations.
Post-Replacement Testing
After completing your driveshaft universal joint replacement, proper testing is essential to ensure everything is working correctly. Start by checking that all connections are secure and that nothing was left loose underneath the vehicle.
Lower your vehicle from the jack stands and take it for a careful test drive. Begin at low speeds in an empty parking lot or quiet street. Listen for any unusual noises—clicking, clunking, or grinding sounds indicate something isn’t right.
Gradually increase your speed, paying attention to how the vehicle feels during acceleration, cruising, and deceleration. A properly replaced u-joint should produce no vibration or unusual sensations. Test the vehicle in both forward and reverse.
After your initial test drive, park and check underneath for any signs of leaking fluids or loose components. It’s also a good idea to re-check the tightness of all fasteners after the first 50-100 miles, as some parts may settle during initial use.
Be prepared to make adjustments if needed. Sometimes it takes a bit of fine-tuning to get everything perfect, especially with older vehicles where other components may have compensated for the worn u-joint over time. Most vibration issues can be resolved by checking for proper driveshaft phasing (orientation) or by verifying that the new joints are properly seated.
Maintenance Tips
Proper maintenance can significantly extend the life of your new universal joints. Here are some tips to keep them running smoothly:
For u-joints with grease fittings, establish a regular lubrication schedule. Most mechanics recommend greasing them every 5,000 to 10,000 miles, but this interval should be shortened if you frequently drive in dusty, muddy, or wet conditions. When greasing, stop as soon as you see fresh grease purging from the seals—over-greasing can rupture the seals and actually cause premature failure.
Include visual inspection of your driveshaft during regular maintenance. Look for rust, leaking grease, or damaged dust seals. Catching issues early can prevent more extensive damage down the road. This is especially important after driving in extreme conditions like deep water crossings or muddy terrain.
Your driving habits also impact u-joint life. Avoid excessive wheel spin and aggressive driving, which place tremendous strain on driveline components. If you use your vehicle for heavy towing, consider upgrading to heavy-duty u-joints specifically designed for increased load capacity. According to Dana Spicer, a leading driveline manufacturer, upgraded u-joints can last up to twice as long under heavy-duty use.
If your vehicle will be stored for extended periods, position it so the u-joints aren’t under load at an extreme angle. This prevents the bearings from developing flat spots that can cause vibration later. For long-term storage, consider supporting the vehicle in a way that takes weight off the suspension entirely.
Conclusion
Replacing your vehicle’s driveshaft universal joints might seem intimidating at first, but with the right tools and approach, it’s a rewarding DIY project that can save you hundreds in labor costs. More importantly, proactive u-joint replacement prevents the cascade of problems that can result from catastrophic failure—from transmission damage to dangerous driveshaft separation.
The satisfaction of feeling that smooth, vibration-free ride after completing this repair yourself is truly one of the great joys of DIY auto maintenance. You’ve not only fixed a critical component but gained valuable knowledge about your vehicle’s drivetrain system that will serve you well for years to come.
Remember that quality parts make all the difference in this repair. The few extra dollars spent on premium u-joints will pay dividends in longevity and performance. This is especially true if you’ve upgraded from standard to greasable joints, which allow for ongoing maintenance to extend service life.
Whether you tackle this job yourself or decide to have a professional handle your drivetrain repairs, understanding the process helps you make informed decisions about your vehicle’s maintenance. A well-maintained driveline not only provides a smoother, quieter ride but contributes to the overall longevity of your entire powertrain.
Frequently Asked Questions
How do I know if my universal joint is failing?
Look for clunking noises when shifting or accelerating, vibrations that change with vehicle speed, or squeaking sounds. You might also notice rust-colored powder around the joint or physical play when you grab the driveshaft by hand.
How long does it take to replace a universal joint?
For a DIY mechanic with proper tools, expect 2-4 hours for the complete job. The actual time depends on your experience level and whether you encounter any seized or damaged components.
How much does a universal joint cost?
Basic universal joints typically cost $20-40 each, while premium or heavy-duty versions range from $50-100. The special u-joint press tool can be rented from most auto parts stores for $20-30.
Can I drive with a bad universal joint?
It’s not recommended to drive with a failing u-joint as it can completely fail without warning, potentially causing the driveshaft to separate from the vehicle. This can cause extensive damage to your vehicle and create dangerous road hazards.
How often should universal joints be replaced?
There’s no set interval for u-joint replacement; they should be inspected regularly and replaced when signs of wear appear. Most quality u-joints last 50,000-100,000 miles depending on driving conditions and maintenance.


Pingback: Universal Joint Cross Bearing – Pro Tips - knowsyourcar.com