Overview
This article outlines seven essential strategies for protecting car paint: regular washing, waxing, ceramic coating, paint protection film, strategic parking, immediate contaminant cleanup, and timely touch-ups for minor damage. These practices help preserve a vehicle’s appearance, prevent expensive repairs, and maintain resale value by creating protective barriers against environmental threats like UV rays, bird droppings, and road debris.
Table of Contents
- Understanding Car Paint and Why Protection Matters
- Tip 1: Regular Washing – The First Line of Defense
- Tip 2: Waxing – The Protective Shield Your Paint Needs
- Tip 3: Ceramic Coating – Long-Term Protection Investment
- Tip 4: Paint Protection Film – Ultimate Barrier Against Damage
- Tip 5: Strategic Parking – Prevention is Better Than Cure
- Tip 6: Immediate Contaminant Cleanup – Time is of the Essence
- Tip 7: Touch-Up and Maintenance – Addressing Small Issues Before They Grow
- Conclusion
- Frequently Asked Questions
Understanding Car Paint and Why Protection Matters
Your car’s paint isn’t just about looking good—it’s your vehicle’s first line of defense against the elements. As someone who’s spent 20+ years working on cars, I’ve seen how protecting car paint properly can make the difference between a vehicle that ages like fine wine and one that looks tired after just a few years.
Modern automotive paint is remarkable stuff—typically a multi-layer system consisting of primer, basecoat, and clearcoat. But despite these technological advances, it remains vulnerable to an army of everyday threats: UV rays, bird droppings, tree sap, road salt, and those inevitable rock chips from highway driving.
“The best repair is the one you never have to make,” my old mentor used to say. That wisdom applies perfectly to paint protection. Prevention costs a fraction of what repainting does, both in money and hassle.
In this guide, I’ll walk you through seven battle-tested strategies to keep your car’s finish looking showroom-fresh for years. These aren’t just theoretical tips—they’re proven methods I’ve recommended to thousands of car owners who’ve seen real results.
Tip 1: Regular Washing – The First Line of Defense
Regular washing isn’t just about keeping up appearances—it’s fundamental paint protection. Every day, your car collects contaminants that can damage the finish if left too long: road grime, insect remains, bird droppings, and industrial fallout.
Bird droppings deserve special mention. They’re not just unsightly—they’re highly acidic and can etch into your clearcoat within hours on a hot day. I’ve seen permanent damage from droppings left for just a weekend in summer heat. The same goes for tree sap and bug splatter—they bake onto your paint under the sun, becoming progressively harder to remove without harsh chemicals.
For best results, wash your car every two weeks, or weekly if you live in harsh environments (coastal areas with salt air, areas with heavy industrial pollution, or regions with lots of bird activity). Use these guidelines for a paint-safe wash:
- Use automotive-specific soap—never dish detergent, which strips protective waxes
- Wash in the shade when the surface is cool to prevent soap from drying too quickly
- Use two buckets: one with soapy water, one with clean rinse water
- Wash from top to bottom, using a microfiber mitt or soft sponge
- Dry with a microfiber towel or chamois to prevent water spots
The two-bucket method deserves explanation: you wash with the mitt from your soap bucket, then rinse it in the clean water bucket before reloading with soap. This prevents you from redepositing grit back onto your paint. It’s a simple change that dramatically reduces the risk of putting swirl marks in your finish.
Remember that proper washing technique is essential. One careless wash with a dirty sponge can do more damage than a month of environmental exposure. Treat your car’s surface with the same care you’d give a newborn’s skin.

Tip 2: Waxing – The Protective Shield Your Paint Needs
Waxing your car isn’t just about that deep, wet-look shine (though that’s a nice bonus). It’s about creating a sacrificial barrier between your paint and the environment. A good coat of wax takes the hit from UV rays, acidic contaminants, and minor abrasions so your clearcoat doesn’t have to.
Think of waxing as putting sunscreen on your car. Skip it, and over time, oxidation sets in—paint fades, loses its luster, and becomes more vulnerable. I’ve seen identical cars from the same year where the regularly waxed one looks years newer than its neglected sibling.
For the average driver, I recommend waxing every three months. If you notice water no longer beading on the surface, that’s a clear sign your wax protection has diminished. Modern synthetic waxes (sometimes called “paint sealants”) generally last longer than traditional carnauba waxes, though the latter often provides a warmer, deeper shine that enthusiasts love.
Application matters as much as frequency. Here’s my process for a perfect wax job:
- Start with a freshly washed and completely dry car
- Apply in the shade, working on one small section at a time
- Use an applicator pad with light, overlapping circular motions
- Allow to haze according to product instructions (usually 5-10 minutes)
- Buff off with a clean, soft microfiber towel, turning frequently
Many folks make the mistake of applying wax too thickly or over the entire car before buffing. This just makes removal harder without adding protection. A thin, even coat is all you need.
Applying wax after washing creates that perfect protective seal. For maximum protection, consider the “sandwich method” used by detailing professionals: wash, clay bar to remove embedded contaminants, polish if needed to remove minor imperfections, then seal with wax. This comprehensive approach can keep your finish looking new for years.
Tip 3: Ceramic Coating – Long-Term Protection Investment
If wax is like sunscreen for your car, ceramic coating is like giving it a suit of armor. These silicon dioxide (SiO2) based products chemically bond to your paint, creating a hydrophobic, UV-resistant layer that can last years instead of months.
I’ve seen properly applied ceramic coatings still performing well after three years, while even the best wax rarely survives beyond 3-4 months. The difference is night and day. Water beads and rolls off so aggressively that it carries dirt with it. Cleaning becomes easier because contaminants have trouble adhering to the slick surface.
But let’s be straight—ceramic isn’t magic. While it provides superior protection against chemical contaminants, UV rays, and makes cleaning easier, it won’t prevent rock chips or scratches from physical impact. It’s chemical protection, not physical armor.
There are broadly two routes to ceramic coating:
- Professional application: $500-2,000 depending on preparation and product grade
- DIY consumer products: $20-200 with varying longevity and performance
Professional coatings generally outperform consumer products in durability and protection, but the DIY market has improved dramatically. Many weekend warriors achieve excellent results with consumer-grade ceramics like Gtechniq, CarPro, or Adam’s.
The key to success with any ceramic coating is proper preparation. The coating will lock in whatever is underneath it—including swirls, scratches, or contaminants. This is why professionals typically include paint correction (machine polishing) before application.
For best results, apply ceramic coating after a thorough wash and decontamination process. The surface needs to be clinically clean—many pros use isopropyl alcohol wipedowns to ensure not even oils from fingerprints remain before application.
If you’re considering ceramic coating, remember that it’s not a permanent “apply and forget” solution. Even coated cars need regular washing and occasional maintenance products to maximize longevity and performance. The pros and cons of ceramic coatings should be weighed carefully before making the investment.
Tip 4: Paint Protection Film – Ultimate Barrier Against Damage
Paint Protection Film (PPF)—sometimes called “clear bra”—is the heavyweight champion of paint protection. Unlike wax or ceramic coatings that primarily offer chemical resistance, PPF provides physical protection against rock chips, scratches, and road debris.
Modern PPF is a marvel of materials science—a clear, thermoplastic urethane film that can absorb impacts. Many premium films even feature “self-healing” properties, where minor scratches disappear when exposed to heat from the sun or hot water.
I’ve worked with countless vehicles that have taken direct hits from road debris that would have required paint repair, but the PPF took the damage instead. Some films even have hydrophobic top layers that provide ceramic-like water beading along with physical protection—truly the best of both worlds.
PPF installation options include:
- Full vehicle wrap: Maximum protection but most expensive ($5,000-8,000)
- Partial coverage: Typically hood, bumper, mirrors, fenders ($1,500-3,000)
- Impact zones only: Front bumper or “clear bra” area ($500-1,500)
- DIY kits: Pre-cut for specific vehicles or universal sheets ($200-1,000)
Professional installation is strongly recommended. Proper application requires significant skill and specialized tools to prevent bubbles, wrinkles, or edge lifting. The film must be stretched and manipulated to conform to complex curves without distorting or creasing.
PPF is particularly valuable for high-impact areas like the front bumper, hood leading edge, fenders, and mirror caps. These areas take the brunt of road debris and benefit most from physical protection. If budget constrains full coverage, these areas give you the most protection per dollar spent.
The downside? Cost. PPF represents a significant investment. However, when you consider that a quality installation can last 5-10 years and potentially save thousands in paint repairs, many owners find it worthwhile—especially for high-value vehicles or those kept long-term.

Tip 5: Strategic Parking – Prevention is Better Than Cure
Where and how you park affects your paint more than most people realize. I’ve seen cars aged prematurely by nothing more than poor parking choices—a shame when it’s one of the easiest aspects of paint protection to control.
The sun is both friend and enemy to your paint. UV radiation breaks down clearcoat over time, leading to oxidation, fading, and eventually failure of the protective layer. A car regularly parked in direct sunlight can show noticeable degradation in as little as 3-5 years, while identical models kept garage-stored often look fresh even after a decade.
Beyond sun damage, consider these everyday threats:
- Trees: Provide shade but drop sap, berries, and attract birds
- Birds: Target cars with uncanny accuracy, leaving acidic deposits
- Industrial areas: Air pollution settles as fine particulate that etches paint
- Coastal regions: Salt air accelerates corrosion and paint degradation
- High-traffic areas: Increased risk of door dings and shopping cart damage
The ideal parking hierarchy, from best to worst:
- Climate-controlled garage (consistent temperature and humidity)
- Standard garage or carport (physical protection from elements)
- Covered parking structure (no direct sun/rain exposure)
- Shaded area away from trees (reduces UV without sap/bird risks)
- Open parking away from other vehicles (reduces door ding risk)
- Under trees (better than direct sun, but introduces other risks)
- Direct sun exposure (accelerates paint degradation)
Can’t garage your car? Consider a high-quality car cover. Modern covers are material-specific to your climate needs—breathable for humid areas, waterproof for rainy regions, or reflective for sunny locales. A good cover costs $200-400 but provides significant protection when proper parking isn’t available.
“Park defensively” isn’t just about avoiding accidents—it’s about protecting your finish. In parking lots, choose spots at the end of rows or next to curbs where one side is protected. The extra walking distance pays off in fewer door dings and shopping cart impacts.
Tip 6: Immediate Contaminant Cleanup – Time is of the Essence
When it comes to paint-damaging contaminants, time is your enemy. The difference between permanent damage and no damage often comes down to how quickly you respond to hazardous substances landing on your paint.
In my years at the body shop, I’ve seen countless cases where quick action could have prevented expensive repairs. That innocent-looking bird dropping? It can etch through your clearcoat in hours on a hot day. Tree sap hardens like cement if left for days. Industrial fallout particles embed themselves deeper with each passing hour.
The most dangerous common contaminants include:
- Bird droppings (highly acidic, can etch within hours)
- Tree sap (hardens and bonds to paint)
- Bug splatter (contains acids that etch paint)
- Brake dust (contains iron particles that embed in paint)
- Road tar (petroleum-based, difficult to remove once cured)
- Gasoline spills (dissolves wax and can penetrate clearcoat)
For emergency roadside cleanup when you’re away from home, keep a “quick detailer” spray and microfiber towel in your trunk. These products provide lubrication to safely remove contaminants without scratching. For stubborn substances like sap or tar, specialized removers break down these contaminants without harming your paint.
Don’t have detailing supplies handy? In a pinch, bottled water can help dilute acidic substances until proper cleaning is possible. Simply flood the area with water to dilute the contaminant—it’s better than leaving it to bake into your finish.
The 24-hour rule is a good guideline: most contaminants won’t cause permanent damage if removed within a day. But on hot, sunny days, that window shrinks dramatically—possibly to just hours. When in doubt, address it immediately.
One car owner I know keeps a small “emergency kit” with quick detailer, a microfiber, and bug/tar remover in every vehicle he owns. It’s saved his paint multiple times when he’s discovered tree sap or bird droppings while away from home. An ounce of preparation here truly saves pounds of cure.
Tip 7: Touch-Up and Maintenance – Addressing Small Issues Before They Grow
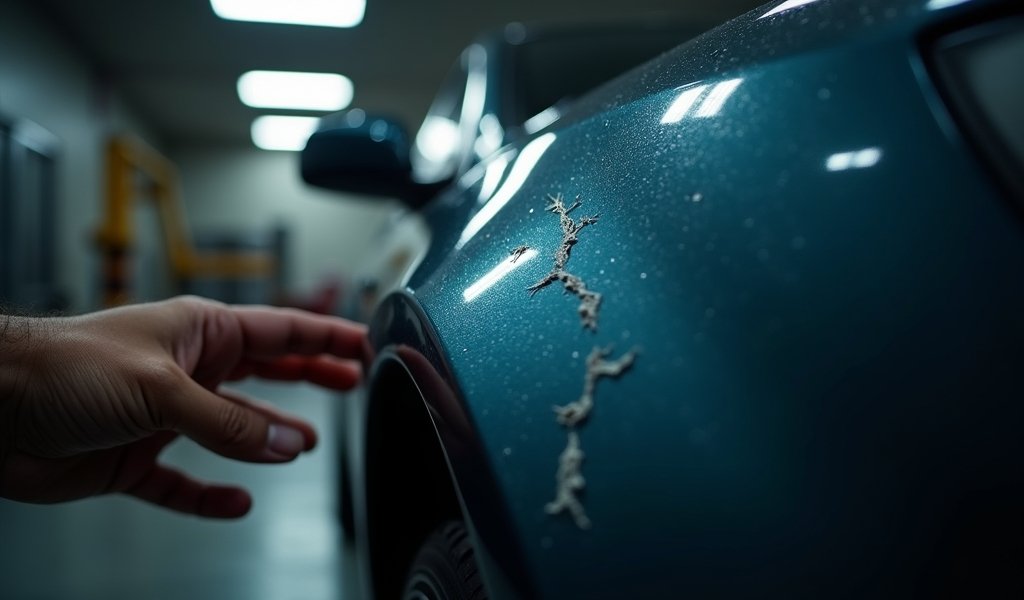
Small paint damage has a nasty habit of becoming big paint damage if ignored. That tiny rock chip exposing bare metal? It’s an entry point for moisture and the beginning of corrosion. That scratch through the clearcoat? It’s compromising the UV protection for the color coat beneath.
I’ve seen far too many cars develop serious rust problems from chips that could have been addressed with a $15 touch-up pen and fifteen minutes of time. The math is simple: small fixes prevent big expenses.
For chips and scratches that haven’t broken through to bare metal, the risk is primarily cosmetic—the damaged area may eventually fade differently than the surrounding paint. But for damage revealing primer or bare metal, corrosion becomes an immediate concern, especially in humid or coastal environments.
Here’s my tiered approach to paint damage:
- Light surface scratches (in clearcoat only): Polish or compound may remove completely
- Deeper clearcoat scratches: May benefit from touch-up clear
- Color coat damage: Requires color-matched touch-up paint
- Primer/metal exposure: Requires immediate attention with primer and color match
Factory-matched touch-up paint is available from dealers and many auto parts stores. The results won’t be body-shop perfect, but preventing corrosion is more important than perfection. Modern touch-up kits with fine brushes or pens make application relatively simple.
For best results with touch-up paint:
- Clean the damaged area thoroughly with isopropyl alcohol
- Apply in thin layers, allowing drying time between coats
- Use a toothpick for precise application on small chips
- Consider leveling with 2000+ grit sandpaper after curing (advanced)
- Protect with wax after touch-up has fully cured (usually 1 week)
Beyond touch-up, regular maintenance should include inspecting for new damage, particularly after driving on gravel roads or through construction zones. The sooner you catch damage, the easier it is to address.
Remember that proper touch-up technique makes all the difference between a nearly invisible repair and one that draws more attention than the original damage. Take your time, work in good lighting, and don’t rush the process.
Conclusion
Protecting your car’s paint isn’t just about vanity—it’s about preserving value, preventing costly repairs, and extending your vehicle’s lifespan. The seven strategies we’ve covered form a comprehensive shield against the daily onslaught your finish faces.
Regular washing removes damaging contaminants before they can bond to your paint. Waxing provides that essential sacrificial barrier. Ceramic coatings offer longer-term chemical protection, while PPF delivers physical defense against impacts. Strategic parking prevents unnecessary exposure, immediate cleanup tackles hazards before they cause damage, and prompt touch-ups seal vulnerable areas before corrosion sets in.
You don’t need to implement every strategy to see significant benefits. Even adopting just a few consistent habits—regular washing and waxing, parking thoughtfully, and promptly addressing contaminants—will dramatically extend your paint’s life and appearance.
Remember that proper paint care is cumulative. The car that looks showroom-fresh after ten years isn’t the result of one expensive treatment—it’s the product of consistent, mindful attention over time. Like most things in life, small, regular efforts yield the most impressive long-term results.
Your car’s paint is both its armor and its face to the world. Treat it with care, and it will reward you with years of turning heads and higher resale value when it’s time to move on to your next vehicle. After all, that first impression when someone sees your car speaks volumes about how you care for what you own.
Frequently Asked Questions
How often should I wax my car for maximum paint protection?
Most cars benefit from waxing every 3-4 months. More frequent application may be needed in extreme climates with high UV exposure or harsh winter conditions.
Is automatic car washing bad for my paint?
Touchless automatic washes are generally safe, but brush-type car washes can create fine scratches over time. Hand washing with proper technique remains the safest option for paint longevity.
Can I apply ceramic coating myself or should I hire a professional?
DIY ceramic coating is possible with consumer-grade products, but professional application typically lasts longer and provides better results. The key factor is proper paint preparation before application.
What’s the best way to remove bird droppings from paint?
Soak the area with a dedicated spray detailer or damp microfiber towel for a few minutes, then gently wipe away without scrubbing. Never scrape at dried droppings as this can scratch your paint.
Is it worth getting paint protection film for an older car?
PPF can still benefit older vehicles by preventing further damage and preserving current condition. However, consider the car’s value and how long you plan to keep it when deciding if the investment makes sense.

